E-commerce, where every click, conversion, and customer interaction could be the key to your next big breakthrough, having the right tools to track and optimise your marketing efforts is not just beneficial—it’s essential. Imagine having the power to understand your customers’ behavior not just on a surface level, but with surgical precision. This is where the Magento 2 Twitter(X) Conversion API comes into play, offering you the ability to track conversions with unparalleled accuracy directly from your server.
But the magic doesn’t stop there. When you combine the Twitter(X) Conversion API with Magento 2, one of the most robust eCommerce platforms out there, and the advanced capabilities of Server-Side Google Tag Manager (GTM), you’re setting the stage for a tracking setup that’s not just powerful, but also secure, reliable, and future-proof.
Why should you care? Because in today’s competitive ecommerce industry, data is gold. And the more accurate your data, the better your decisions, and ultimately, your bottom line. In this blog, We’ll walk you through the entire process of implementing the Twitter(X) Conversion API using Server-Side GTM in your Magento 2 store. Whether you’re a seasoned developer or an eCommerce enthusiast looking to take your store’s analytics to the next level, this guide will equip you with the knowledge and tools you need to make it happen. Let’s dive in!
Understanding Twitter(X) Conversion API and Server-Side GTM
What is Twitter(X) Conversion API?
The Twitter(X) Conversion API is a powerful tool that allows businesses to send web events directly from their servers to Twitter(X). Unlike traditional client-side tracking methods, this API enables server-side data transmission, improving accuracy and giving businesses more control over the data they share.
Benefits of using the Twitter(X) Conversion API include:
- Improved Data Accuracy: Reduces discrepancies caused by ad blockers or browser limitations.
- Enhanced Data Control: Allows businesses to customise the data they send to Twitter(X), ensuring compliance with privacy regulations.
- Better Attribution: Helps in accurately attributing conversions to specific campaigns, leading to more informed decision-making.
What is Server-Side GTM?
Server-Side GTM is an advanced version of Google Tag Manager that shifts the tracking logic from the client’s browser to a server environment. This method of tracking offers several advantages over traditional client-side tracking:
- Improved Data Security: Data is processed on your server, reducing exposure to third-party tools and minimizing the risk of data breaches.
- Enhanced Performance: By offloading tracking tasks to the server, you can reduce the load on the client’s browser, leading to faster load times and a better user experience.
- Greater Flexibility: Server-side GTM allows for more complex tracking setups, including the integration of multiple APIs and third-party tools.
Prerequisites
- GA4 data layers implemented on the store, we will use the information from this data layer to fire the Twitter conversion API tag. (you can check our GTM GA4 extension that implements GA4 data layers for you)
- A Twitter(X) ads account (signup at ads.x.com)
- A Stape.io account and server setup which will fascilitate our server side events. You can do the set up using the following Guide.
Setting Up Magento 2 Twitter(X) Conversion API
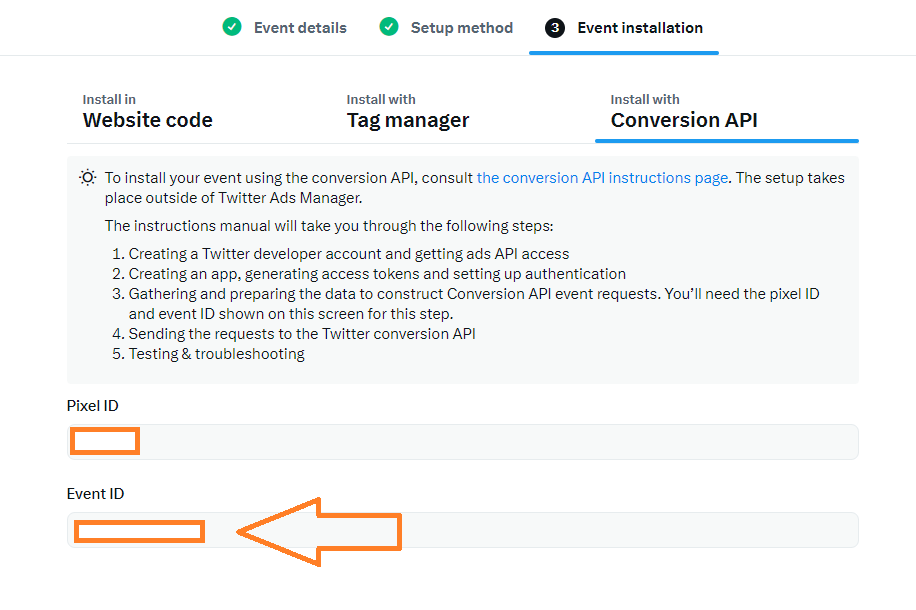
The very first step of our implementation would be to create a server side tag in our twitter ads account. Please follow the steps below:-
- Login to your twitter ads account and navigate to Events Manager
- Click on “Add Events” in the event manager.

- Provide the name and select event type as “custom”. Click next to move to the next step.
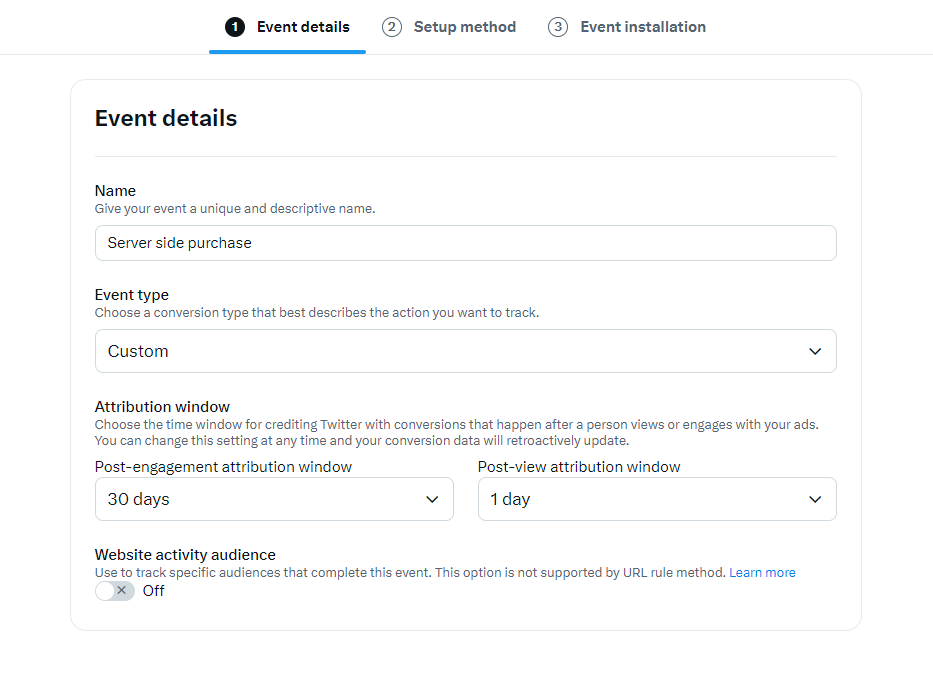
- Here select “Define Event with Code Recommended” and click next.
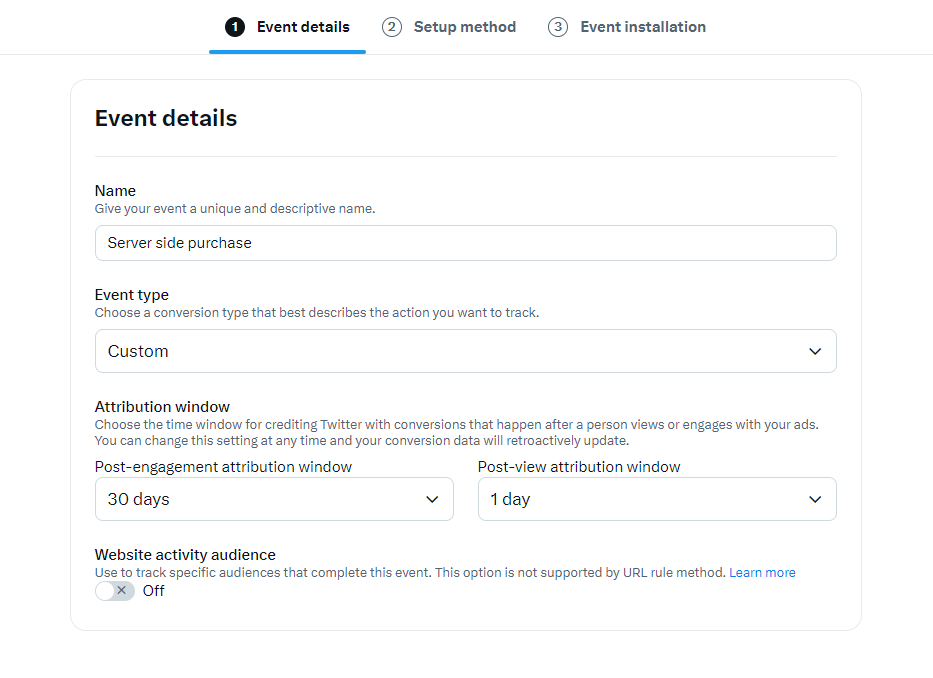
- Under Event Installation copy the pixel id for this event
Set Up Server-Side Tag in GTM Client Side Container
To effectively set up the GTM server-side tag for Twitter(X) conversion tracking, we’ll need to capture specific data at the moment of conversion. Since there’s no dedicated Twitter client for server-side GTM, we’ll leverage the GA4 client to transmit the required data.
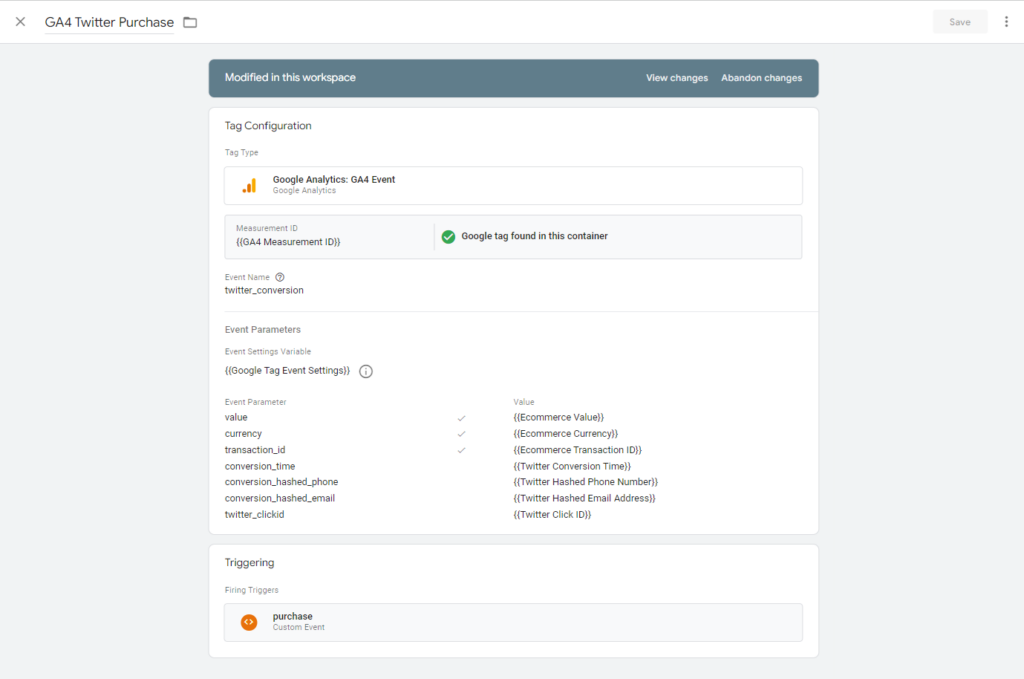
Create a new tag on the client side where we will send all the information needed for our Twitter tag in server side. Create the event based on the following settings:-
- Tag Name:- GA4 Twitter Purchase
- Tag Type:- Google Analytics: GA4 event
- MeasurementID :- {{GA4 Measurement ID}} (Add variable containing GA4 measurement ID)
- Event Name:- twitter_conversion
- Event Settings Variable:- {{Google Tag Event Settings}} ( Add variable containing event settings for GA4)
- Event Parameters
- value:- (Add variable containing conversion value from data layers)
- currency:- (Add the variable containing currency)
- transaction_id:- (Add variable containing transaction_id from data layers)
- conversion_time:-(Use the custom javascript variable to get the timestamp of the conversion in the UNIX format)
- conversion_hashed_phone:- (Add variable containing hashed phone from data layers)
- conversion_hashed_email:- (Add variable containing hashed email from data layers)
- twitter_clickid:- (use the variable the captures twitter click ID passed with the URL)
- Trigger:- We will fire this event when our GA4 event “purchase” is pushed into the data layers. This is done because on this push we have all the values that we need for reddit.
Set up Twitter Conversion API tag in GTM Server Side
At this point you should already have a GTM server side contianer connected with Stape.io as mentione din the prequisites step, if you haven’t already set this up then go back to the section and follow the guide to complete this setup.
Now we will start by creating required variables in our GTM server side container.
Create Required Variables
- Variable Name:- Stape API Key
- Variable Type:- Constant
- Key Path:- Add your stape API key obtained from stape.io (this is required for authentication)

- Variable Name:- Twitter Consumer Key
- Variable Type:- Constant
- Key Path:- Add your Twitter Consumer Key

- Variable Name:- Twitter Consumer Secret
- Variable Type:- Constant
- Key Path:- Add your Twitter Consumer Secret

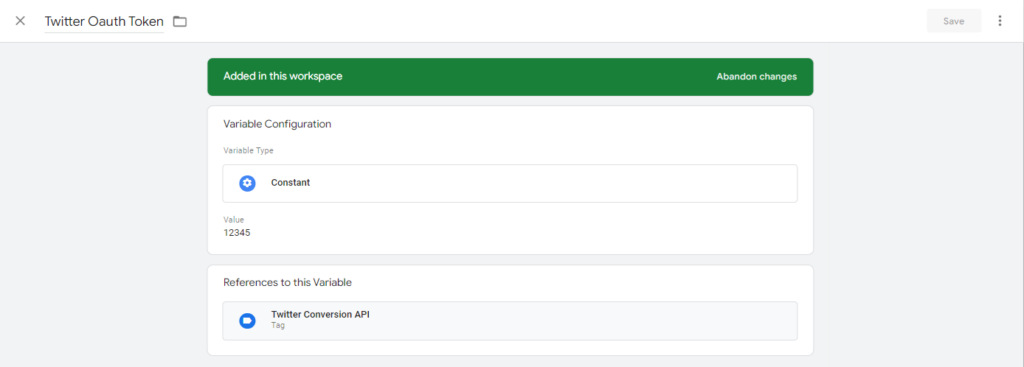
- Variable Name:- Twitter Oauth Token
- Variable Type:- Constant
- Key Path:- Add your Twitter Oauth Token
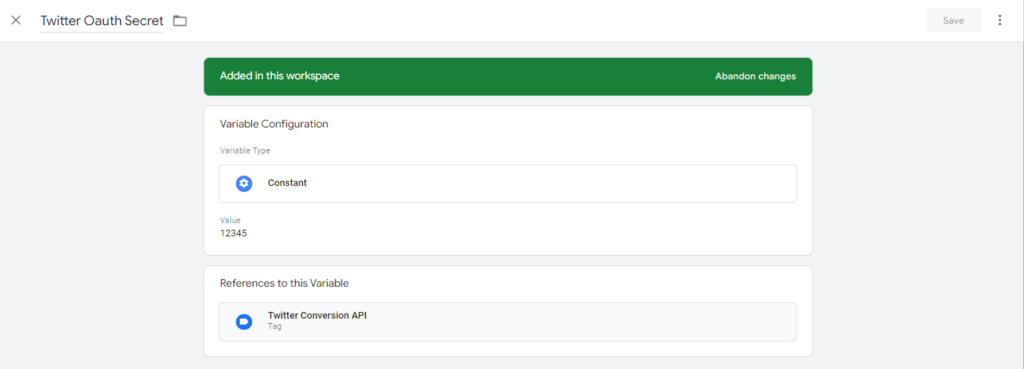
- Variable Name:- Twitter Oauth Secret
- Variable Type:- Constant
- Key Path:- Add your twitter Oauth Secret
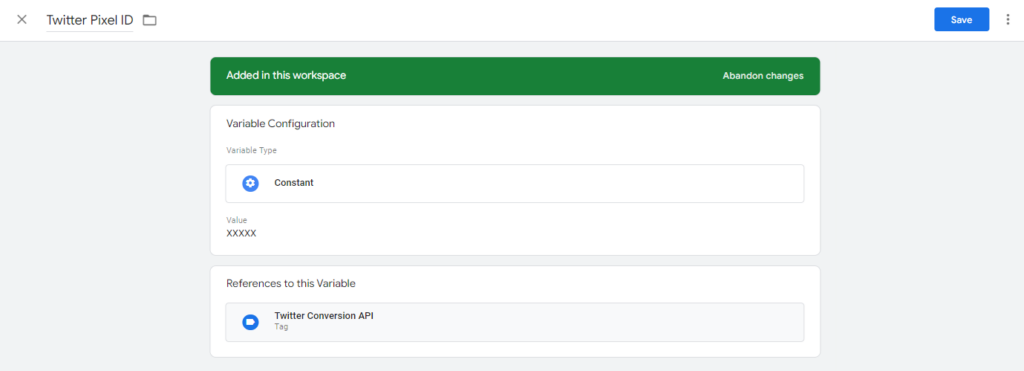
- Variable Name:- Twitter Pixel ID
- Variable Type:- Constant
- Key Path:- Add your twitter pixel ID
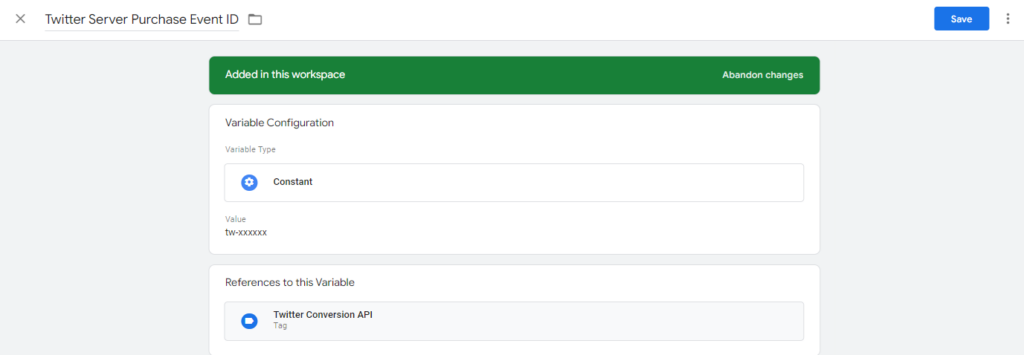
- Variable Name:- Twitter Server Purchase Event ID
- Variable Type:- Constant
- Key Path:- Add your twitter server purchase Event ID (the server purchase event that we created earlier)
- Variable Name:- Twitter Value
- Variable Type:- Event Data
- Key Path:- value

- Variable Name:- Twitter Currency
- Variable Type:- Event Data
- Key Path:- currency

- Variable Name:- Twitter Conversion ID
- Variable Type:- Event Data
- Key Path:- transaction_id

- Variable Name:- Twitter Conversion Time
- Variable Type:- Event Data
- Key Path:- conversion_time

- Variable Name:- Twitter Email
- Variable Type:- Event Data
- Key Path:- conversion_hashed_email

- Variable Name:- Twitter Phone
- Variable Type:- Event Data
- Key Path:- conversion_hashed_phone

- Variable Name:- Twitter Click ID
- Variable Type:- Event Data
- Key Path:- twitter_clickid

Create trigger
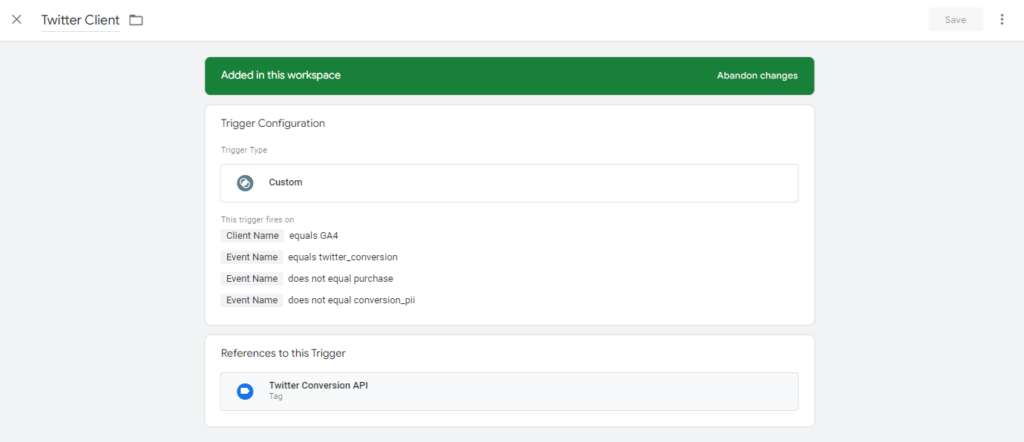
Please create a trigger based on the following settings:-
- Trigger Name:- Twitter Client
- Trigger Type:- Custom
- This trigger fires on:-
- “Client Name” Equals “GA4”
- “Event Name” Equals “twitter_conversion”
- “Event Name” does not Equals “purchase”
- “Event Name” does not Equals “conversion_pii”
Creating the Tag
The Twitter Conversions API tag isn’t available by default. Hence, you’ll need to search for and import it from the GTM tag gallery provided by Stape.io.
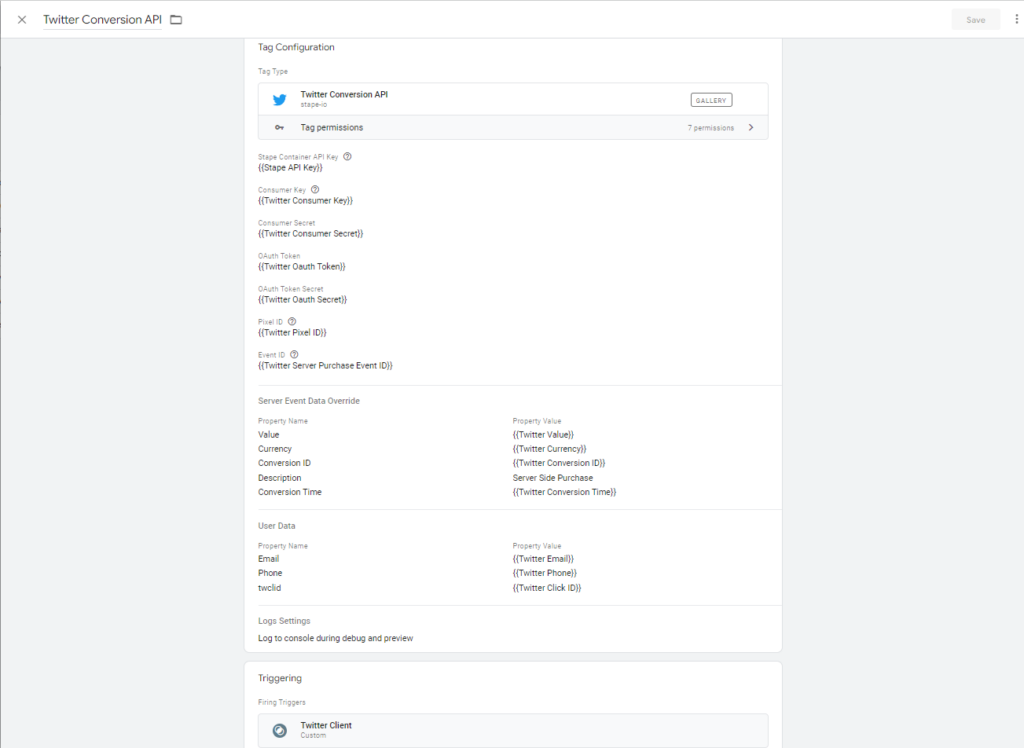
- Tag Name:- Twitter Conversion API
- Tag Type:- Twitter Conversion API
- Stape Container API Key:- {{Stape API Key}}
- Consumer Key:- {{Twitter Consumer Key}}
- Consumer Secret:- {{Twitter Consumer Secret}}
- OAuth Token:- {{Twitter Oauth Token}}
- OAuth Token Secret:- {{Twitter Oauth Secret}}
- Pixel ID:- {{Twitter Pixel ID}}
- Event ID:- {{Twitter Server Purchase Event ID}}
- Server Event Data Override:-
- value:- {{Twitter Value}}
- Currency:- {{Twitter Currency}}
- Conversion ID:- {{Twitter Conversion ID}}
- Description:- Server Side Purchase
- Conversion Time:- {{Twitter Conversion Time}}
- User Data:-
- Email:- {{Twitter Email}}
- Phone:- {{Twitter Phone}}
- twclid:- {{Twitter Click ID}}
- Logs Settings:-
- Log to console during debug and preview
- Triggering:- Twitter Client
Testing the Set Up
We will use Google Tag Manager Preview mode to test the entire setup.
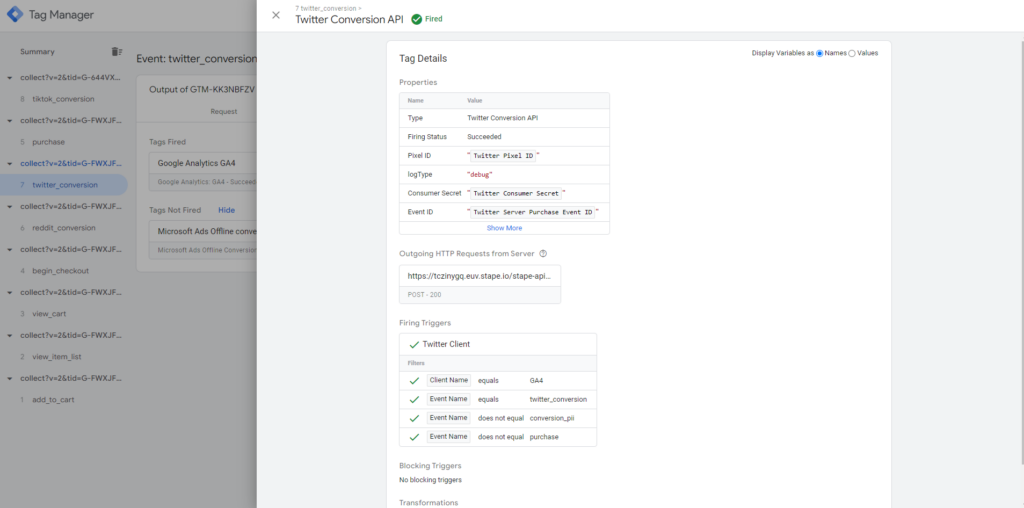
When the tag is fired succeffully you can see a 200 request.
Best Practices and Tips
Data Privacy and Compliance
- GDPR and CCPA Compliance:
Optimisation Tips
- Troubleshooting Common Issues:
- If you encounter issues with data not being sent or incorrect data being captured, revisit your GTM tag configurations and server endpoint settings.
- Check server logs for any errors related to API calls to Twitter(X).
- Optimise your tagging setup by consolidating tags and minimizing redundant data collection.
Conclusion
Integrating advanced tracking tools into your eCommerce platform is no longer a luxury—it’s a necessity. In this blog, we’ve taken a deep dive into the process of implementing the Magento 2 Twitter(X) Conversion API using Server-Side Google Tag Manager (GTM), a combination that brings unparalleled accuracy, security, and performance to your conversion tracking efforts.
If you’ve found this guide helpful, don’t stop here. Dive deeper into each component. Explore advanced GTM configurations, experiment with different Twitter(X) events. The world of eCommerce is vast, and staying ahead of the curve requires continuous learning and adaptation.
Magento 1 / Open Mage:- https://www.scommerce-mage.com/magento-ga4-google-tag-manager.html
Magento 2:- https://www.scommerce-mage.com/magento-2-ga4-google-tag-manager.html


