

Improved Import & Export is the Shopware 6 extension that is installed on your store manually, and allows you to import and export products and other entities in and out of your store fast and with the required values.
Latest release is 1.0.0
- Import and export of products with custom properties and categories
- Support of CSV files
- Mapping of custom properties

Table of contents
Where to find the extension
The extension can be found in the Settings section of your Shopware 6 administration panel. Navigate to Settings > Improved Import & Export.
When at the Improved Import & Export extension page you will see the Import procedure selected by default.

Clicking Import or Export heading will move you between procedures respectively.
How to import data
Select entity
At the Import section of the extension you are greeted with the suggestion to select the entity you want to import. The initial release features only ‘Products’
Click the blue ‘Products’ button to proceed to the next step.
Select file
At the second step you are suggested to either select the file you want to import from your harddrive or drag and drop it into the dedicated block of the screen.

NOTE: only CSV files are supported in the initial release
Additionally, if required you can specify the delimiters used in the CSV file manually, or click ‘Auto detect delimiter’ checkbox and let the extension do the job.
When done, click the ‘Next’ button.
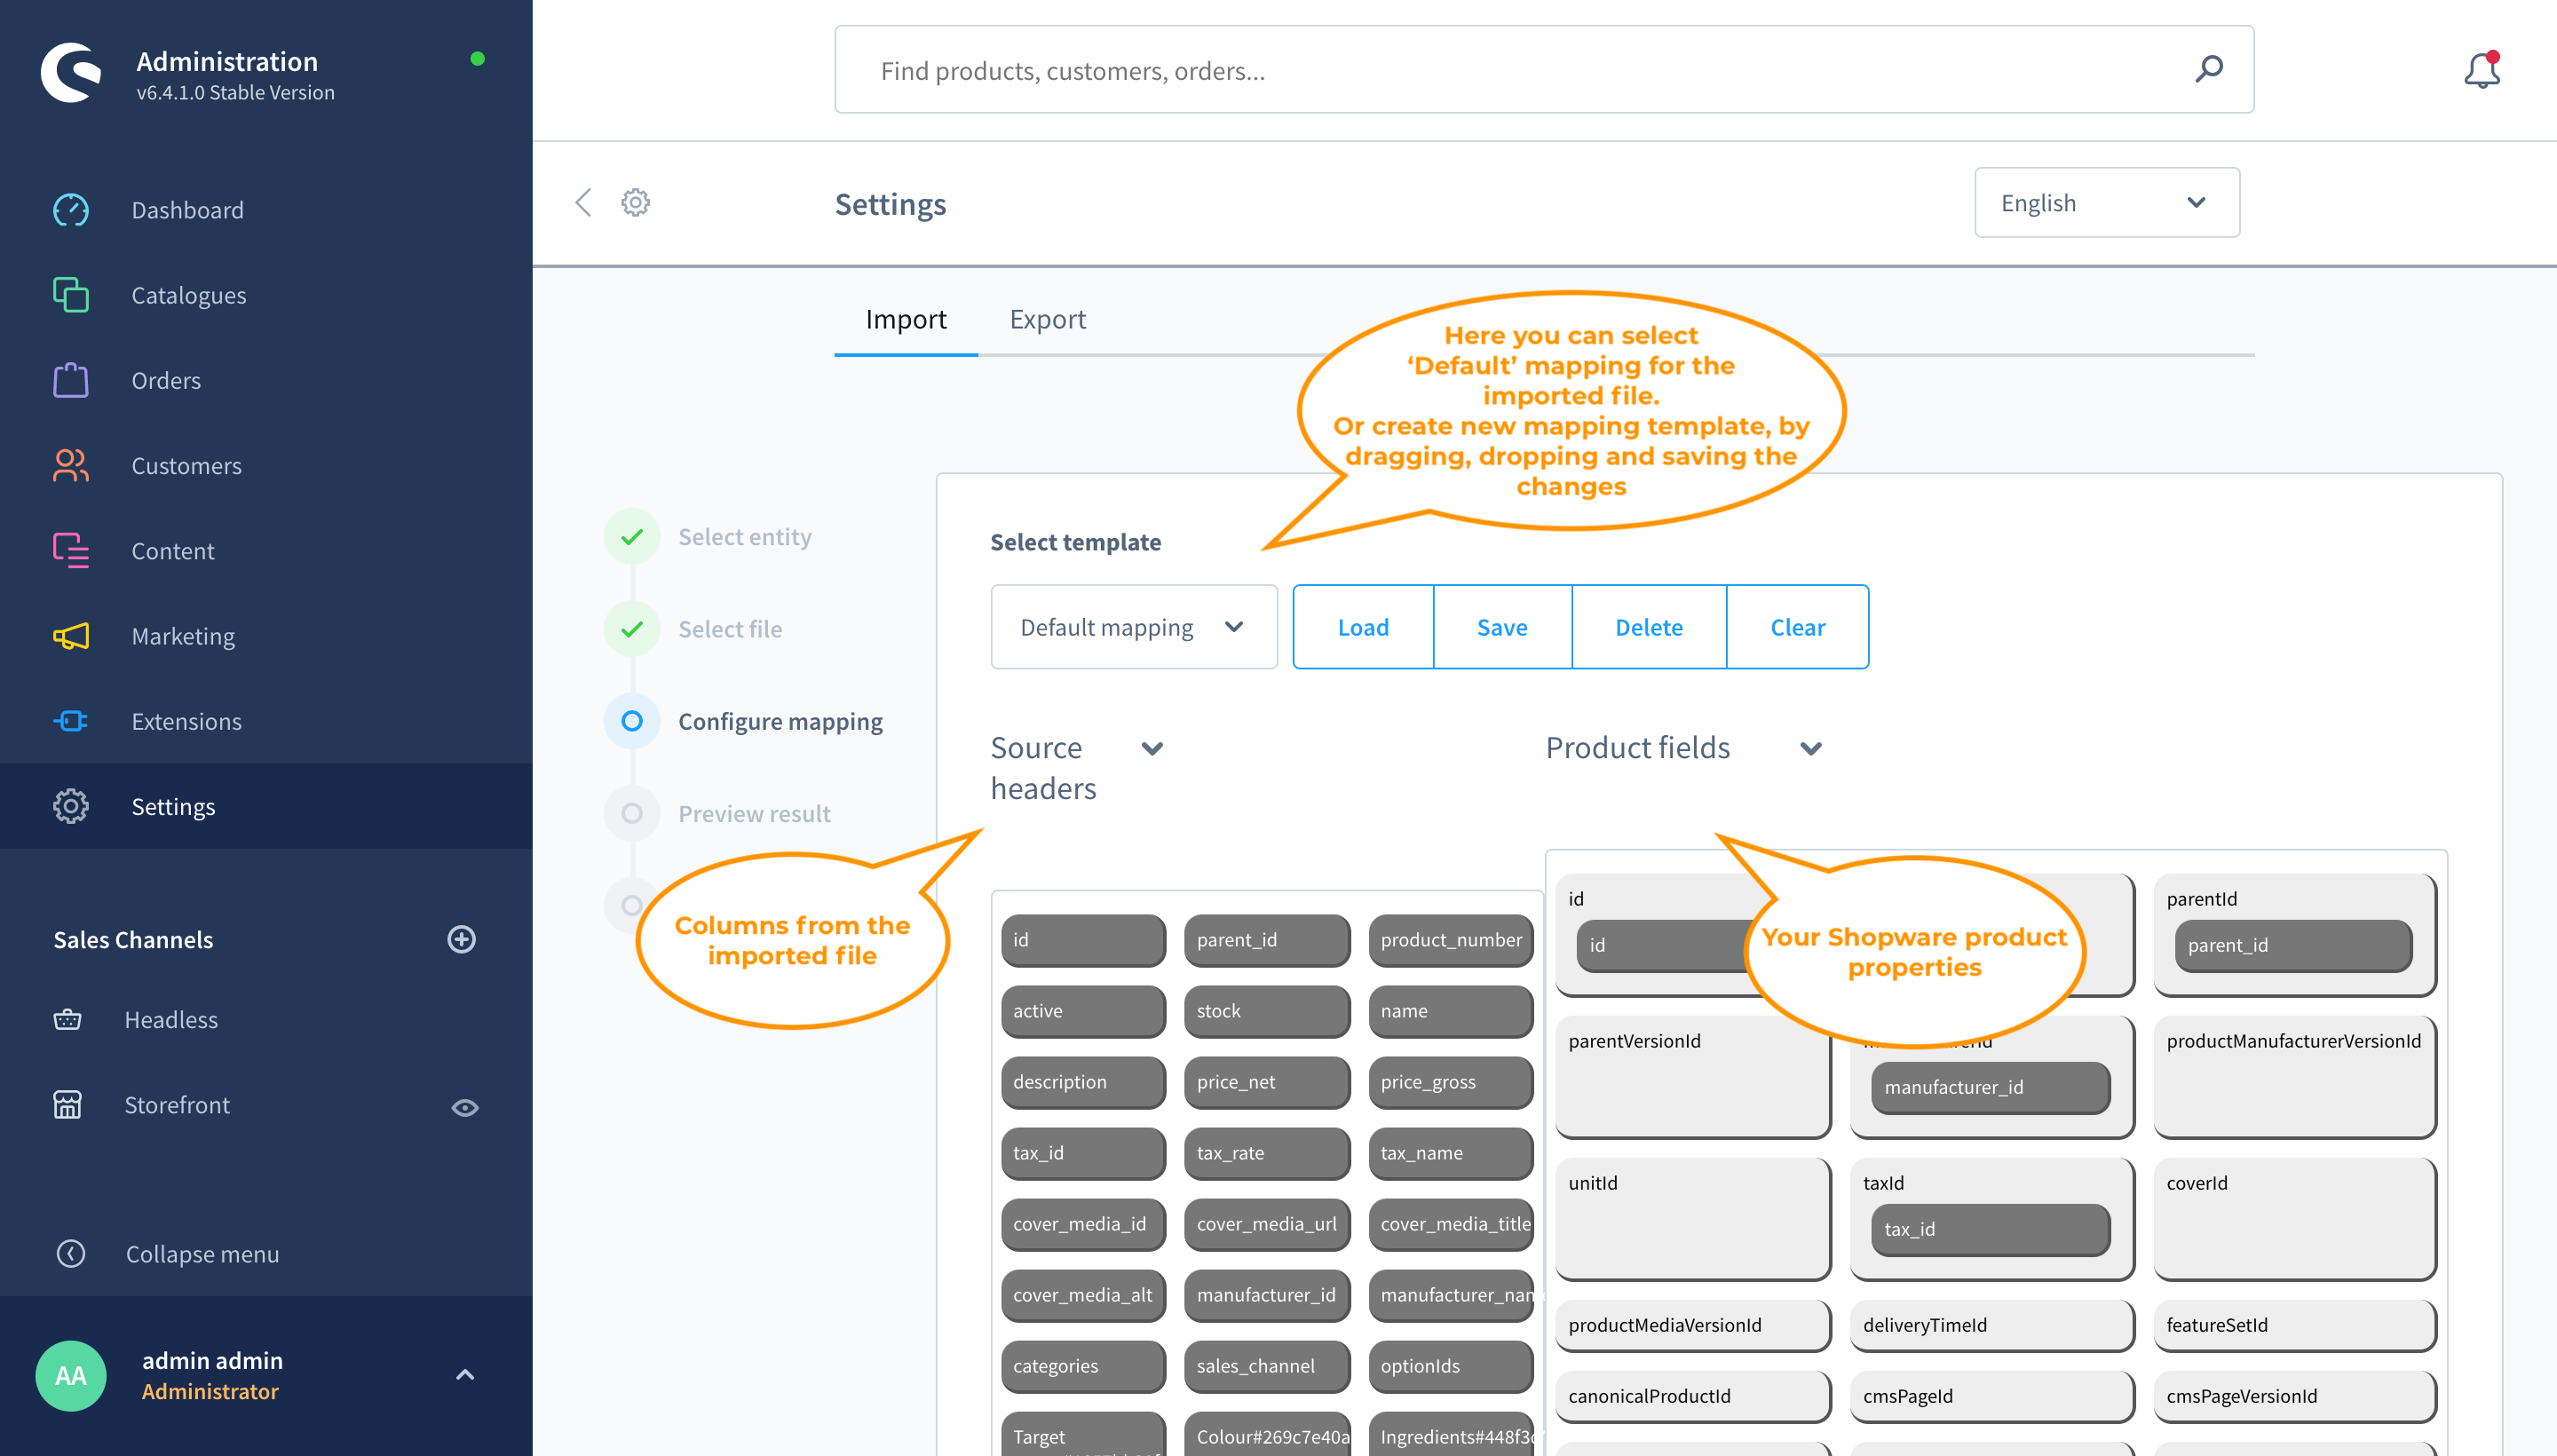
Configure mapping
In the Configure Mapping section you are suggested to specify which columns from the imported file match properties of the products from your Shopware 6 store. Or, if you are using the same column names, you can quickly load the ‘Default’ template.

What are product properties and how to work with them.
Each of your Shopware 6 products has multiple fields, such as ‘Name’, ‘Product number’, ‘Manufacturer’ etc. These fields are product properties or attributes, whatever you call them. Each of these properties has a related database entity where the property’s values are stored. And each property inside the database has a dedicated internal name which doesn’t allow spaces.
When importing products you are directly addressing the database, so you need to address product properties as they are listed in the database.
Like this, the Manufacturer will be listed inside the database as ‘manufacturer_id’, and Product Number will have a name ‘product_number’. You can check the exported file to see how different properties are named.
This is important because when importing a file you will need to name the columns with product properties as they are named inside the Shopware, to let the extension understand that you are importing proper values for a particular property.
That’s where the Mapping section of the Improved Import & Export comes into play.
For example:
Your supplier Microsoft sends you a CSV file with the products they supply to you. However, instead of ‘product_number’ and ‘name’ properties of the product they use ‘microsoft_product_number’ and ‘microsoft_name’.

If you were to import such a file, your Shopware won’t understand that ‘microsoft_product_number’ column contains the value for ‘product_number’ property of your product. That’s where you can use the Mapping section.

All you need to do is to match the column names you are importing with the relevant product properties. And then you are good to go.
Preview results
Before starting the import procedure, Improved Import & Export extension suggests you preview how the products will actually look before you import them.
This has been done so that you could confirm that the product attributes and properties have the proper values and you can start the import process.

When you have previewed the results, it is high time to start the import procedure.
Import
When you click ‘Import’ button at the bottom of the Preview result step of the import, the extension starts importing the file you have uploaded.

During the import you will see the number of the imported products, excluding the child products of the configurable ones, and the average import time.
Once the process is finished you can check the products you have imported to the Shopware 6 store.
How to export data
The export is much simpler, here you select the entity – currently only ‘Products’ available, – output file type, and hit the ‘Export’ button.
Select entity
At the main export screen you are suggested to select the entity you want to export and are given the log with all the previously launched export processes.

The step advances when you select the entity in the ‘Select entity’ block.
Select format
At this step you are suggested to select the output file format.

The default format is CSV, it bears the same settings for delimiters as native Shopware export.
Configure export
At the configure export step you can manually change the delimiters used in the CSV file you will be exporting. This may come in handy if you are using the exported file for uploads to third party services which require particular delimiter settings.

Export
Once the delimiters are set you can start the export process.

The exported file can be downloaded by clicking ‘Download’ button at the bottom of the export process recap.
Product properties export and import
Default export and import
By default Shopware 6 exports products without the custom properties that you create for them. In other words, if you have added custom ‘Size’ or ‘Color’ properties to the product, these properties will not be exported along with the products.
You can, however, export custom product properties as a dedicated export entity. However, in this file you will not have any reference to the products they are assigned to. Making importing products back with the relevant values assigned impossible.

Improved export and import
With Improved Import & Export extension you are exporting custom properties along with the products in a convenient format, featuring both the database ID of the custom property and the name displayed in the store’s backend for quick reference.
The exported file can look like the screenshot below:

The columns in green color are the columns with the custom product properties which have the following format:
color#0bde8db993684f8b92a713913aa3d9c3
Where:
color – is the name of the property as it is displayed in the Shopware 6 backend
#0bde8db993684f8b92a713913aa3d9c3 – is the ID of the property as it is written in the database
How can you import products with properties
When importing products along with the properties you can import properties in THREE different formats – i.e. column names.
- property_name#property_id – the default column name format as you get it in the export file
- property_name – the second possible option is to import property is by naming the column with it as it is named in the Shopware 6 administrator panel
- #property_id – the third possible option is to use ID of the property solely, starting with the # symbol
When importing products with custom properties at the mapping step of the import procedure you need to drag & drop the properties you want to import into the dedicated block called ‘Product properties’.

All the custom product properties need to go inside this block doesn’t matter the order or the format you will be using.
Why use both the name of the property and the id
Why use both the name of the property and the id and what is the difference in possible import formats?
In the Shopware 6 backend you can create as many custom properties for the product with the SAME name as you want. That’s why, if you have several product properties with the SAME name you need to identify them from one another.
That’s where you may need to use the property ID which looks like #0bde8db993684f8b92a713913aa3d9c3. The ID of the property is always unique and cannot be shared with any other property.


