Magento is top-notch e-commerce platform providing its users with everything they need to run a successful eCommerce business. Be it inventory management, customer management, payment integrations, order management, everything is intricately well balanced to give both customers as well owners the best experience possible. However, in today’s fast growing eCommerce business nothing is ever perfect. For instance, Magento 2 order management requires a dedicated team for large stores to manage and fulfill orders. Magento 2 order tagger can help reduce this extra work by allowing the admin to create and assign custom tags to orders so that searching for a specific order is only a click away. Today we will look at how you can integrate Magento 2 Order Tagger into your Magento store.
What is Order Tagger?
Magento 2 order tagger basically enhances the inbuilt order management system to add on the tagging functionality. Tagging stands for creating and assigning tags to specific orders so that orders can be easily accessed by using tags for searches. Quick access to orders allows the admin to access order data easily as well as fulfill orders as a priority. For instance, you want to fulfill orders that have a specific shipping location want to access orders which have a large number of quantities or you want to search orders based on certain order statuses and more. All of this can be fulfilled by creating a variety of custom tags and then assigning them to orders either manually or automatically depending upon the tag type. The Magento 2 order tagger extension by scommerce seamlessly integrates this functionality into your Magento store.
Magento 2 Order Tagger Features & Functionality
The Magento 2 order tagger extension by Scommerce Mage is not as straightforward as it sounds. It perfectly implements several complex scenarios around order tagging giving the admin a lot of flexibility while creating a wide range of tags. The admin can assign multiple tags to an order with varying priorities. There are several exclusive features within the module:-
- You can create or assign custom tags both manually or automatically
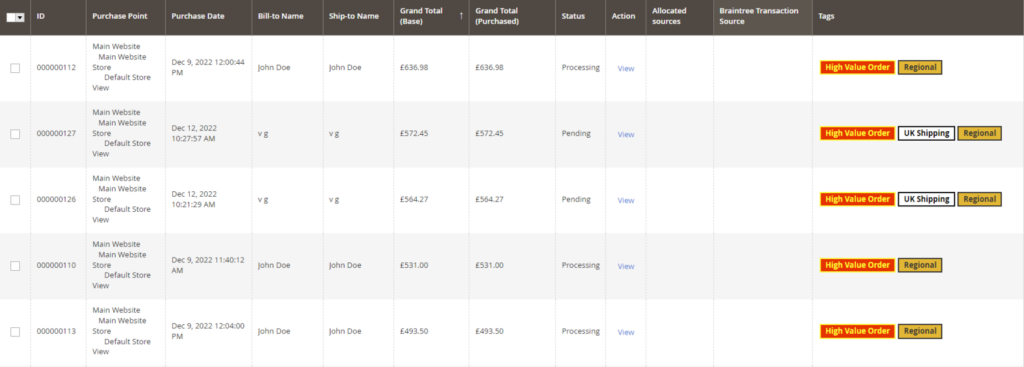
- A new column has been added in the order grid to show the assigned tags to the orders
- There is a new filter added in the order grid filter which can be used to filter orders based on the tags assigned providing ease of access to a variety of orders.
- You can create static tags which can then be manually assigned through the order grid directly via the actions menu.
- Dynamic tags get automatically assigned based on the conditions set while creating the tag.
- You can enable or disable tags at any point with a click of a button.
- A priority can be assigned while creating the tags based on which the tags are displayed in the tag column in the order grid.
- The tags can be styled using the inbuilt feature where you can define the background and text color of the tags.
- You can use a combination of conditions to create dynamic tags using Address and order attributes such as status, purchased from, Subtotal(inc. tax), Subtotal, Total Items quantity, Payment method, Shipping method, Shipping postcode, Shipping region, Shipping country, Shipping state/province.
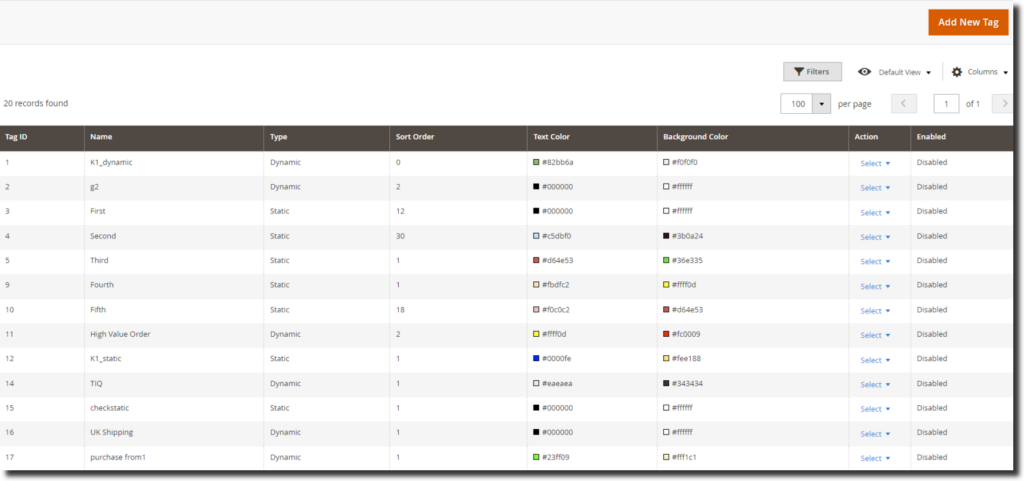
- The extension adds an order tags grid which contains its own filters that can be used to quickly access all the created tags.
- The extension adds an order tags logs grid which contains the information related to all the tags that get automatically assigned to orders.
Types of Tags
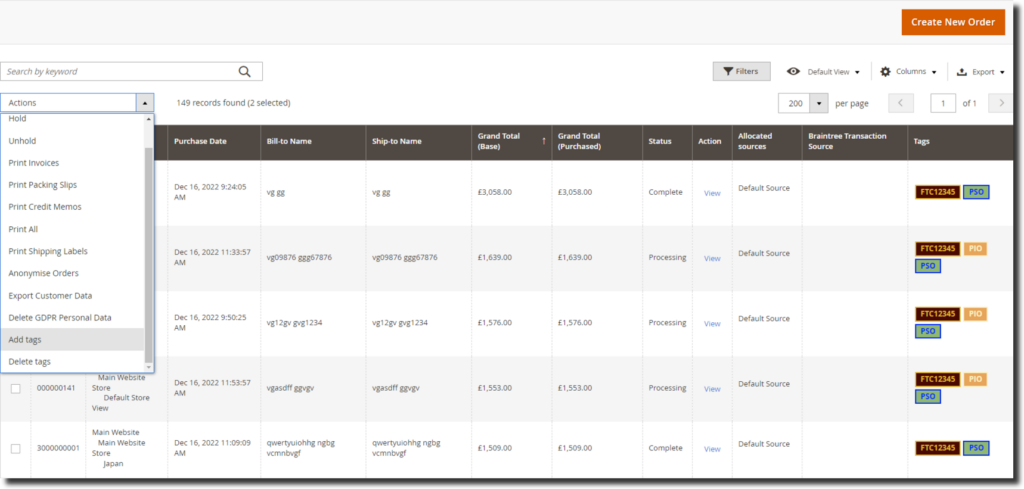
- Static Tags:- Static tags are the tags that need to be manually assigned to orders. You need to first create a static tag and then go to the order grid in order to assign this tag to one order or multiple orders. These tags can be directly assigned through the Actions menu in the order which contains both options Add Tag and Delete Tag.
- Dynamic Tags:- Dynamic Tags are the tags that are automatically assigned upon creation. A log is maintained for the dynamic tags that are assigned to specific orders.
Create and Assign a Static Tag to an Order
Create
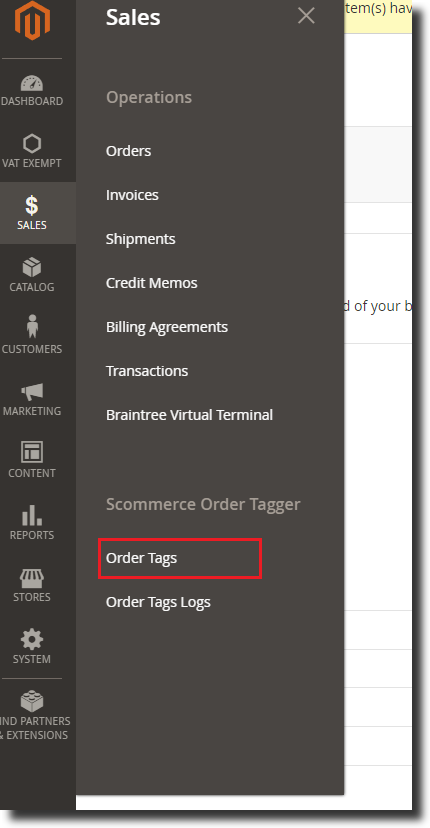
Step 1:- Go to Admin>Sales>Scommerce Order Tagger>Order Tags.
Step 2:- From the grid click on Add new tag button from the top right corner.
Step 3:- Enable the tag, enter the name and choose ‘Static’ from the tag type dropdown.

Step 4:- Enter the sort order for the tag with 0 being the highest. Style the tag by entering the background color and text color.

Step 5:- Lastly, save the tag by clicking on the save button in the top right corner.
Assign
Step 1:- Go to Admin>Sales>Orders and from the order, grid select one order or multiple orders to that you want to assign this static tag.
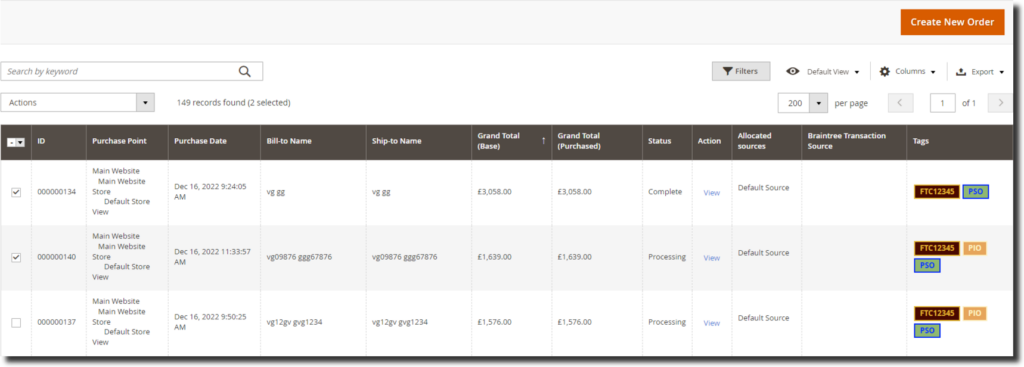
Step 2:- Then click on the Actions dropdown and select ‘Add Tags’. A popup will appear on the screen.
Step 3:- Choose the tag from the dropdown that you want to assign.
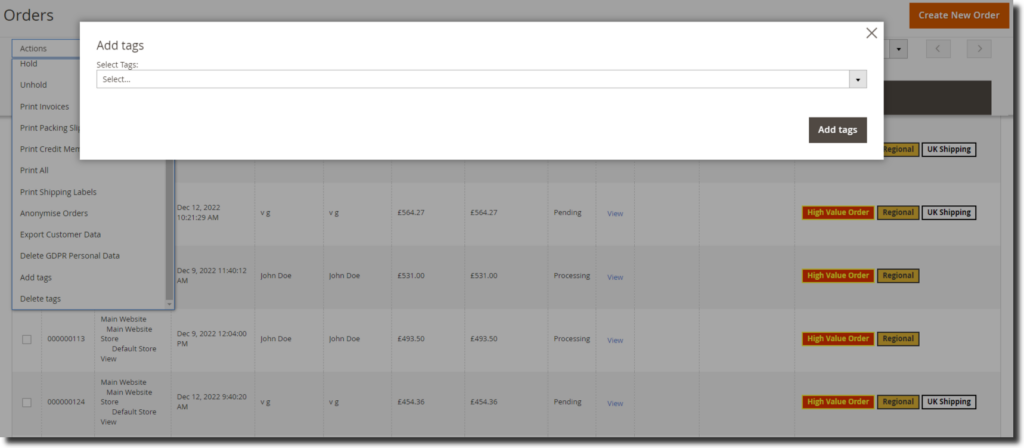
Step 4:- Lastly click on Add tags and that tag will be assigned to the order.
Create and Assign Dynamic Tags to Orders
Step 1:- Go to Admin>Sales>Scommerce Order Tagger>Order Tags.

Step 2:- From the grid click on Add new tag button from the top right corner.

Step 3:- Enable the tag, enter the name and choose ‘Dynamic’ from the tag type dropdown.

Step 3:- Enter the sort order for the tag with 0 being the highest. Style the tag by entering the background color and text color.

Step 4:- From the left menu go to conditions and enter a condition or combination of conditions. For eg:- we want this tag to be assigned to the orders that have order status as ‘On Hold’.
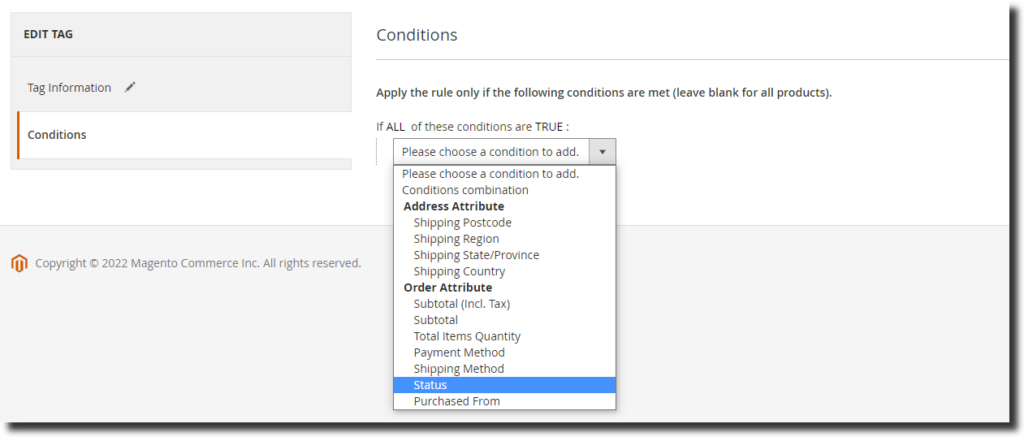

Step 5:- Lastly, save the tag by clicking on the save button in the top right corner.
Note:- Dynamic tags get assigned automatically based on the conditions selected.
Order Tag Logs
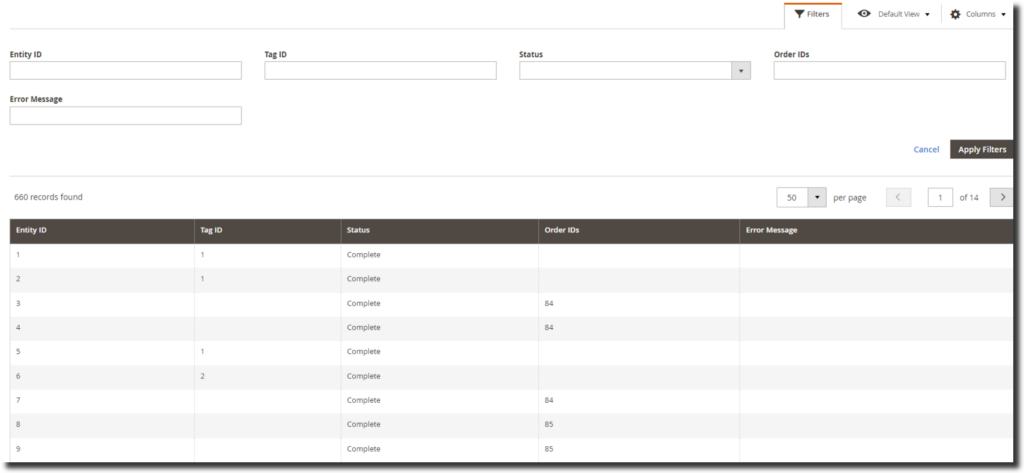
Order tag logs contain the details related to all the dynamic tags that get automatically assigned to specific orders. The grid contains details such as Entity Id, Tag ID, Status, Order Ids, Error Message, and Product Id. This grid has its own set of filters that can be used to access a certain entry in the log.
