

Let’s briefly run through the Shopware 6 admin interface. The following article provides the initial overview of the Shopware backend interface structure and functionality. Below, we focus on login, menu, search, and notifications. Other articles in our blog describe the backend section of Shopware 6 in more detail.

Note that we provide Shopware integration with external platforms. Contact our support for further information or try our Improved Import & Export Extension for Shopware.
Table of contents
Shopware 6 Access and Login
Let’s see how to reach the Shopware 6 administration. You simply need to add “/admin” after your shop domain, such as www.myshop.com/admin. However, it is not the most secure admin URL, so it is recommended to replace it with one which is harder to guess.
But the initial Shopware 6 admin login still takes place at “/admin” after you send the request. The system redirects you to a corresponding page where you can use your login credentials to log in. A successful login attempt launches the general administration overview.

Shopware 6 Admin General Screen
The administration of Shopware 6 has been completely revamped compared to the system’s previous version. The new backend interface is no longer divided into separate windows. Instead, the central location combines numerous settings under a clean and intuitive view.
Furthermore, you can dramatically simplify your navigation through the Shopware 6 admin by opening the administration in parallel in several browser tabs. It lets you avoid switching back and forth between the individual menu items.
The Multi-Browsertab functionality of Shopware 6 works in all common browsers. It lets you display several Shopware Administration functions simultaneously by simply right-clicking + “Open in the new tab.”
Note that the system logs you in as the same user in all the tabs you open. If you log out, it happens for all open tabs.
Shortcuts
Now, when your Shopware 6 administration screen is open, you can control it using keyboard shortcuts. The most important functions of your Shopware backend are available by pressing several buttons at the same time. Let’s look at the most common commands:
- F – press F to launch focus search;
- Shift + ? – this command displays the Shopware 6 shortcut listing, so you only need to remember this shortcut for the first time;
- alt + S – this command saves the detail view for Windows; use “control + S” for Mac and “alt + S” for Linux;
- Esc – use this shortcut to cancel the detail view in Shopware 6.
Also, you can add items to your Shopware 6 admin within a few clicks. The following functions require pressing the keys quickly, one after the another:
- A + P – with the help of this command, you can add a product to Shopware 6;
- A + C – this shortcut adds a new category to your backend;
- A + E – use it to add a Shopping Experience layout;
- A + U – this command is designed to add a new customer to Shopware 6;
- A + P + R – by pressing these buttons, you add properties;
- A + M – adding a manufacturer in Shopware 6 can be that simple;
- A + R – this command adds a new rule;
- A + S – use this shortcut to add a new sales channel in the Shopware 6 admin.
You can also navigate through your Shopware 6 admin interface quickly by pressing the following keys quickly one after the another:
- G + H – this command transfers you to the dashboard;
- G + P – this command transfers you to products;
- G + C – this command transfers you to categories;
- G + D – this command transfers you to dynamic product groups;
- G + P + R – this command transfers you to properties;
- G + M – this command transfers you to manufacturers;
- G + O – this command transfers you to orders;
- G + U – this command transfers you to customers;
- G + E – this command transfers you to Shopping Experiences;
- G + M + E – this command transfers you to Media;
- G + P + O – this command transfers you to promotions;
- G + N – this command transfers you to newsletter recipients;
- G + S – this command transfers you to settings listing;
- G + S + N – this command transfers you to snippets;
- G + S + P – this command transfers you to payment;
- G + S + S – this command transfers you to shipping;
- G + S + R – this command transfers you to rule builder;
- G + A – this command transfers you to plugins.
You can find your Shopware 6 admin menu bar on the left side of the backend screen. As you can see, it is split into several areas. You can navigate between them by clicking their titles. Alternatively, use shortcuts described in the previous chapter.

Shopware Version
The version of your Shopware installation is displayed at the top part of the menu bar. It doesn’t appear there for cloud stores.
Admin Sections
Below the software version, you can see numerous areas where you can configure your Shopware 6 website:
- Dashboard;
- Catalogues;
- Orders;
- Customers;
- Content;
- Themes;
- Marketing;
- Extensions;
- Settings.
You can view orders, edit products, create new categories, or manage your e-commerce storefront otherways.

We describe each area in the corresponding article. View our Shopware 6 guide to find them.
Sales Channel
You can view your existing sales channels in the corresponding Shopware 6 admin section. Click the plus symbol to add more channels. Click the channel name for further information and configuration.

You can fold the menu to the left edge of the Shopware admin. Use the Minimize Menu button to display only the symbols of the individual menu items. This feature provides additional space to the editing area.
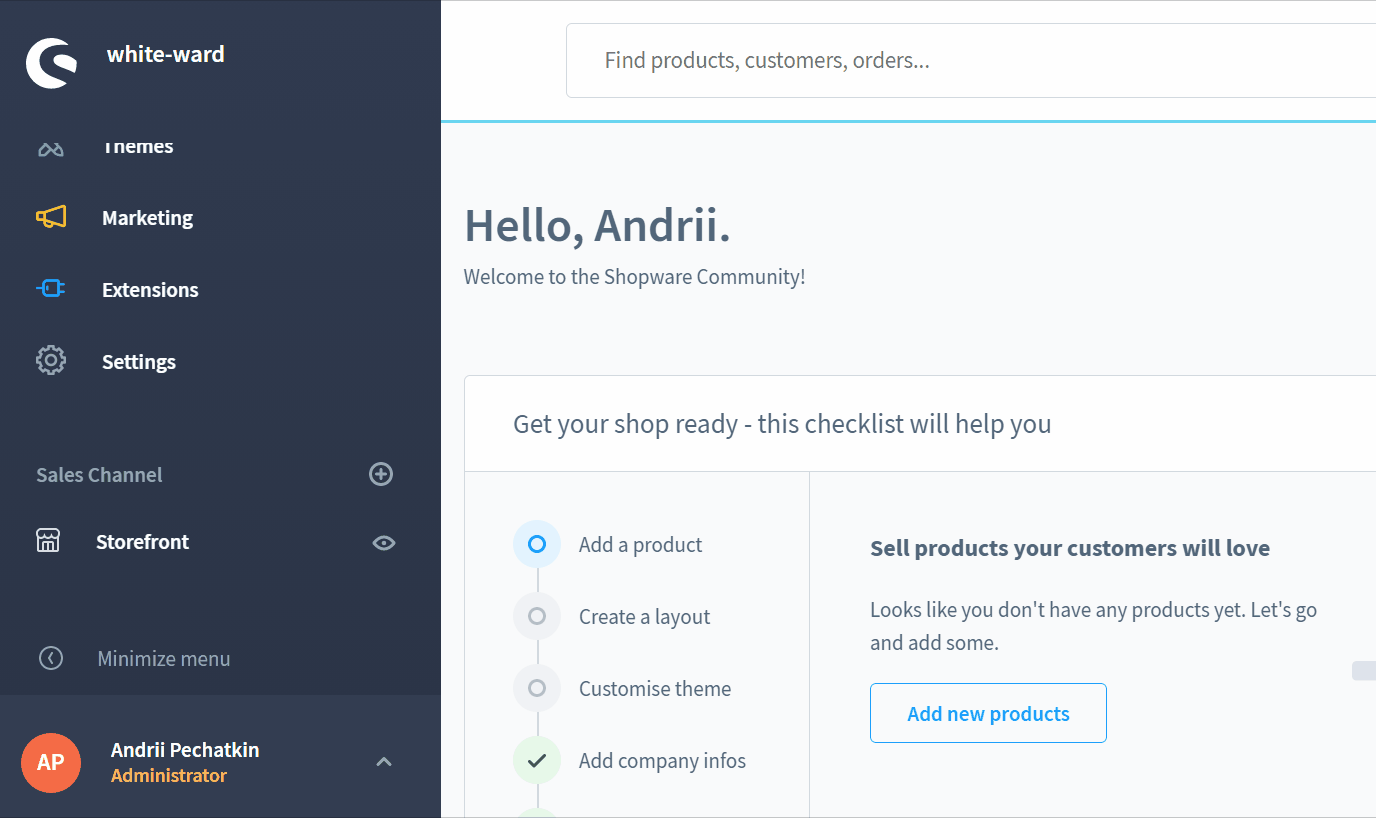
Profile Settings
The bottom section of the menu bar contains the profile settings. Use them to switch between the display language of the administration. Also, it is possible to log out there.

Shopware 6 Admin Search
The Shopware 6 administration area contains the central search function at the top of the screen. Use it to search for products, orders, media, and other entities. You can call them up from any menu directly.
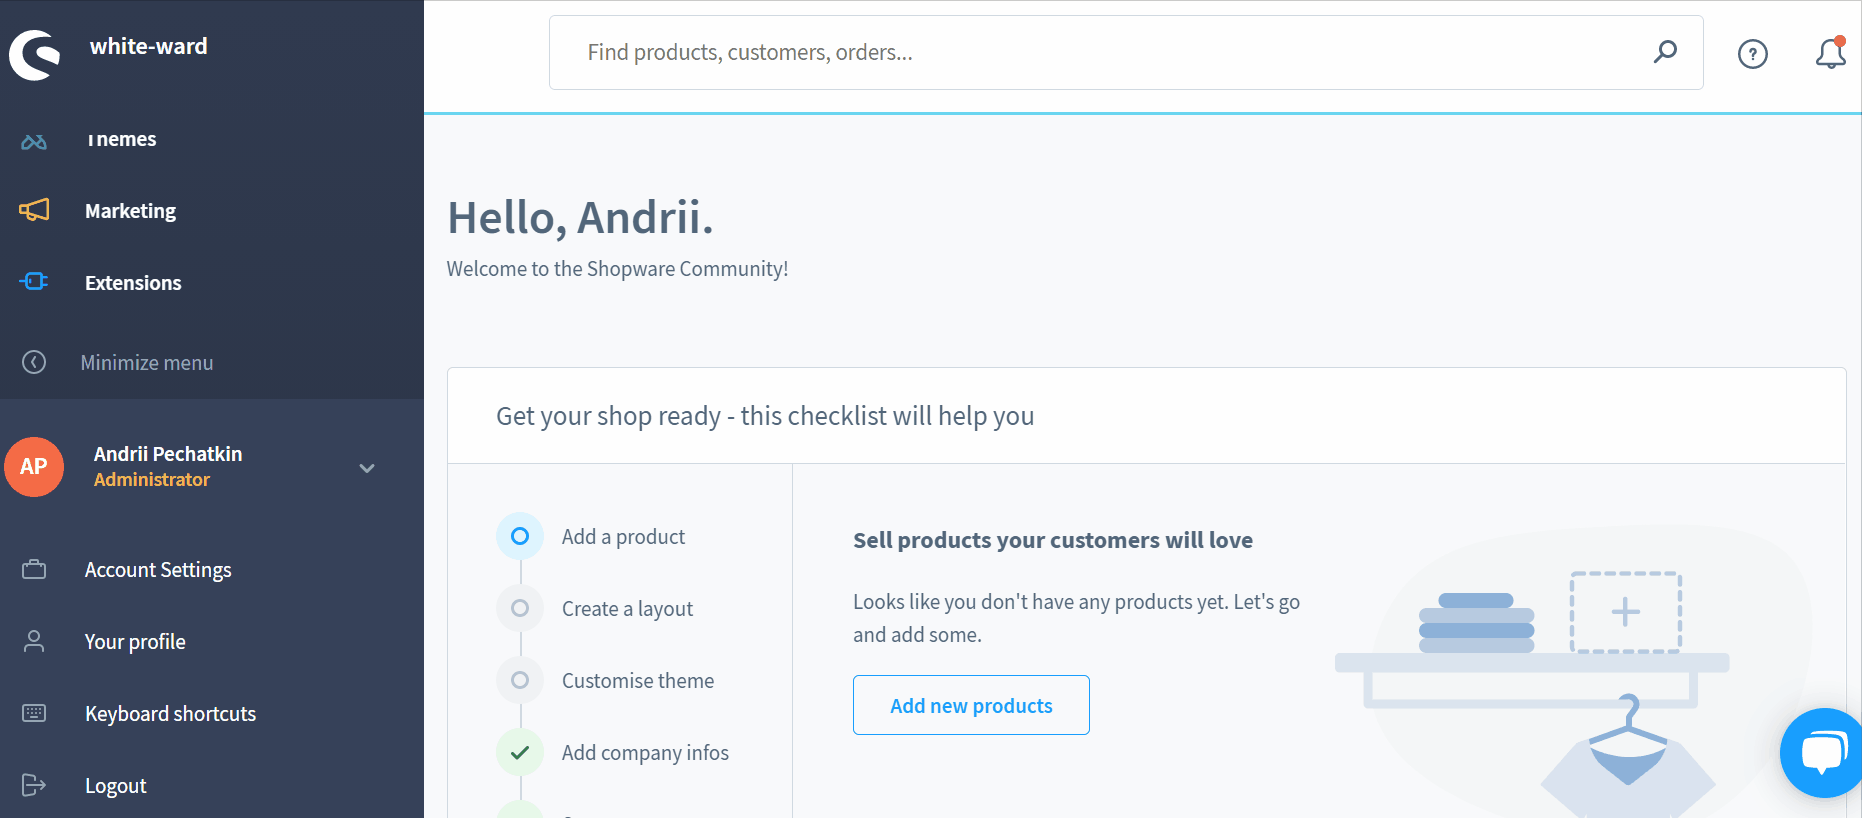
Shopware 6 Admin Notifications
You might have already spotted the bell symbol at the top right of the admin screen. It lets you view notifications stored within the Shopware 6 admin interface. There, you can find data on the system or plugin updates, errors, or various issues.


