The ever-evolving world of digital marketing demands uncompromised conversion tracking accuracy for optimal ad campaign performance. The traditional Facebook pixel tracking is not accurate and Facebook itself recommends to implement both the conversion API and Pixel tracking for the optimal tracking and results. For Magento stores, the synergy between the Facebook Conversion API and Google Tag Manager (GTM) server-side implementation presents a powerful solution to navigate the complexities of cookie restrictions. This innovative approach unlocks the potential for seamless data transfer from your Magento to Facebook, resulting in a more reliable foundation for campaign analysis and optimization. This guide serves as your step-by-step roadmap to establishing Magento Facebook Conversion API with GTM(Server-Side) using the GA4 as data source.
Before Starting the Set Up:
As we know Facebook Pixel tracking is not as accurate and we are needed to implement Facebook conversion API which requires a lot of additional implementation. Implementing Facebook CAPI with Google Tag Manager Server side adds even more tracking accuracy and security. However, in this guide we are going to show you how to use the existing GA4 data layers as the data source to configure Facebook Pixel events and then setup GTM server side to transfer data from GA4 events to the Facebook Conversion API resulting in accurate tracking and campaign optimization which eventually leads to improved conversions. The Set Up would involve the below mentioned sections, which needs to be followed closely in order to have a functional setup:-
- Create GTM Server Side Container and Set Up Tagging Server:- We will use Stape.io but Google Cloud Platform(GCP) can be used as a suitable alternative as well.
- Set Up Conversion API in Facebook Business Manager
- Set Up GTM Server Container
- Set Up GTM Web Container
- Test the implementation
Create GTM Server Side Container and Set Up Tagging Server
Create GTM Server Side Container
Please follow the steps below:-
- Login to your Google Tag Manager account and navigate to your web container.
- Go to the admin section and click on the “+” button
- Add the container name and choose “Server” from the list.
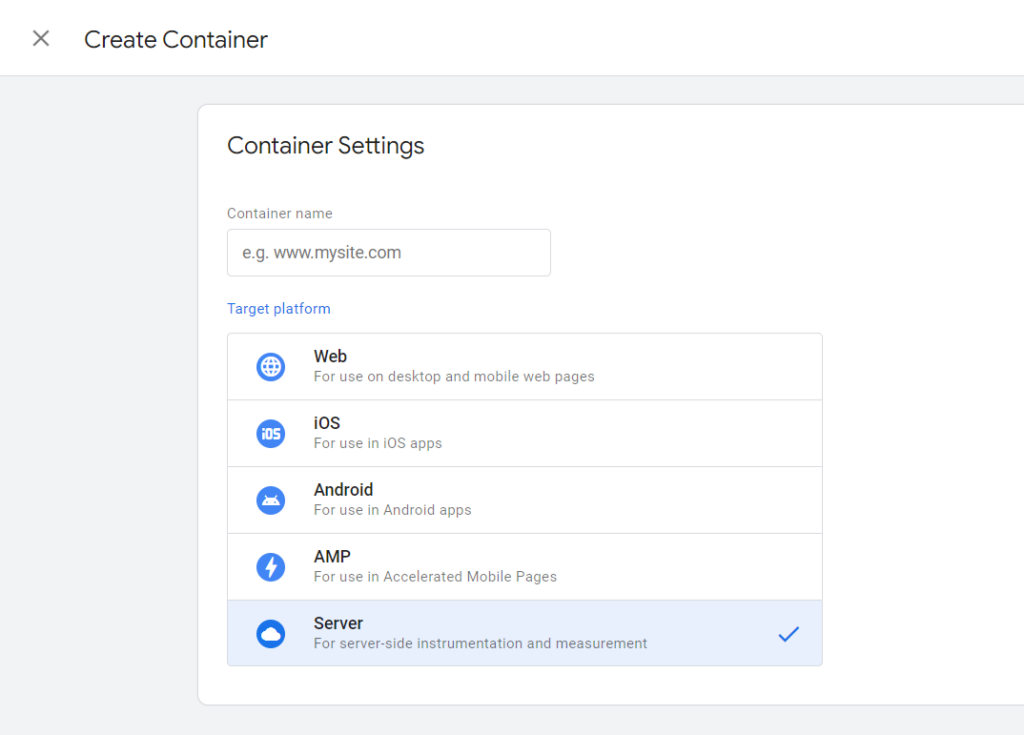
- Once done, you can either go with “Automatic Provisioning Server”(can connect with your Google Cloud Platform) or “Manual Provisioning Server” (setup tagging server manually using third party services such as “Stape.io”. We will go with the manual provision server i.e “Stape.io”.
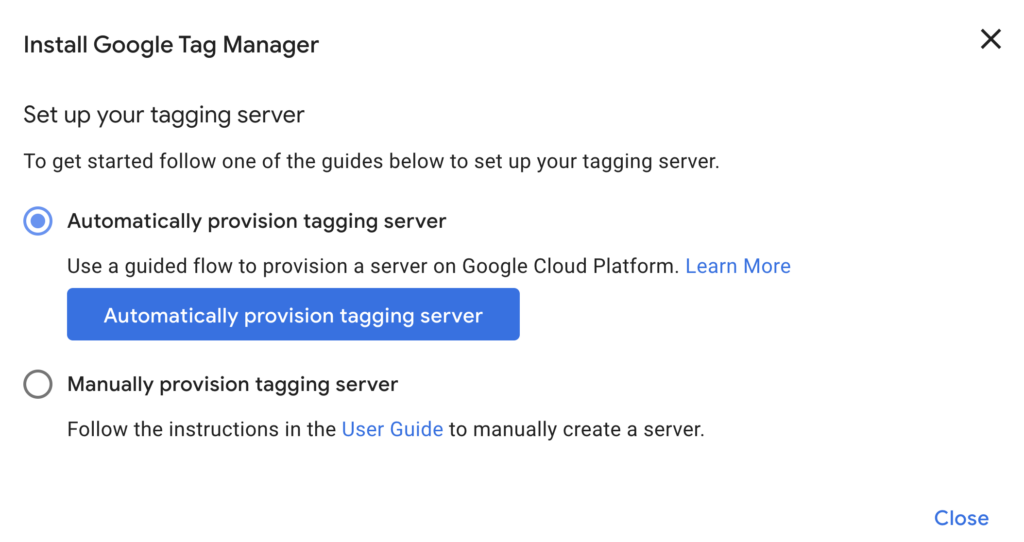
- Upon selecting “Manually provision tagging server” you will be presented with the container config key, save it. We will need it in the next step.
- Also check out Fast Domains
Set up Tagging Server
- Go to Stape.io and sign up. You can with with the free plan(10,000 free requests) for the test setup but as there the number of requests are huge, you will have to eventually upgrade the plan.
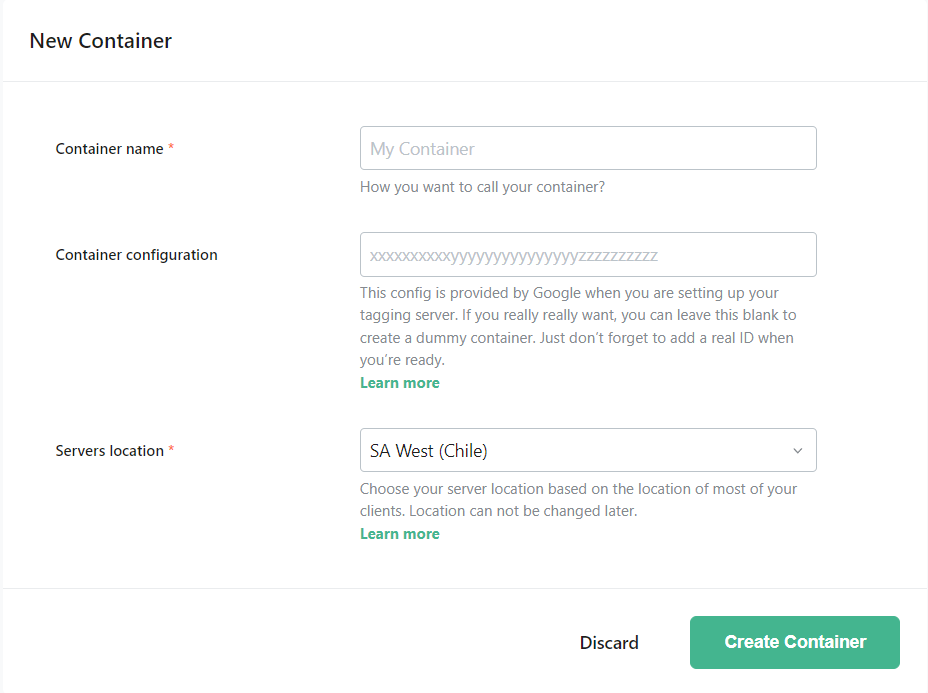
- Once done, on the dashboard page click on ‘Create Container’. Add the container name, Location and the config key that we got in the earlier step.
- Once your container is created, navigate to the settings and scroll down to find the domain url. Make sure to save it as we will need it in the next steps.

Set Up Conversion API in Facebook Business Manager
In order to set up the facebook conversion API in GTM, we would need the three key entries which can be obtained from the Facebook Business Manager.
- Facebook Pixel ID
- API Access Token
- Test ID
Please follow the steps below to retrieve these essential details:-
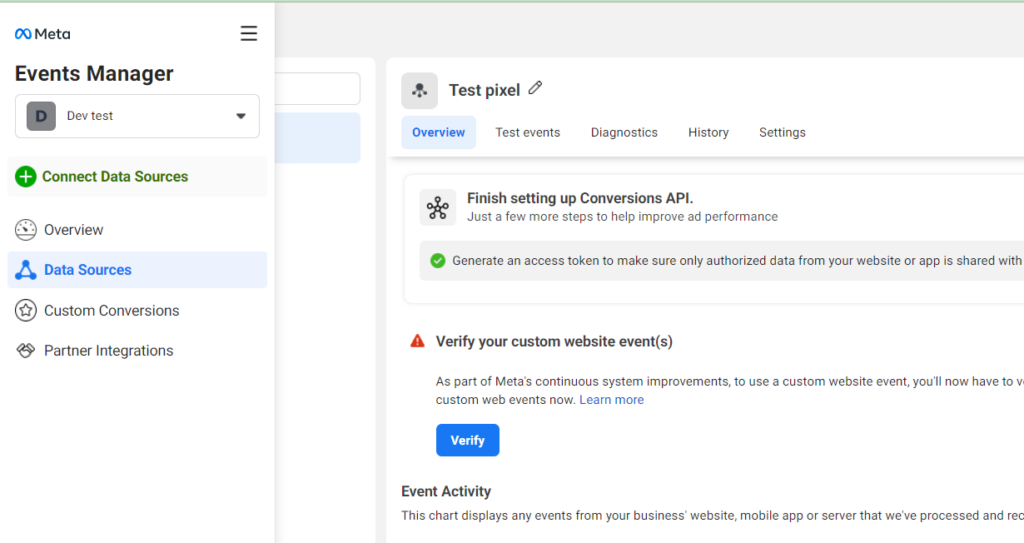
- You will find the “Facebook Pixel ID” in the left menu.
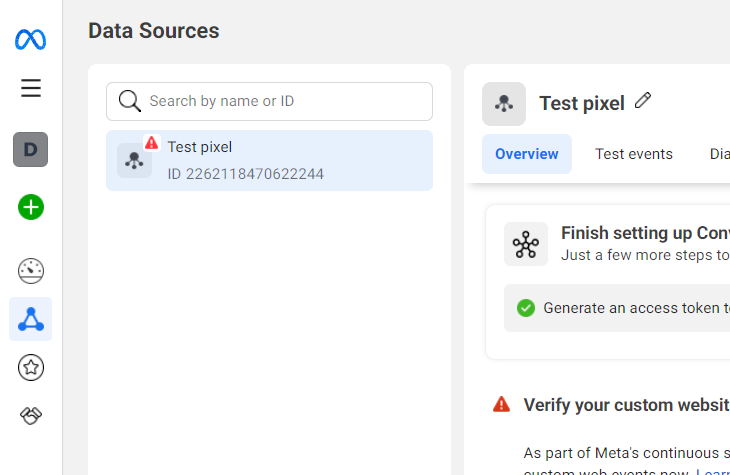
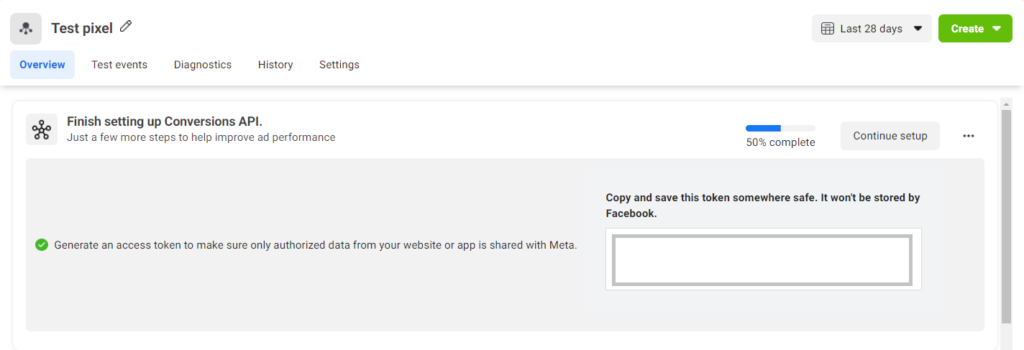
- Scroll down in the overview section and click on set up Conversions API. Follow through all the five events in which you essentially select the events and the parameters to create a guide for the setup. We just proceed through these steps to get the API access token. Once you finish with the steps save your access token as shown in the image below:-
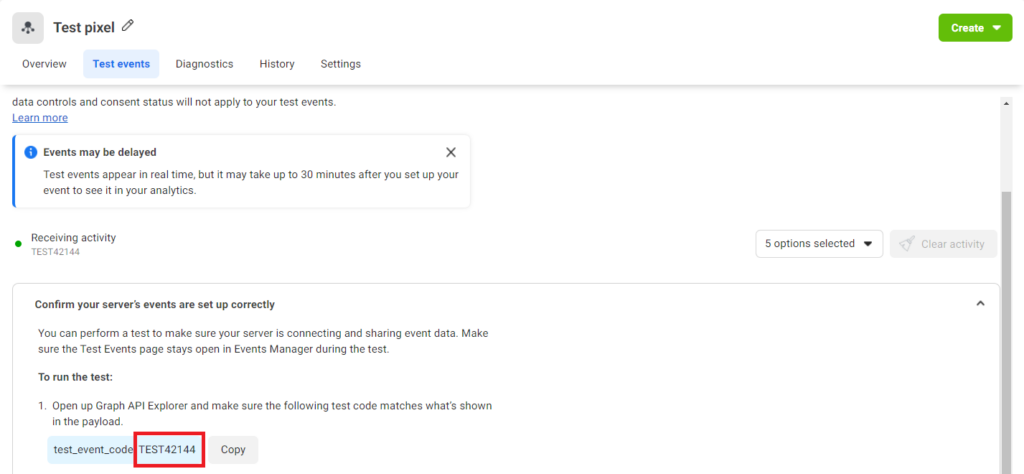
- Now navigate to the “Test Events” section and scroll down to find “Confirm your server’s events are set up correctly“, you will find the test id under this section:-
Set Up GTM Server Container
Note:- We are going to use the GA4 events in the web container to feed the Magento Facebook conversion API Tag in the server container, we will also implement Facebook pixel tracking in the web container to ensure that we are sending events from both web and server container as recommended by Facebook for improving tracking accuracy, however sending both events lead to an issue that we will discuss and resolve in the next step.
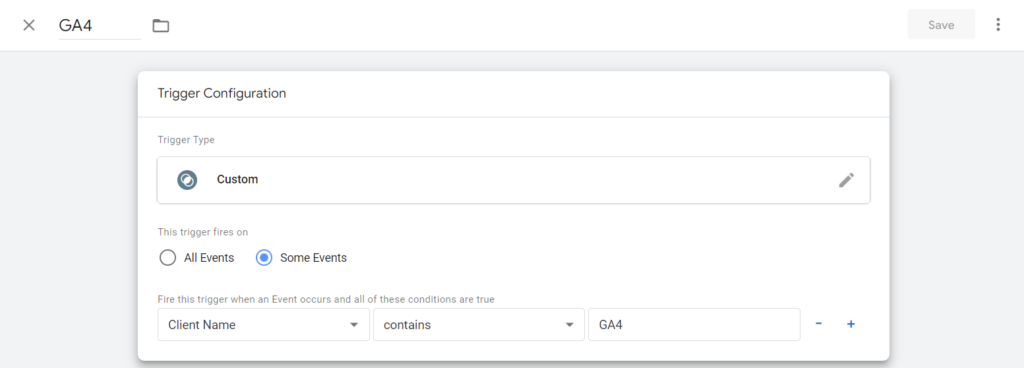
- Go to your GTM server container that we created earlier and create a trigger as per the following settings:-
- Trigger Name:- GA4
- Trigger Type:- Custom
- This trigger fires on:- Some Events
- Condition:- Client Name contains GA4
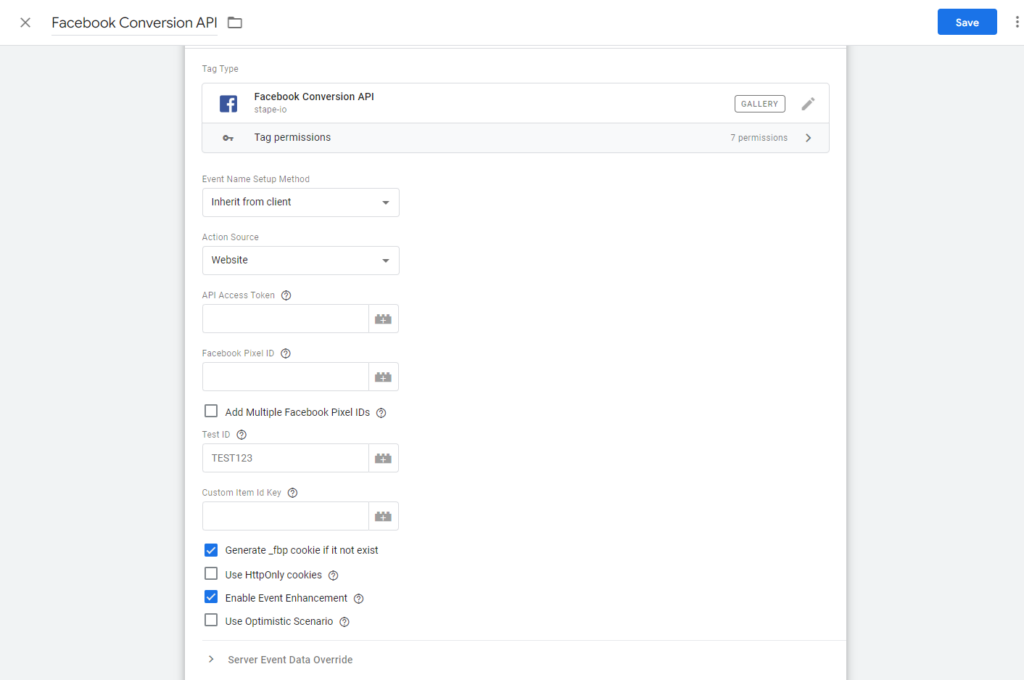
- Go to the Tag Configuration, create a new tag and set it up using the details provided below:-
- Tag Name:- Facebook Conversion API
- Tag Configuration
- Select Gallery and search for “Facebook Conversion API by stape.io”. Since this tag is not avialable by default we will import it from the template gallery.
- Tag Type:- Facebook Conversion API
- Event Name Setup Method:- Inherit from Client
- Action Source:- Website
- API Access Token:- obtained in the earlier steps
- Facebook Pixel ID:- obtained in the earlier steps
- Test ID:- obtained in the earlier steps
- Check “Generate _fbp cookie if it not exist”
- Check Enable Event Enhancement
- Trigger:- GA4 (Created previously)
- Now you will see that a GA4 client is created automatically. Now our server container is set up properly, ensure to publish the container before testing.
Set Up GTM Web Container
Note:- The issue that we talked about in the previous section is essentially we sending duplicate events one through conversion API and another through Facebook Pixel. This is necessary in case one of the events do not reach then this data gets lost. But sending two events ensures optimum tracking. Now to deduplicate these events, Facebook recommends to send “Event ID” with each of your tags so that Facebook can recognize the duplicate event ids and then deduplicate them record a single event instead of 2 same events.
- Assuming you already have a GA4 setup in the web container, in case you don’t you can use our Magento Google Tag Manager extension to Set up GA4 web container.
- Now we will need an “Event ID” variable that generates random event ids for each event. This is not present in the default GA4 data layer. Lucky for us we have a variable in the template gallery that we can use, create the variable as per the settings below:-
- Variable Name:- Unique Event ID
- Variable Type:- Unique Event ID ( Search in the template gallery and import from there, not avialable by default)

- Create the following variable as well which we will need for the setup:-
- Facebook Pixel ID
- Variable Type:- Constant
- Value:- add the pixel ID obtained in the earlier steps of the set up.
- Facebook Pixel ID

- Transport_URL
- Variable Type:- Constant
- Value:- add the domain URL that we obtained from stape.io

- Google Tag Event Settings
- Variable Type:- Google Tag: Event Settings
- Event Parameter:- transport_url
- Value:- {{Transport_URL}}

- Add the event_ID and transport_URL to all the GA4 events that you want to send to the server container to feed the Facebook Conversion API which will automatically detect and map the corresponding event to the facebook event and send the details.
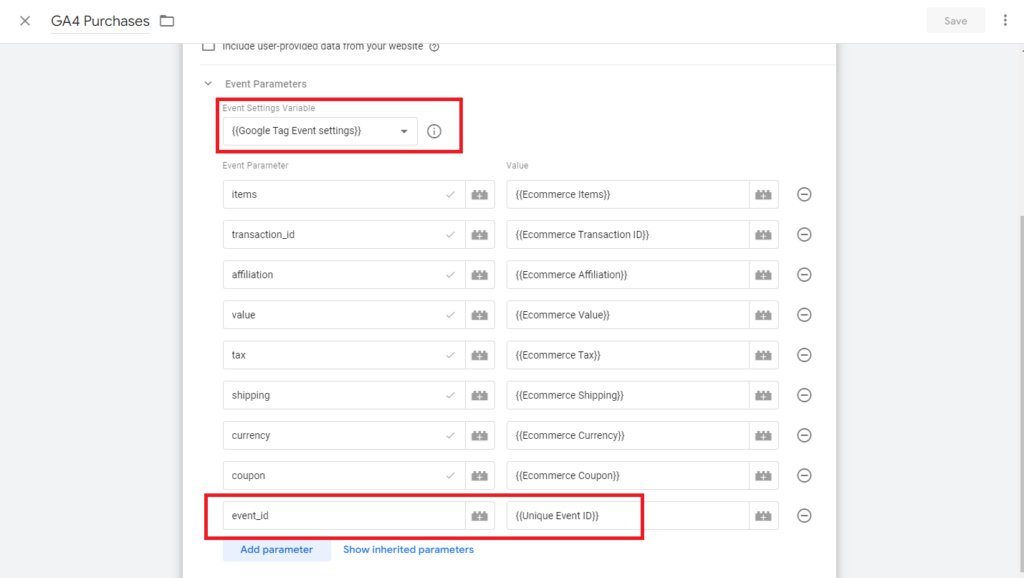
- Here we have only added it in the purchase event but you should add it all the other events that you want to send.
Set up Facebook Pixel Tracking Events
N.B:- If you already have this set up in your web container, then you can simply add the event id and make sure all the events have the same triggers as their corresponding GA4 event.
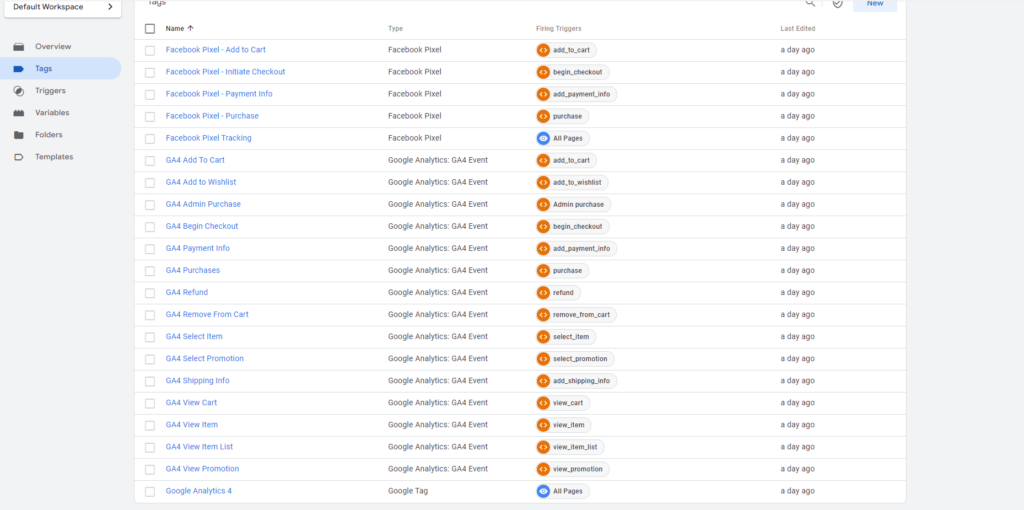
- We will create one of the Facebook Pixel events and you can follow the same procedure to create other events that you want to send with the Facebook Pixel Tracking:-
- Create the Facebook Purchase event as per the following settings:-
- Event Name:- Facebook Pixel – Purchase
- Tag Type:- Facebook Pixel ( This tag is not present by default you need to import it from the template gallery the name should be “Facebook Pixel by facebookarchive”)
- Facebook Pixel ID(s):- {{Facebook Pixel ID}} ( the variable that we created earlier)
- Event Name:- Purchase
- Object Properties:- Add the parameters that you want send such as currency, value, transaction_id, these must already be there since they are being used with the GA4 events.
- More Settings> Event ID:- {{Unique Event ID}} ( variable created earlier)
- Trigger:- Purchase ( Same as GA4 purchase event)
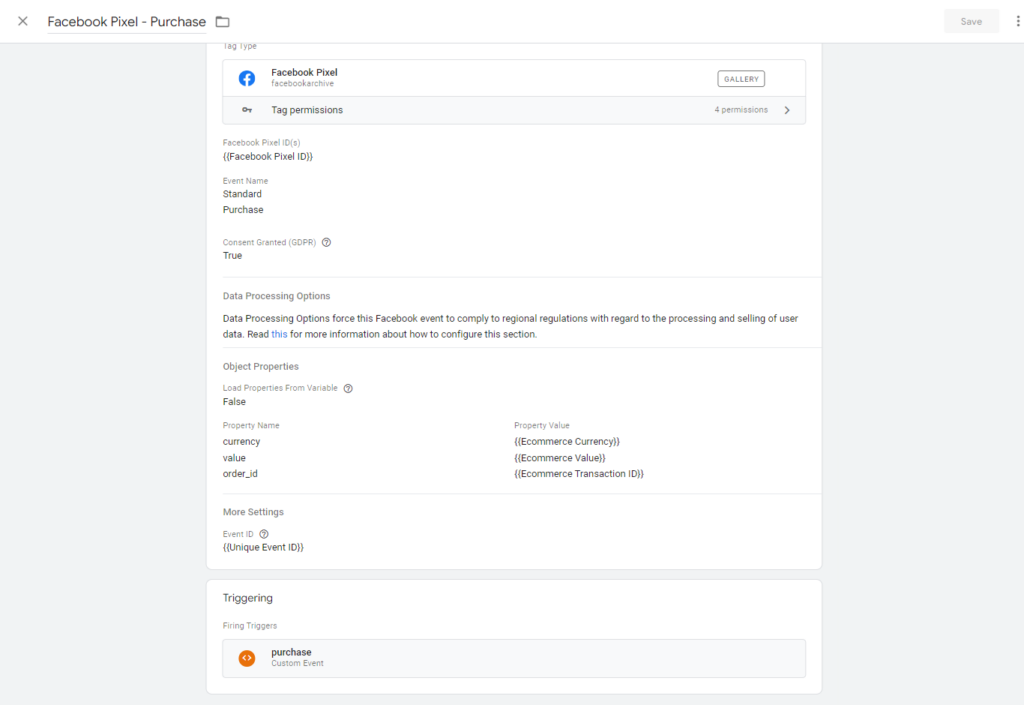
- Similarly, create the other events and your setup is complete.
Test the implementation
- Open preview mode for server container.
- Open preview mode for web container
- Keep the “Test Events” open in the Facebook Buisness Manager.
- Start browsing the site, you can see the events coming up in the web container as well as they getting sent to the server container.
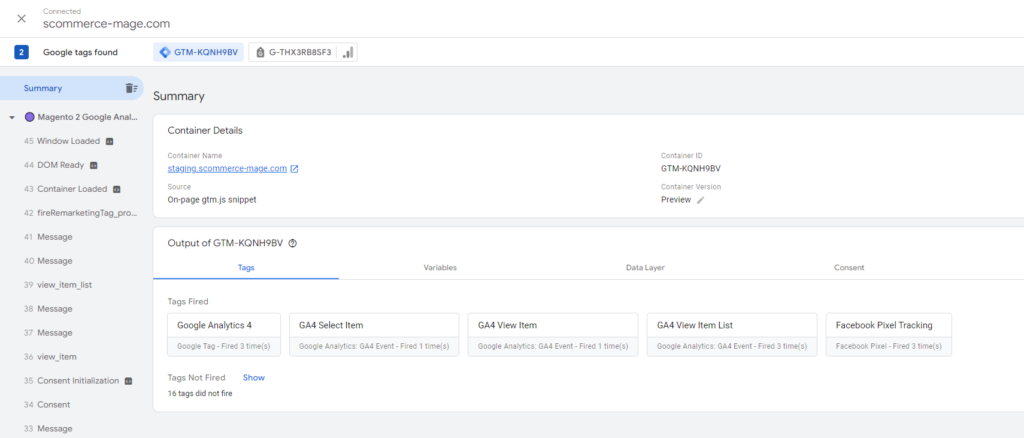

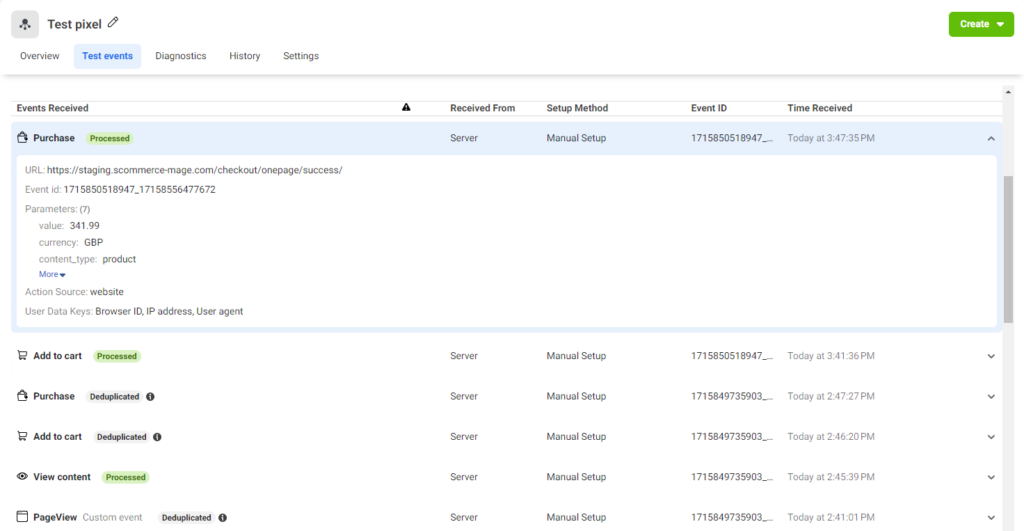
- We can also see that these events are coming through to Facebook:-
Conclusion:
Congratulations! You’ve successfully integrated the Magento Facebook Conversion API with GTM server-side for your Magento store. Now, you can enjoy more accurate conversion tracking and optimize your Facebook ads for maximum results. You can also reach out to us in the comments regarding any unclear steps or in case you want us to set it up for you..
Bonus Tip: Regularly monitor your Facebook conversion data and experiment with different targeting options to fine-tune your ad campaigns and maximize your return on investment (ROI).


