This article explains how to change the VAT rate in Shopware 6, highlighting the most important points. You may have to adjust the tax rates stored in your Shopware 6 shop due to a change in the law. What are the most crucial aspects? You will learn how to adjust the tax rate in the settings, edit the corresponding prices, and apply VAT changes for orders. Before going any further, check other Shopware 6 tutorials in our cookbook.
Note that we provide Shopware integration with external platforms. Contact our support for further information or try our Improved Import, Export & Mass Actions.
Get Improved Import, Export & Mass Actions for Shopware by Firebear Studio
Explore Shopware
Table of contents
How To Adjust Tax Rates In Shopware 6 Settings
You can change tax rates in Shopware 6 right in your administration under Settings -> Shop -> Taxes.
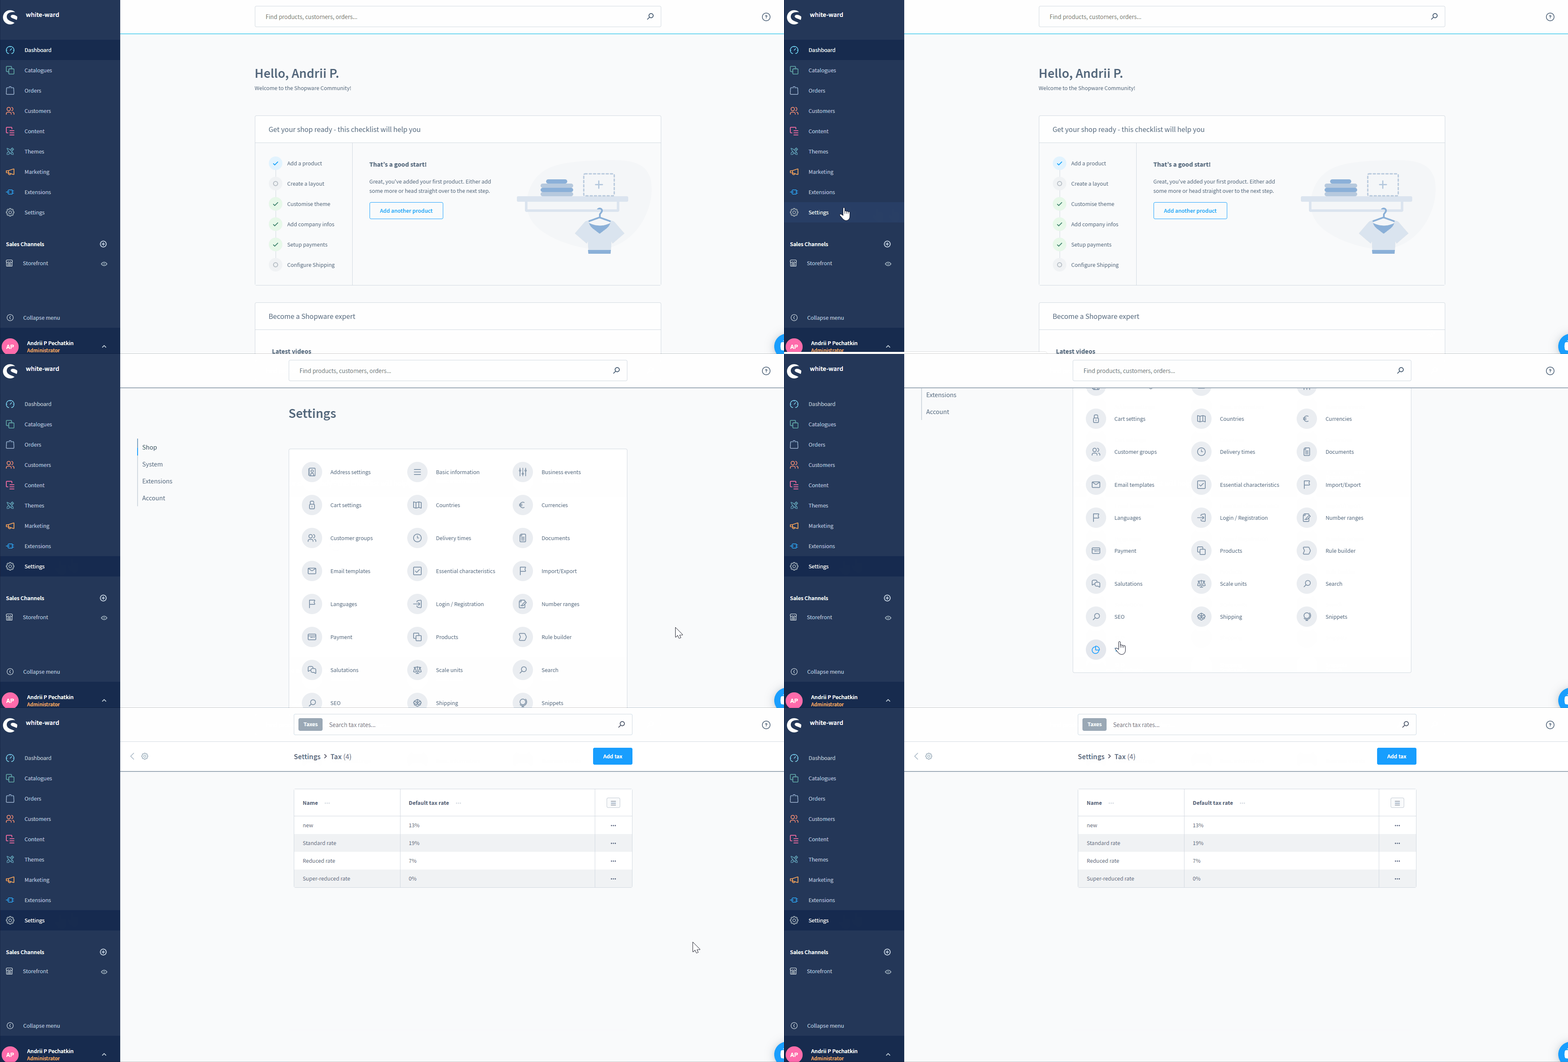
The current tax rates are stored in a grid that displays the tax name and rate. Besides, a context menu lets you edit or delete the existing records.
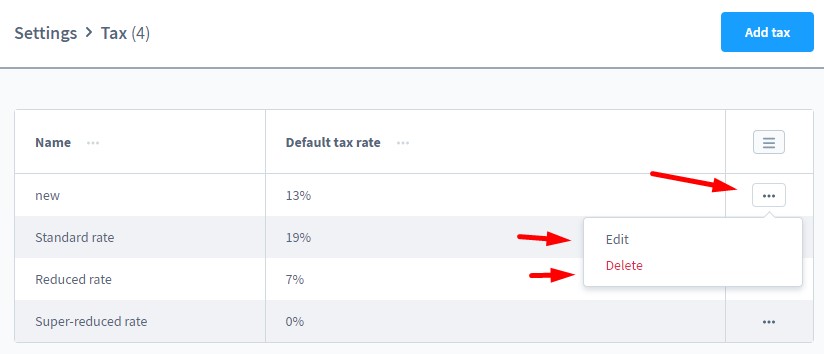
Here, you can change the current VAT rates available in your Shopware 6 database or create new ones. We describe the corresponding module in this article: Tax Settings in Shopware 6.
Note that changing the tax rates is only a part of your routine since it does not affect the stored product prices. In Shopware 6, prices stay the same in the database when you change the corresponding tax rate. The system only calculates the respective tax portion in the shopping cart.
How To Use Discounts To Adjust Product Prices In Shopware 6
Go to the Promotions screen of your Shopware 6 installation under Main Menu -> Marketing -> Promotions.
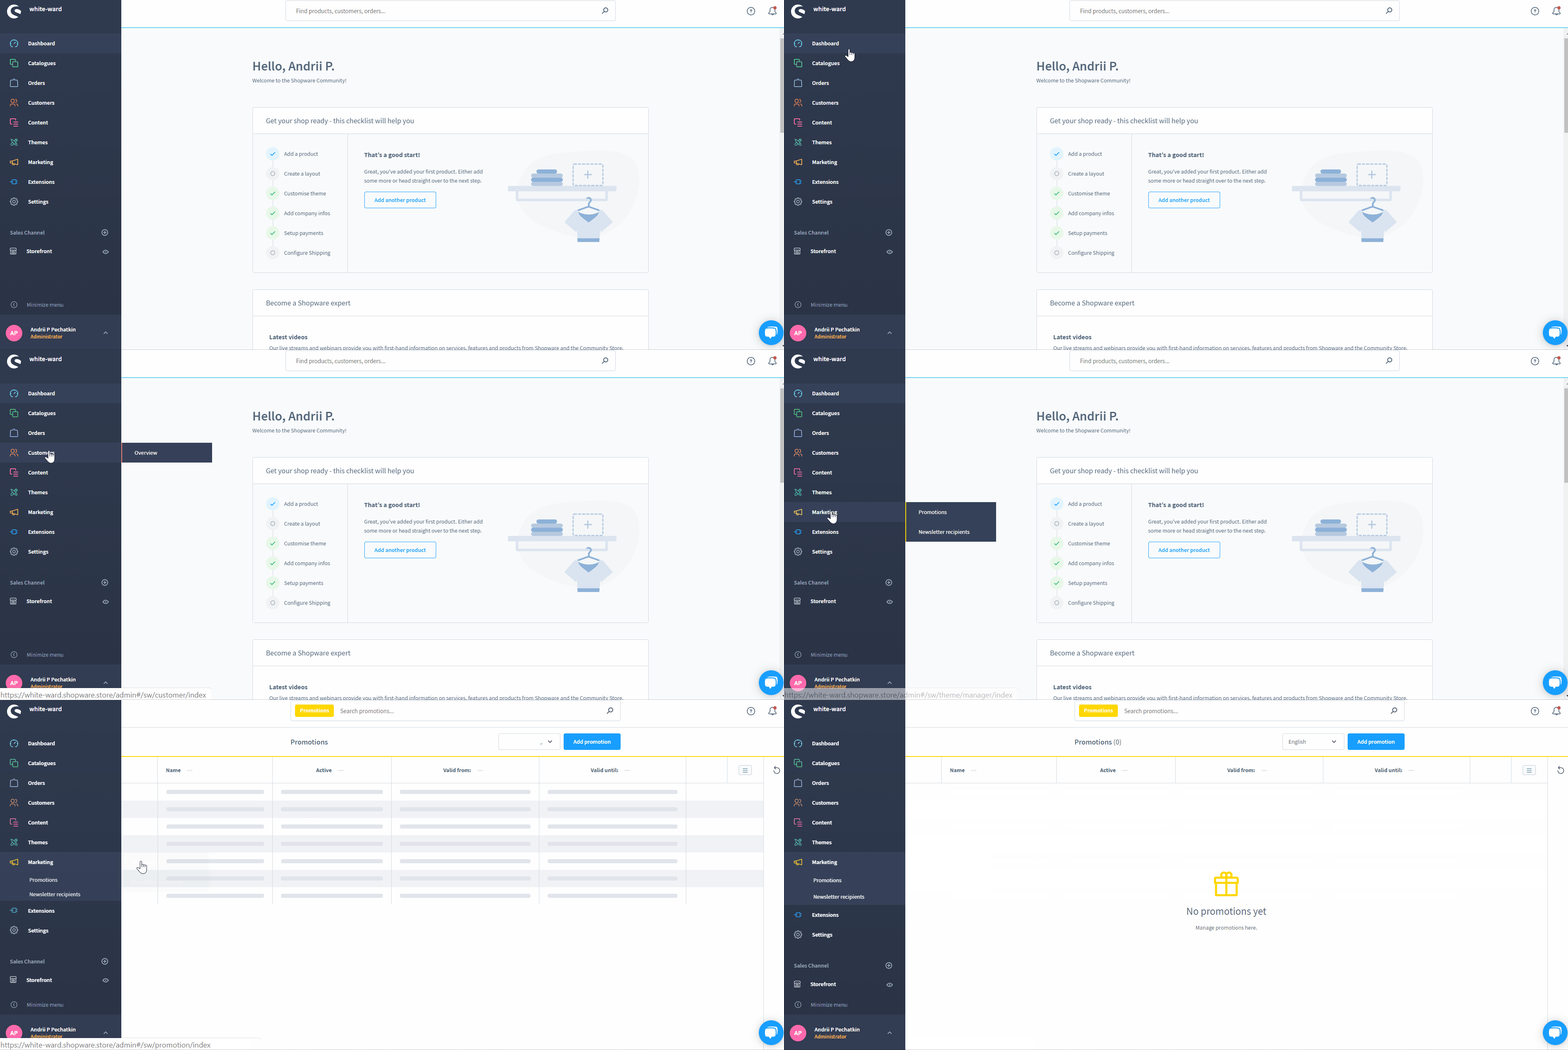
The module enables you to create new promotions or manage the existing ones. We need to generate a new record.
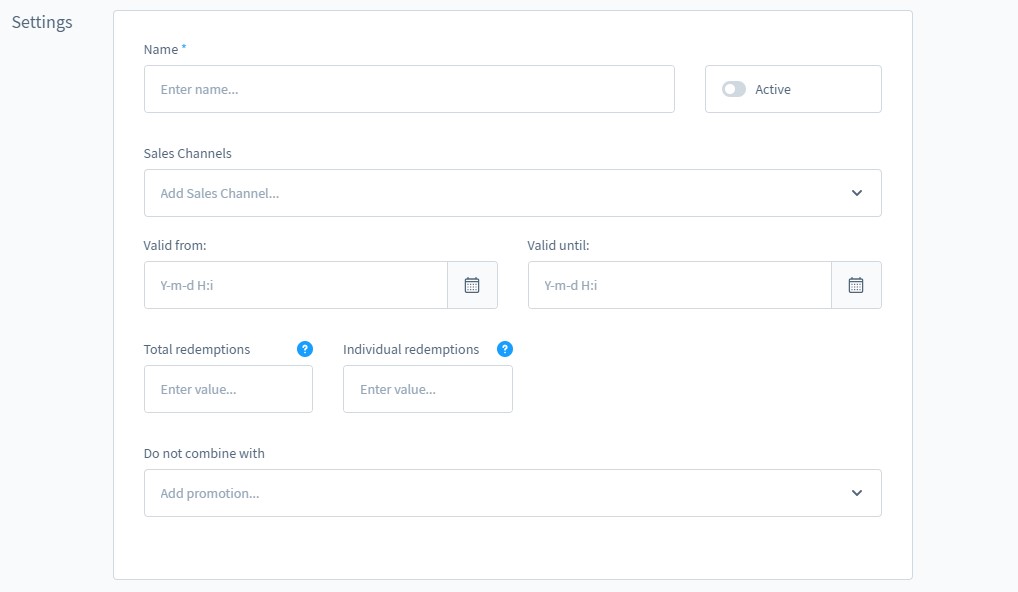
Configure the basic settings on the General tab:
- Name your new promotion and enable it;
- Choose a sales channel;
- Set the total redemptions and individual redemptions to 0 to indefinitely apply the promotion to product prices.
Proceed to the Discounts tab. Here, you can add two options:
- Tax reduction from 19% to 16%;
- Tax reduction from 7% to 5%.
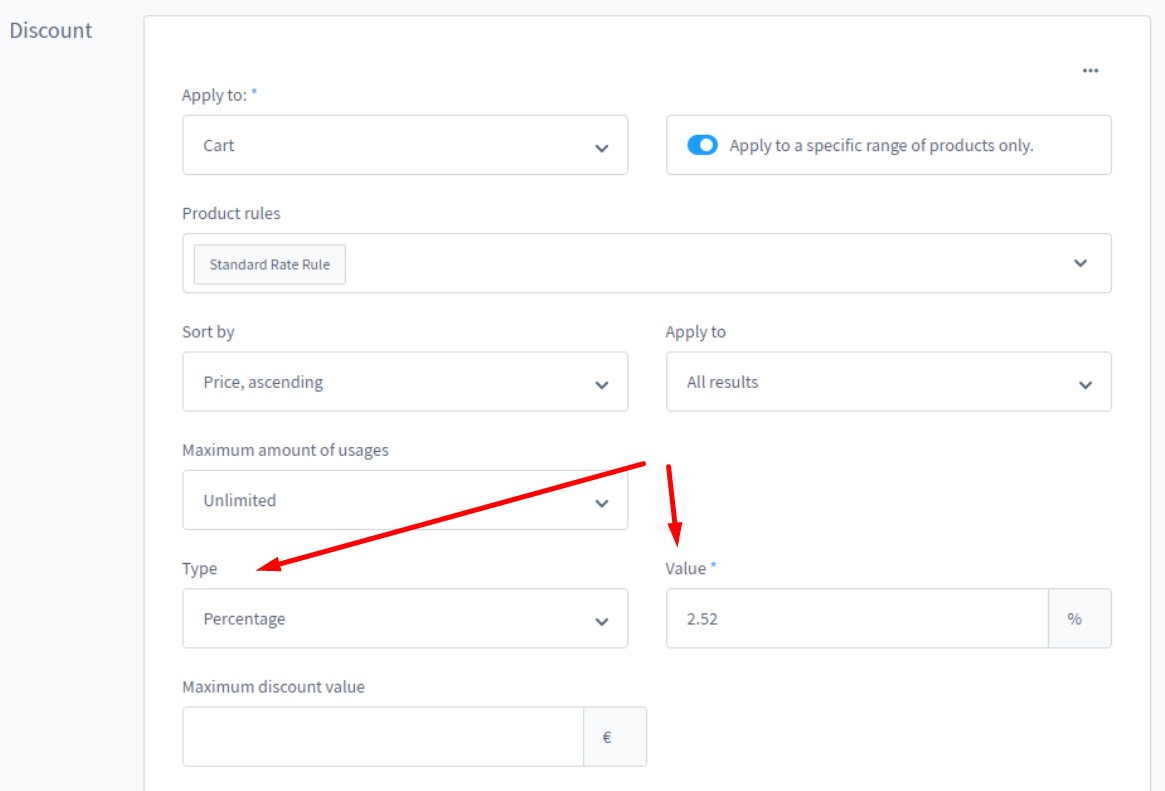
In the first case, you need to specify the effective tax saving of 2.52 in the Value field for the value. The VAT saving is not 3%, but 2.52% because the prices are reduced from 119% to 116% – not from 100% to 97%.
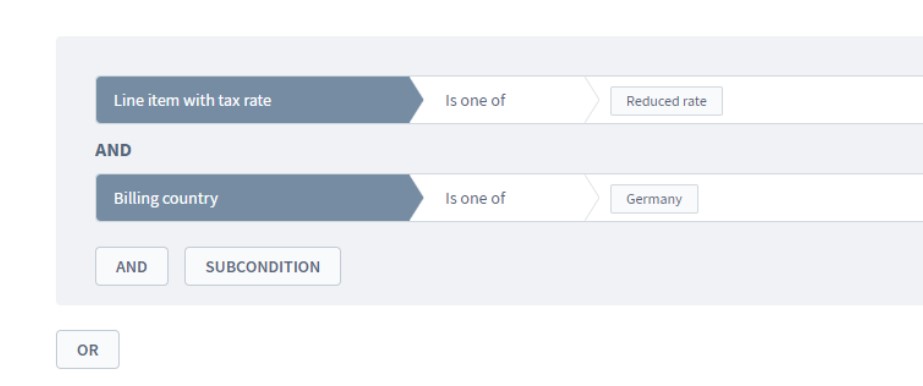
Now, activate the Apply to a specific range of products only option. You will set up the necessary product rule for the discount. It must be a line item with a tax rate that is a standard rate. Also, your billing country should be Germany.
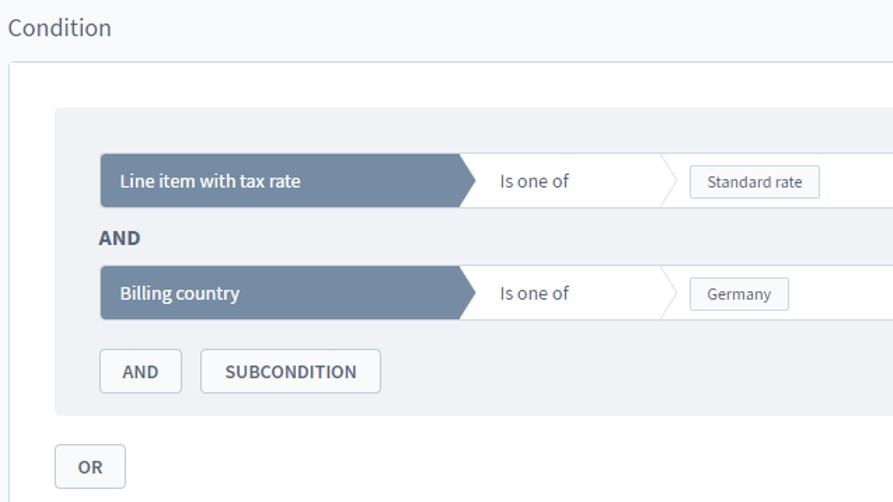
As for the tax reduction from 7% to 5%, enter the value 1.87 and create a new product rule following the tutorial above.
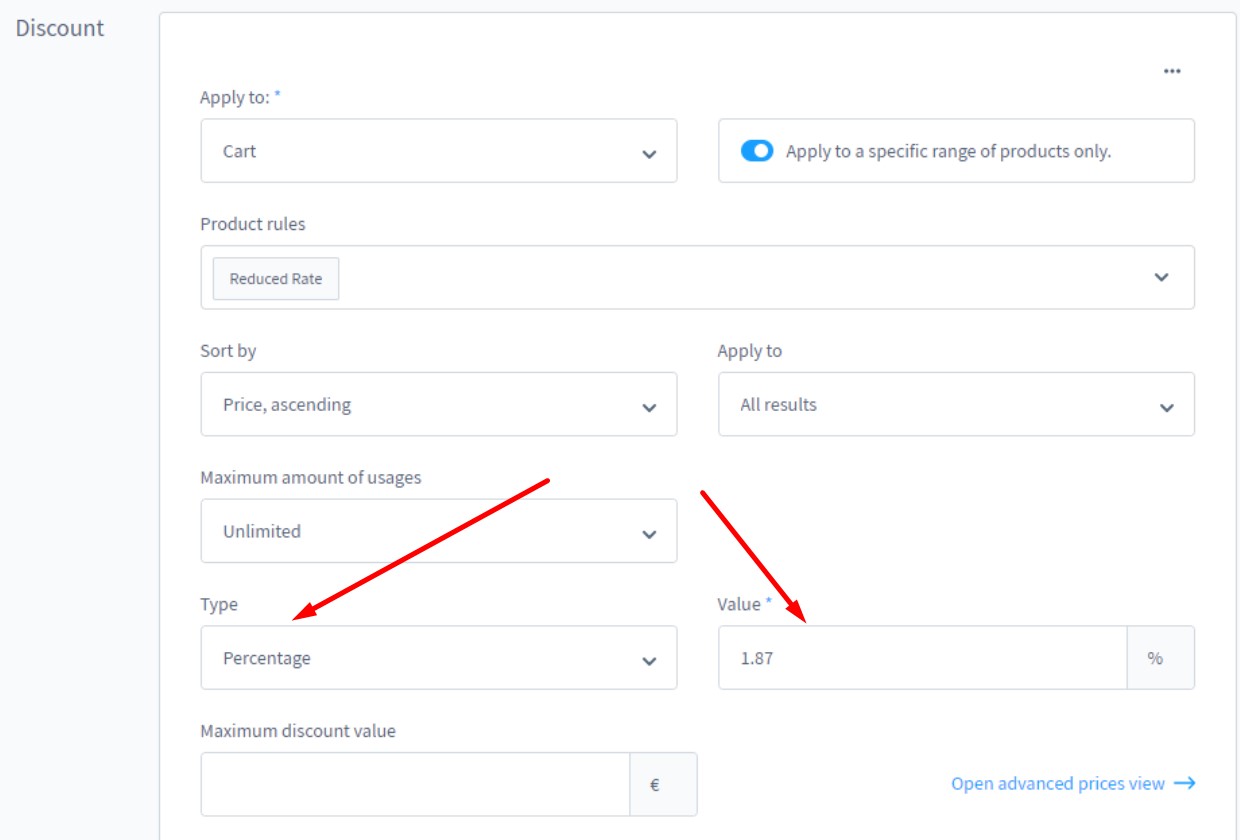
Now, the condition is a line item with a tax rate that is a reduced rate.
That’s how you adjust tax rates in Shopware 6. Read this article for further information: Promotions & Discounts in Shopware 6.
How To Adjust Tax Rates For Orders
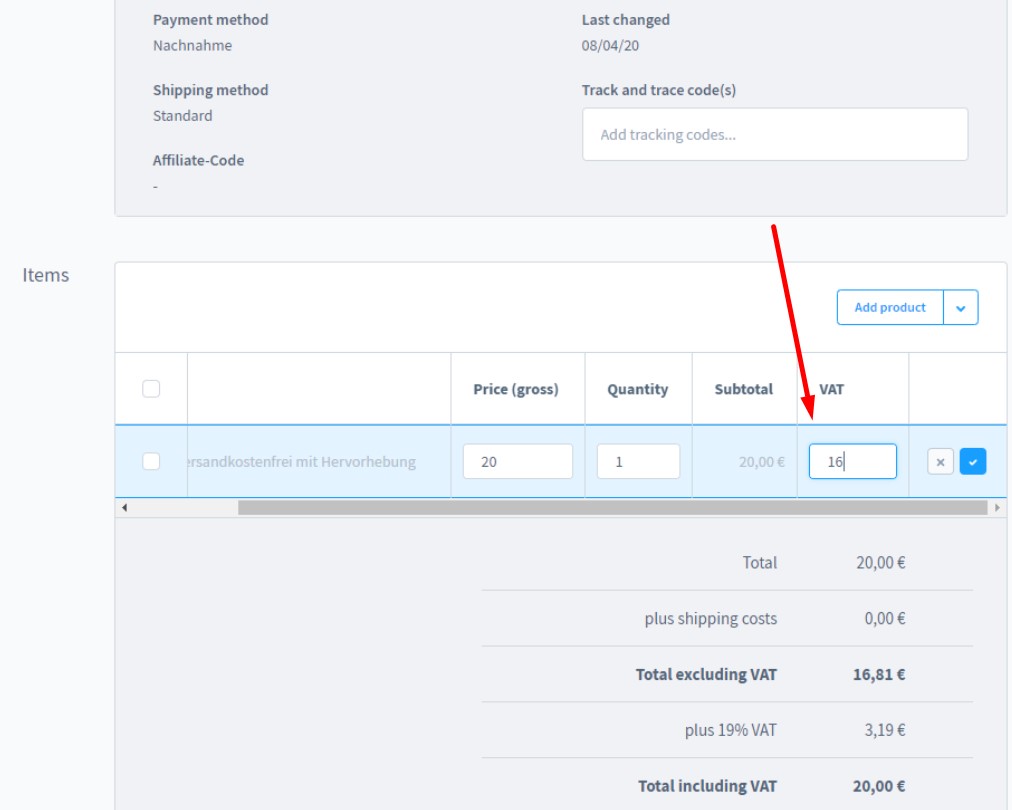
Shopware 6 lets you adjust the tax rates for an existing order. Click on the desired order and then the Edit button from the upper right corner. Doubleclick on the tax rate to edit it.
Shopware 6 Essentials FAQ
How to create a Shopware account?
You need to create a Shopware account before changing tax (VAT) rates in Shopware. Visit the registration page, hit the Register Now link, and fill in the form to create a new account. After receiving a confirmation email, follow the instructions provided in it.
What about a Shopware ID?
You will get it upon registration automatically.
What is Shopware master data?
Under Shopware master data, we assume all the information you provide about your company and business, including physical addresses, phone numbers, and emails.
How to add a new Shopware shop?
You need to create a Shopware shop to enable tax configuration. It is possible to add it in your merchant area. Click the corresponding link, choose the type of your new shop (a cloud storefront or an on-premise installation), and provide all the information the system requires.
How to add a payment method to your Shopware account?
It is necessary to add a payment method used for internal purposes. You can do that under Basic Information -> Accounting. Select PayPal, credit card, or direct debit as a way to transfer funds to your account.
How to create a deposit in Shopware?
A working payment method enables you to create a deposit for purchasing extensions and themes. Go to your Merchant Area -> Shops, choose a shop to provide funds to, click Open Account Details, and transfer a deposit that covers the amount of your purchase.
How to purchase Shopware extensions?
You can purchase extensions and themes on the Shopware Marketplace. Alternatively, it is possible to do that in the Plugin Manager. Create a deposit in advance that equals the amount of your future purchase. Next, select a tool you want to buy and complete the checkout.
How to get support in Shopware?
Shopware accepts accounting and financial inquiries here: financial.services@shopware.com and +49 2555 9288 510. For license inquiries, use these channels: info@shopware.com or call +49 2555 9288 50.
How to automate import and export processes in Shopware 6?
The Improved Import, Export & Mass Actions extension is developed to automate recurring data transfers. The module will help you create schedules to launch the corresponding import and export processes automatically.
How to migrate to Shopware 6?
Also, the Improved Import, Export & Mass Actions tool is suitable for migrating to Shopware 6. It can help you transfer data from your existing website to the new platform. You can migrate from other e-commerce systems or Shopware’s previous versions. Note that we also offer export solutions for systems like Magento and Shopify so that you can simplify your data transfers between them and Shopware. Contact us for more information.
How to integrate Shopware 6 with external systems?
Shopware 6 integration with ERPs, CRMs, accounting tools, and other similar platforms is another strong point associated with the Improved Import, Export & Mass Actions plugin. As we’ve already mentioned, the module can help you automate repetitive import and export processes. Also, it introduces mapping presets to help you modify data according to the requirements of your Shopware store during import. Also, the extension can help you follow the rules of the connected platform during export.
Get Improved Import & Export for Shopware by Firebear Studio
Explore Shopware


