

Shopware 6 provides the ability to create custom forms for the storefront. Thus, you get the ability to collect more information about your prospects or use such forms as an additional communication channel. However, this functionality is associated with the Professional Edition of Shopware 6 and its CMS extension. Below, we shed light on creating individual forms if the required conditions are met, and the desired functionality is available. The process is split into the following five steps: creating a shopping experience, adding a form, form settings, creating fields, assigning a layout. To make the long story short, let’s see how to create custom forms in Shopware 6. You can find other materials about Shopware 6 here.

Note that we provide Shopware integration with external platforms. Contact our support for further information or try our Improved Import, Export & Mass Actions.
Get Improved Import, Export & Mass Actions for Shopware by Firebear Studio
Explore Shopware
Table of contents
Create a shopping experience (step 1)
Go to Content -> Shopping Experiences to create your new custom form for Shopware 6. Here, you need to choose the experience world to add the form to. Or you can create a completely new layout.
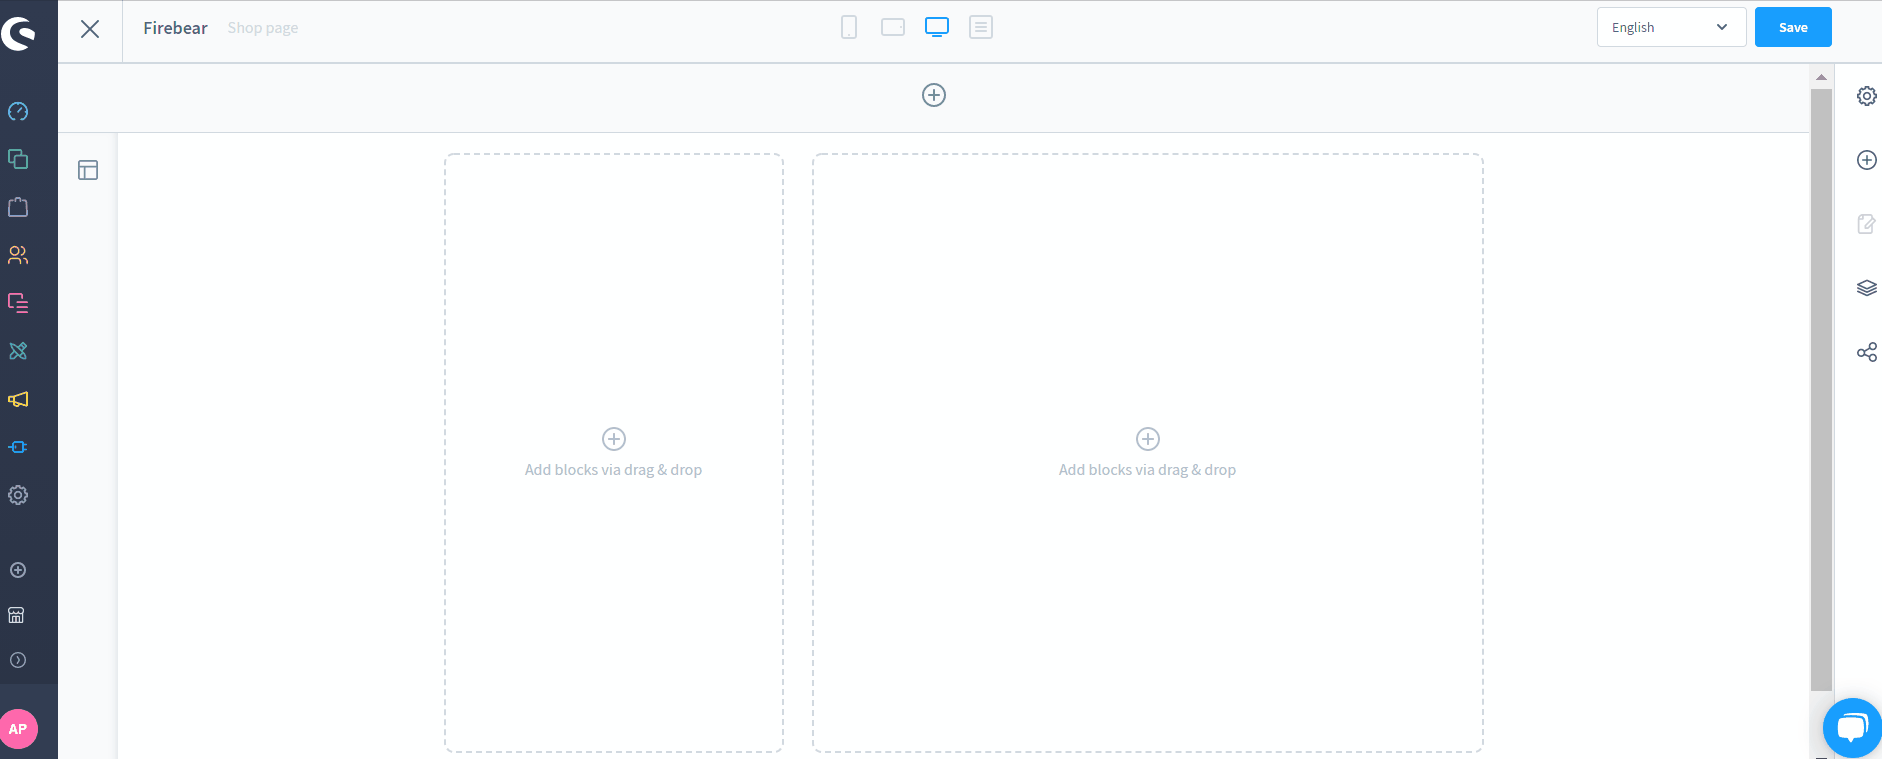
Add a form (step 2)
It is necessary to hit the + symbol on the right-hand side to add a new block, creating a custom Shopware 6 form. Choose the block category form, such as contact or any custom form. After that, drag and drop the desired form into the Shopping Experience layout, like shown below:
Configure form settings (step 3)

You have to decide upon the selected template. A pop-up window displays where you can switch from a template you have previously created to a completely new form. Apply the basic settings for the form:
- Name (internal) – you can specify an internal form name here;
- Headline – it is a form headline displayed in the shopping experience on the frontend;
- Confirmation text – the system shows this text to the user upon filling in the form;
- Recipient address – an email address to which the filled-out form is sent should be specified (multiple addresses are supported);
- Email template – select an email template to provide the recipient with the form content.

Create form fields (step 4)
On the Fields tab, you can select fields visible on the frontend. Also, it lets you specify mandatory fields and create groups that consist of one or more fields:
- Groups (1) – fields are combined under the Address container. Utilize the dots on the left to change the group field and the order of groups.
- Context menu (2, 4) – a context menu is available for each group and field. You can use it to rearrange the group position, delete the group, edit or duplicate it. Editing options (7) appear on the right to let you add the group’s internal name and change the group heading.
- Field (3) – one or more fields a group consists of. You can rearrange their order using the dots on the left.
- Add field (5) – this button lets you add a new field to the selected group.
- Add group (6) – this button lets you add a new group with a single field.
- Save as template (8) – this button lets you save the form as a template and select it while editing shopping experiences.
- Done (9) – click this button to save all changes applied to the form.

All field options are described in this article: CMS Extension for Shopware 6.
Assign a layout (step 5)
Now, when you have a form layout, you must assign it to your custom form.

Storefront
On the storefront, your new custom form will look as follows:

How to Import CMS Pages to Shopware 6
Let’s explore another important process associated with individual forms. Since they are a part of CMS pages, you may need to import the already created forms to your e-commerce website. With our team, you can simplify and automate such processes. We provide the ability to eliminate the manual creation of most entities, replacing this process with import procedures. Contact our support for more details and try our Improved Import & Export Extension for Shopware. You can use it to import any entity to Shopware 6. Please, consult our specialists before using the module for transferring CMS pages, layouts, and form data to Shopware 6.
The module works as follows for all import processes:
- Choose an entity you want to import;
- Configure the schedule of updates;
- Map external attributes (if such are available) to ones used in Shopware 6;
- Configure other import parameters, such as your import source and file format.
- Enable the import profile.
Now, the extension should do all the work for you.
Shopware 6 Essentials FAQ
How to create a Shopware account?
You need to create a Shopware account before creating individual forms in Shopware 6. Visit the registration page, hit the Register Now link, and fill in the form to create a new account. After receiving a confirmation email, follow the instructions provided in it.
What about a Shopware ID?
You will get your Shopware ID during the registration. The procedure requires no additional efforts or steps.
What is Shopware master data?
Shopware master data includes physical addresses, phone numbers, emails, and other facts about your company and business.
How to add a new Shopware shop?
You need to create a Shopware shop to add a custom form. Visit your merchant area, click the corresponding link, choose the type of your new shop (a cloud storefront or an on-premise installation), and provide all the information the system requires.
How to add a payment method to your Shopware account?
You need a payment method associated with your account. It will be used for internal purposes. You can add an internal payment method under Basic Information -> Accounting. Select PayPal, credit card, or direct debit as a way to transfer funds to your account.
How to create a deposit in Shopware?
A working payment method lets you create a deposit for purchasing extensions and themes. Go to your Merchant Area -> Shops, choose a shop to provide funds to, click Open Account Details, and transfer a deposit that covers the amount of your purchase.
How to purchase Shopware extensions?
The Plugin Manager is designed to buy extensions and themes for Shopware 6. Alternatively, you can get them straight on the Shopware Marketplace. In both cases, you need to create a deposit in advance that equals the amount of your future purchase. Next, select a tool you want to buy and complete the checkout.
How to get support in Shopware?
If you need help with accounting and financial issues, reach the support department: financial.services@shopware.com and +49 2555 9288 510. With license inquiries, contact shopware via info@shopware.com or call +49 2555 9288 50.
How to automate import and export processes in Shopware 6?
You need a third-party extension to automate data transfers on your Shopware website. It is possible to automate recurring data transfers with the help of the Improved Import, Export & Mass Actions extension and its update schedules. Also, the plugin offers mapping presets that edit external data automatically, following the Shopware requirements.
How to migrate to Shopware 6?
Install the Improved Import, Export & Mass Actions module to simplify Shopware 6 migration. The extension will help you move entities from other e-commerce systems or Shopware’s previous versions. Note that we also offer export solutions for systems like Magento and Shopify, so you can simplify your data transfers between them and Shopware. Contact us for more information.
How to integrate Shopware 6 with external systems?
You can also rely on the Improved Import, Export & Mass Actions plugin to integrate Shopware with ERPs, CRMs, accounting tools, and other similar platforms. The module can help you automate repetitive import and export processes with the help of schedules and mapping presets. The presets help you modify data according to the requirements of your Shopware store during import as well as follow the rules of the connected platform during export.
Get Improved Import & Export for Shopware by Firebear Studio
Explore Shopware


