In the previous articles, we discussed creating a Magento 2 custom theme using the default blank theme as the parent. We also learned how you can add your custom logo to the storefront. You can check it out HERE. Today, we will use the same custom theme and modify its layout by changing the positions of different blocks. Moreover, we will also learn how you can override CSS files and render your custom styles on the website. You will also learn briefly about the Magento 2 prebuilt UI library. All Magento 2 themes are made up of a few basic elements such as layouts, blocks, and templates. Let us look at what are layouts, blocks, and how to override CSS files.
Blocks in Custom Theme
Blocks in a Magento 2 theme is used to differentiate between several functional components of the page. The main logic behind blocks is to make it simple for developers like us to customize and manage the functionality of our components.
When we look at our custom theme we can see various components such as search box, navigation links, mini cart, and many more. The HTML of these features is displayed using content blocks by Magento and these content blocks fall withing the structural blocks. To put it in simple terms blocks basically define the nature of content to be displayed in our view or page layout.
We can use blocks to modify the visual hierarchy of our page. Themes utilize a column block structure for the page layout. A three-column block layout may be structured as follows:
- Header Panel
- Primary Area
- Footer Panel
We can also further subdivide the primary area into the left column, right column, and primary area. It surely makes a developer’s life easy while working on the frontend of any theme.
Layouts in Custom Theme
Layouts in Magento themes define the basic standards of positioning various elements on the page. Each of the elements’ position plays a specific role in the rendering of the layout. We use XML files to define various layouts. The file default.xml helps modify the layout changes for every page in the theme. If you navigate into the vendor>magento>module-theme>view>frontend>layout directly you will find the default.xml file that defines the basic layout for your parent theme.
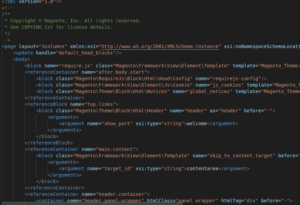
You can reference this file to change the positioning of different elements in the layout. Also, you create custom layouts for every module that you add to the theme. For instance, you can check the category_catalog_view.xml for the catalog module layout specifications.
Let us make some changes in the default.xml file to view changes in the frontend. First, we will look at the class of the element that we want to reposition from the default.xml file of the parent theme. Once we get the correct class name then we can use the <move> tag in XML to change the positioning of blocks. Include the following code in your custom theme’s default.xml file to remove the copyright and report bugs block from your theme.

Here, we mention the class of the block that needs repositioning, then the destination as to where we want to move it and after or before attributes to position accurately. Before lets, you place your element before any element class and after lets, you place your element after any element class.
Override LESS Files and Explore UI Library
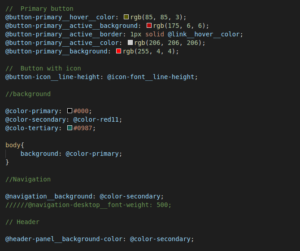
Magento uses Less Preprocessor to process the CSS styles for all the themes. We will talk about further details of Less in another article. For today, let’s see how you can add some custom styles or override existing styles. You will find several tutorials online that will guide you to place your custom styles in __styles.less file. However, this is not a feasible or recommended method of styling in Magento themes. Since __styles.less file imports several other Less files and they further import even more so it easy to mess up the entire style of your theme. Instead, you should reference the UI library for variable definitions and use them to override the styles in theme.less file. This file should be stored in the following directory Custom_theme_root>Web>css>source. You can also override the predefined variables or create your new ones as we did in the below image.
Further, if you are not satisfied with customizing the already existing styles and want to create your new ones then you should do that in the file _extend.less. All of your custom modifications should be available in this file.
You can reference the Magento 2 UI library from the following directory Magento_root>lib>web>css>source>lib. Here, you will find all the style files that you can use to override or customize your custom styles.


