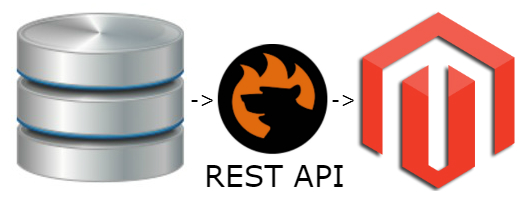
Depending on the edition of your Magento 2 installation, your built-in import and export tools may vary a little bit. However, the difference is not very vast: with the Commerce edition, you can create schedules of updates while the Open Source edition doesn’t let you do that. At the same time, neither of them lets you leverage REST API import processes. Luckily, the missing functionality can be enabled at any moment with minimum effort. You only need to install the Improved Import & Export Magento 2 module to leverage the Magento 2 REST API import and export processes.
The following article sheds light on how to import data into Magento 2 via REST API. We discuss how to enable the Magento 2 REST API import and what extra benefits you can get. If you are not familiar with what REST API is, we’ve also prepared a chapter that describes this standard. Besides, there is an FAQ section that provides answers to frequently asked questions about REST and Magento 2 import/export processes.

Please Note: Connection to complex 3rd-party API may require custom development on top of our Improved Import & Export. Our solution is 100% open source, so we would be happy to advise how to add the necessary functionality. We can also provide you with a quote for any integration – contact us.
Table of contents
Magento 2 REST API Data Import
As you might have already guessed, it is possible to import data into Magento 2 via REST API with the help of a third-party extension. With the desired functionality enabled, you can connect your Magento 2 store to any external system transferring all the necessary information to your store in the most natural way. And the only tool that completely revamps the default Magento 2 import adding the extended REST API support is the Improved Import & Export Magento 2 module.
Install the extension, and you will be able to import data via REST API to Magento 2 in the most seamless manner. Our module not only adds support for the standard but also enables multiple additional features that make your import routine much more efficient.
Most external systems that store product, customer, or other data usually work with REST API. Consequently, you can refer to the system’s REST API using your login and password and get any information you need. This nature of REST API connections opens endless opportunities regarding the Magento 2 synchronization with third-party systems. Freely import any kind of data (products, customers, categories, orders, cms pages, discounts, etc.) to Magento 2 from any REST API source.
As for the Improved Import Export extension, it also enables fully automated updates and mapping. With the REST API functionality, you can get data in XML or JSON formats and import it to Magento 2 as fast as possible implementing all modifications right in the extension’s backend.
Additional Features & Benefits
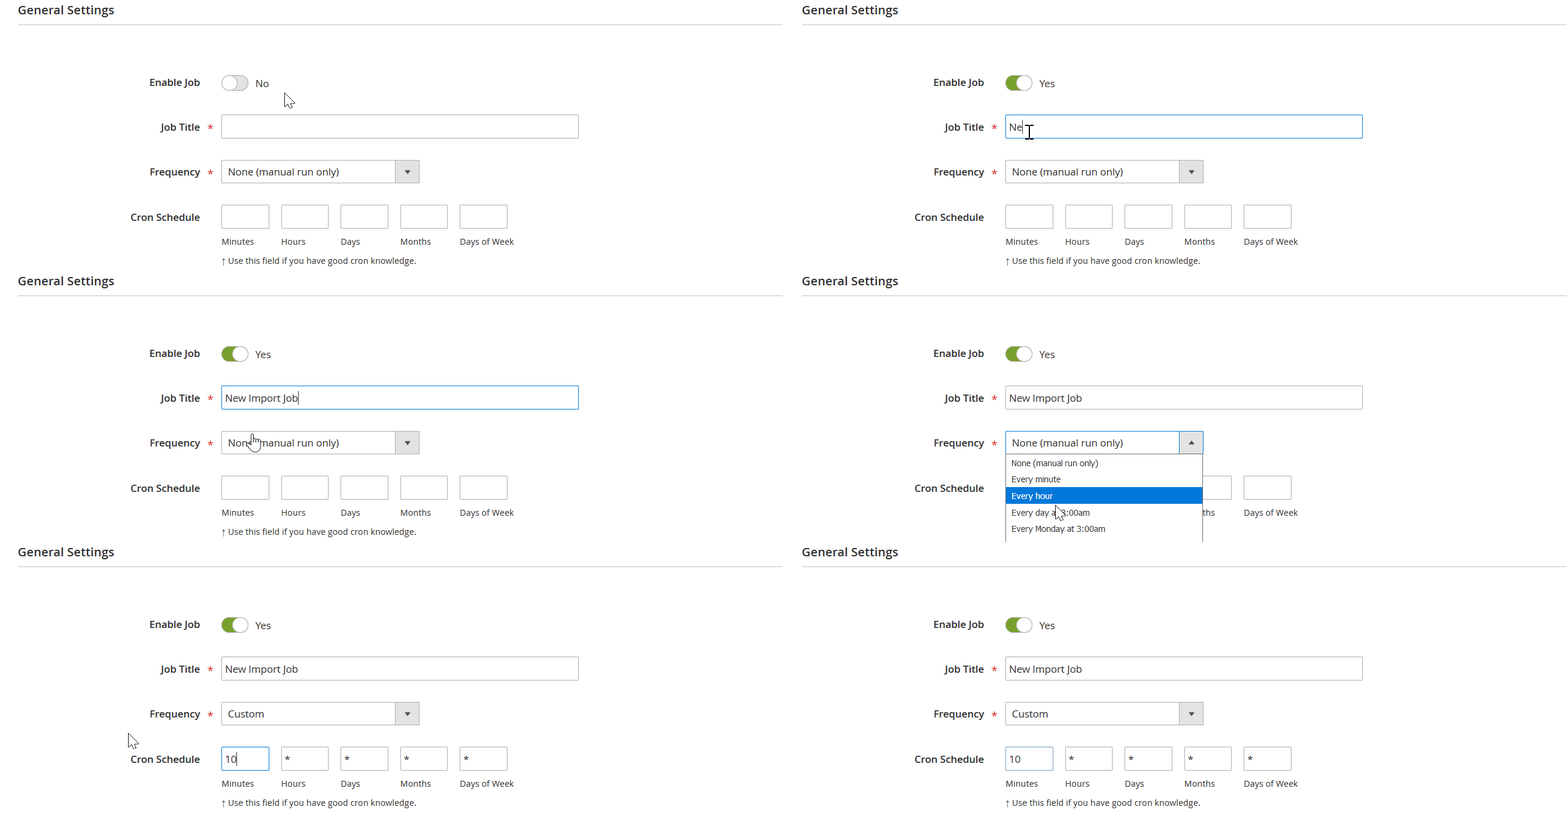
The Improved Import & Export Magento 2 module provides the ability to create any custom schedule to run the REST API import. Use the standard cron syntax to enable any custom update interval. Alternatively, you can select a predefined schedule and customize it according to your needs if necessary.
Besides, the Improved Import & Export Magento 2 extension provides the ability to create import profiles aimed at manual run only. It is a very convenient feature for such processes as the Magento 2 migration. For instance, you need to transfer data from another store to your new e-commerce website, and the REST API data import is the easiest way to achieve this goal. Create the corresponding import profile and switch it to a manual mode. Launch the profile, and it will seamlessly transfer data to your Magento 2 store via REST API.
Also, note that you can launch any automated Magento 2 REST API import manually if required. For instance, the next update is planned for the end of the week, but it is Tuesday, and you need to import the new information right now. The Improved Import & Export extension allows you to launch the Magento 2 REST API import whenever you want. The following gif image displays how to create various update schedules and choose a manual mode.

Another essential feature that makes the Magento 2 REST API import not only possible but also as easy as it could be is mapping. Every import profile includes a mapping interface where you can match the external attributes to their Magento 2 compatibles.
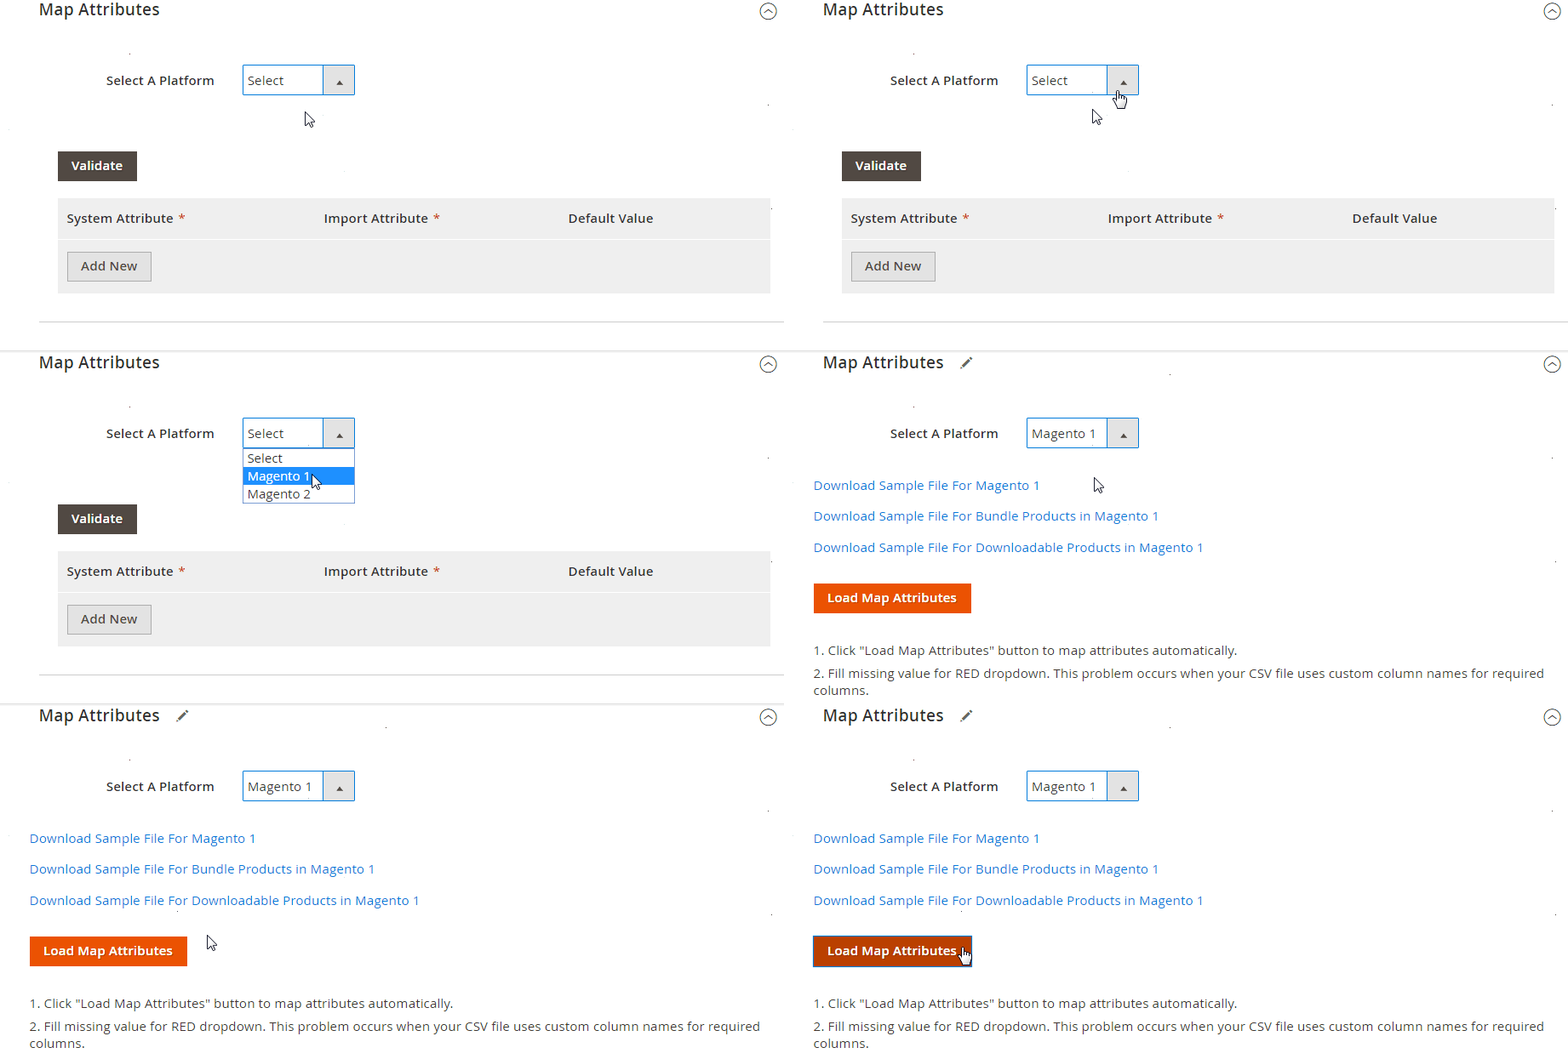
Since every system has its rules and requirements related to data standards, it is impossible to import information from a third-party platform to Magento 2 without applying mapping. Since we are talking about the REST API import, you eliminate the use of data files in their standard form. Consequently, it is impossible to edit them before import so that the mapping interface is the only available option. But it is a significant advantage since mapping requires much less time and effort than manual data file editing. Furthermore, you apply it only once while manual modifications are needed before every import process. Below, you can see how a new mapping scheme is created:

There is even a more user-friendly way to eliminate issues caused by the use of different data standards. The Improved Import & Export Magento 2 extension offers mapping presets – mapping schemes already configured by our specialists. Thus, matching external attributes to Magento 2 standards is reduced to a few clicks:

To discover all features of the Magento 2 Import & Export Magento 2 extension, watch the following video:
[embedded content]
For further information about the Improved Import & Export Magento 2 module, follow this link:
Get Improved Import & Export Magento 2 Extension
Please Note: Connection to complex 3rd-party API may require custom development on top of our Improved Import & Export. Our solution is 100% open source, so we would be happy to advise how to add the necessary functionality. We can also provide you with a quote for any integration – contact us.
REST API Brief Explanation
If you are not familiar with REST, here is a brief description from StackOverflow.
Being the underlying architectural principle of the web, Representational State Transfer (REST) defines a set of constraints and properties on the basis of HTTP. Since clients (browsers) and servers can interact without the client knowing anything beforehand about the server and its resources, the constraint occurs: both server and client must agree on the media (HTML) used.
Let’s take a look at API that adheres to the principles of REST. Its nature eliminates the necessity to know anything about the structure of the API from the perspective of the client. Indeed, the server provides all information required by the client for interacting with the service.
An excellent example of the core REST principle is an HTML form. From the perspective of the server, the resource location and the required fields are specified. From the perspective of the browser, it is not clear in advance what information to submit and where. The server provides the answers to both questions.
Since HTTP is oriented around verbs and resources, we should draw your attention to verbs. GET and POST are widely used and recognized by all developers. At the same, there are two fewer mainstream verbs – PUT and DELETE. All four verbs are applied to resources following the server instructions.
A user database managed by a web service will help us illustrate the situation behind REST API in more details. The service utilizes a custom JSON-based hypermedia. You can assign the application/json+userdb mimetype to it. Alternatively, it can be application/whatever+userdb, for instance, XML. The same fact about the client and the server is that both have been programmed to understand the specified format. But there is one problem: they don’t know anything about each other.
That’s where the REST API standard becomes helpful. It spends almost all its descriptive effort to define the media types used for representing resources and driving the app state. Alternatively, REST API can define extended relation names and hypertext-enabled markup used by the existing standard media types.
Below, you can find several examples of requests and responses. The request for the base resource “/” and the corresponding response looks as follows:
Request
|
GET / Accept: application/json+userdb |
Response
|
1 2 3 4 5 6 7 8 9 10 11 12 13 14 15 16 17 18 |
200 OK Content–Type: application/json+userdb { “version”: “1.0”, “links”: [ { “href”: “/user”, “rel”: “list”, “method”: “GET” }, { “href”: “/user”, “rel”: “create”, “method”: “POST” } ] } |
Now, let’s try to request the information about related resources from the “Links” sections called “links”. Below, you can see a request for “/user” with the corresponding response:
Request
|
GET /user Accept: application/json+userdb |
Response
|
1 2 3 4 5 6 7 8 9 10 11 12 13 14 15 16 17 18 19 20 21 22 23 24 25 26 27 28 29 30 31 32 33 34 35 36 37 38 39 40 41 42 43 44 45 46 47 48 49 50 51 52 53 54 55 56 57 58 |
200 OK Content–Type: application/json+userdb { “users”: [ { “id”: 1, “name”: “Emil”, “country: “Sweden“, “links“: [ { “href“: “/user/1“, “rel“: “self“, “method“: “GET“ }, { “href“: “/user/1“, “rel“: “edit“, “method“: “PUT“ }, { “href“: “/user/1“, “rel“: “delete“, “method“: “DELETE“ } ] }, { “id“: 2, “name“: “Adam“, “country: “Scotland”, “links”: [ { “href”: “/user/2”, “rel”: “self”, “method”: “GET” }, { “href”: “/user/2”, “rel”: “edit”, “method”: “PUT” }, { “href”: “/user/2”, “rel”: “delete”, “method”: “DELETE” } ] } ], “links”: [ { “href”: “/user”, “rel”: “create”, “method”: “POST” } ] } |
Now, you can even create a new user by POSTing to /user:
Request
|
1 2 3 4 5 6 7 8 |
POST /user Accept: application/json+userdb Content–Type: application/json+userdb { “name”: “Karl”, “country”: “Austria” } |
Response
|
1 2 3 4 5 6 7 8 9 10 11 12 13 14 15 16 17 18 19 20 21 22 23 24 25 26 27 28 29 30 31 32 |
201 Created Content–Type: application/json+userdb { “user”: { “id”: 3, “name”: “Karl”, “country”: “Austria”, “links”: [ { “href”: “/user/3”, “rel”: “self”, “method”: “GET” }, { “href”: “/user/3”, “rel”: “edit”, “method”: “PUT” }, { “href”: “/user/3”, “rel”: “delete”, “method”: “DELETE” } ] }, “links”: { “href”: “/user”, “rel”: “list”, “method”: “GET” } } |
Thus, the Improved Import & Export Magento 2 extension uses the aforementioned principle to refer to the system’s REST API using your login and password. As a result, it can import any information you need: products, customers, categories, orders, cms pages, discounts, etc.
For further information about REST API, follow this link: Learn REST: A RESTful Tutorial.
It describes how to build RESTful web services most professionally. The Internet industry grows on a daily basis providing developers with new and new challenges. Thus, creating a REST API requires best practices to ease development and increase client adoption. You can find all of them at RestApiTutorial.com.
Magento 2 REST API Import & Export FAQ
How to import products to Magento 2 via REST API?
You can effortlessly transfer products to Magento 2 via REST API with the help of the Improved Import & Export extension. It is only necessary to create a new import job that connects your e-commerce website to the destination that contains product data. Provide the credentials for the point of data exchange, create a schedule of data transfers, and apply a mapping scheme to replace unsupported product attributes with the ones used in Magento 2. Note that the Improved Import & Export supports all product types: simple, configurable, bundle, downloadable, etc.
How to export products to Magento 2 via REST API?
The Improved Import & Export offers the same functionality for export processes so that you can easily transfer products from your e-commerce store to a remote destination via REST API.
How to import categories to Magento 2 via REST API?
You can effortlessly transfer categories to Magento 2 via REST API with the help of the Improved Import & Export extension. It is only necessary to create a new import job that connects your e-commerce website to the destination that contains category data. Provide the credentials for the point of data exchange, create a schedule of data transfers, and apply a mapping scheme to replace unsupported category attributes with the ones used in Magento 2. Note that the Improved Import & Export supports all category data and lets you map external categories to the ones available in the existing category tree.
How to export categories to Magento 2 via REST API?
The Improved Import & Export offers the same functionality for export processes so that you can easily transfer categories from your e-commerce store to a remote destination via REST API.
How to import orders to Magento 2 via REST API?
You can effortlessly transfer orders to Magento 2 via REST API with the help of the Improved Import & Export extension. It is only necessary to create a new import job that connects your e-commerce website to the destination that contains order data. Provide the credentials for the point of data exchange, create a schedule of data transfers, and apply a mapping scheme to replace unsupported order attributes with the ones used in Magento 2. Note that the Improved Import & Export supports all order data, including all the related documents and tracking information.
How to export orders to Magento 2 via REST API?
The Improved Import & Export offers the same functionality for export processes so that you can easily transfer orders from your e-commerce store to a remote destination via REST API.
How to import customers to Magento 2 via REST API?
You can effortlessly transfer customers to Magento 2 via REST API with the help of the Improved Import & Export extension. It is only necessary to create a new import job that connects your e-commerce website to the destination that contains customer data. Provide the credentials for the point of data exchange, create a schedule of data transfers, and apply a mapping scheme to replace unsupported customer attributes with the ones used in Magento 2. Note that the Improved Import & Export lets you transfer customers with all the related information, including customer addresses, groups, billing/shipping details, etc.
How to export customers to Magento 2 via REST API?
The Improved Import & Export offers the same functionality for export processes so that you can easily transfer customers from your e-commerce store to a remote destination via REST API.
How to import B2B entities to Magento 2 via REST API?
You can effortlessly transfer B2B entities to Magento 2 via REST API with the help of the B2B addon of the Improved Import & Export extension. It is only necessary to create a new import job that connects your e-commerce website to the destination that contains the B2B entities. Provide the credentials for the point of data exchange, create a schedule of data transfers, and apply a mapping scheme to replace unsupported attributes with the ones used in Magento 2. Note that the Improved Import & Export supports the following B2B entities: companies, requisitions lists, shared catalogs, quotes, and negotiation quotes.
How to export B2B entities to Magento 2 via REST API?
The Improved Import & Export offers the same functionality for export processes so that you can easily transfer B2B entities from your e-commerce store to a remote destination via REST API.
How to automate REST API import and export processes in Magento 2?
With the help of the Improved Import & Export Magento 2 extension, you can not only launch data transfers via REST API but also automate them. The extension uses a cron scheduler so that you can specify intervals to launch import and export processes automatically.
How to import data with unsupported attributes to Magento 2 via REST API?
In addition to leveraging REST API import and export processes, our extension also lets you leverage a robust mapping interface. Here, you can match unsupported attributes to ones used in Magento 2. As a result, the system replaces all unsupported designations and lets you import any data from external systems with no additional data modifications.


