
Did you know that Pinterest boasts over 445 million active users, many of whom are actively searching for products and inspiration to make purchases? Leveraging this platform effectively is crucial for businesses looking to drive conversions. However, traditional pixel-based tracking methods often fall short due to cookie limitations, increasing browser restrictions, and growing data privacy concerns. These factors can lead to inaccurate conversion data, hindering your ability to optimize ad campaigns and measure ROI accurately. Enter server-side tracking with the Magento Pinterest Conversion API – a powerful solution that allows you to send conversion data directly from your server to Pinterest.
This method bypasses browser-based limitations, provides better control over your data, and improves the accuracy of your conversion tracking. In this comprehensive guide, we’ll walk you through the process of implementing Magento Pinterest Conversion API server-side using Google Tag Manager (GTM) and Stape.io. You’ll learn how to set up everything step-by-step, ensuring a smooth and successful implementation.
What is Pinterest Conversion API?
The Pinterest Conversion API lets you directly track actions on your website (like purchases, sign-ups, or lead form submissions) and send that data to Pinterest. This eliminates the reliance on traditional browser-based pixels, which can be blocked or face limitations.
Benefits of Pinterest Conversion API:
- Improved Data Accuracy: Get a more accurate view of your conversion data, free from browser restrictions, leading to better campaign optimization.
- Enhanced User Privacy: Reduce reliance on third-party cookies and gain more control over the data you share, aligning with privacy regulations.
- Better Control Over Data Sharing: Dictate precisely which conversion events and associated parameters are sent to Pinterest.
- Future-Proof Tracking: Server-side tracking is less affected by browser updates and changing privacy landscapes, ensuring your tracking remains robust.
Why Use Server-Side Tracking with GTM & Stape.io?
Instead of relying on your website visitor’s browser to send conversion data to Pinterest, server-side tracking sends this data directly from your web server. This bypasses browser limitations and ensures more reliable data transmission.
GTM Server-Side Advantages:
- Centralized Management: GTM Server-Side offers a single platform to manage and configure all your server-side tracking needs.
- Flexibility and Control: GTM’s powerful features allow for advanced customization and data manipulation before sending it to Pinterest.
- Integration with Other Tools: Easily integrate with other marketing and analytics tools you’re already using.
Introducing Stape.io
Stape.io acts as a bridge between your website, GTM Server-Side, and Pinterest. It simplifies the process of setting up server-side tracking for Pinterest specifically, offering:
- Improved Data Accuracy: Stape.io bypasses ad blockers that can interfere with client-side tracking scripts, ensuring you get a more complete picture of user behaviour on your website.
- Ease of Use: Stape.io provides a user-friendly interface and pre-built integrations to make implementation straightforward.
- Pre-built Integrations: Connect to various platforms and tools effortlessly, including GTM, without complex coding.
- Reliability and Support: Rely on Stape.io’s robust infrastructure and dedicated support team for peace of mind.
- First-Party Cookies and Extended Lifetime: With a custom domain on Stape.io, you can leverage first-party cookies instead of third-party cookies (which are being phased out by many browsers). This gives you more control over data collection and potentially allows for longer cookie lifespans.
- Custom Loader: Stape.io offers a custom loader to make Google Tag Manager and Google Analytics scripts undetectable by ad-blocking techniques.
- Global CDN: Stape.io utilises a global Content Delivery Network (CDN) to load tracking scripts from servers closer to your visitors, resulting in faster page loads.
- Offline Conversion Tracking: Stape.io can potentially help with tracking offline conversions.
Step-by-Step Guide: Setting Up Magento Pinterest Conversion API Server-Side
Prerequisites:
- A Pinterest Business account
- A Google Tag Manager account with a server-side container set up
- A free Stape.io account
- GA4 data layers, Purchase event with all the data ( In case you do not have the data layers you can check our module that implements these for you)
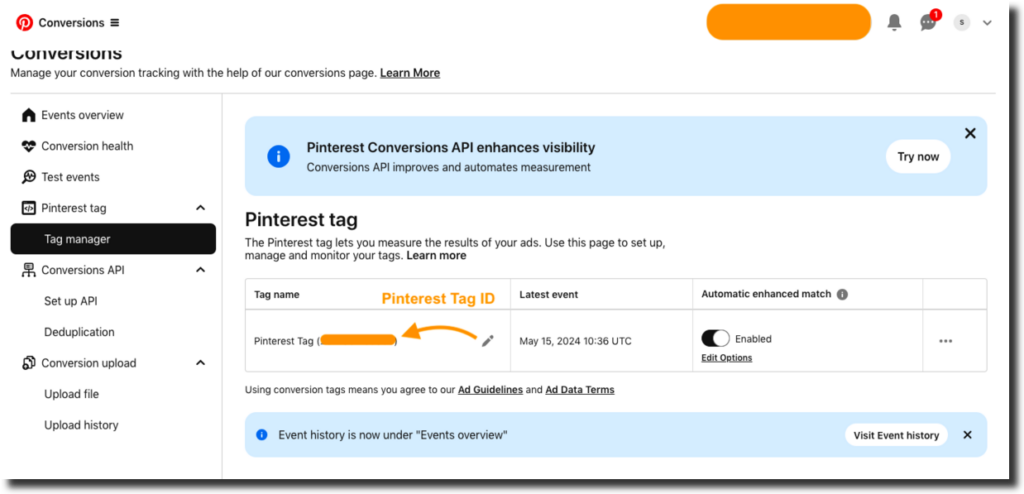
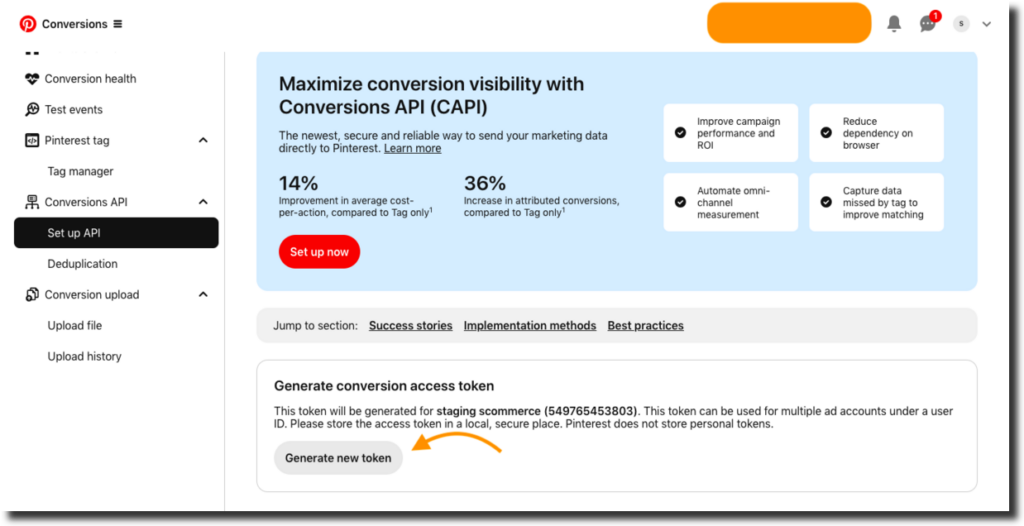
Go to your Pinterest Ads account and extract the following information “Pinterest Tag ID” “Pinterest Conversion Access Token”
Pinterest Tag ID:- From the left menu click on Pinterest Tag>Tag Manager. You will find the tag ID as shown in the image below:-
Pinterest Conversion Access Token:- From the left menu click on Conversions API>Set Up API and click on Generate New Token as shown in the image below:-
Create a Stape.io Account and Connect Pinterest:
- Sign up for a free Stape.io account.
- Navigate to the “Destinations” section and add Pinterest as a destination.
- Follow the prompts to authenticate your Pinterest account and grant necessary permissions.
Configure GTM Client-Side:
Since we do not have a Pinterest Client in Server Side GTM, we will have to use the GA4 client to receive events from GTM client side and then use the data from that event to populate the Pinterest tag. You need to make sure your GA4 client is set up properly in server side. For this setup you can refer to our blog :- https://www.scommerce-mage.com/blog/how-to-setup-server-side-tagging-gtm-magento.html
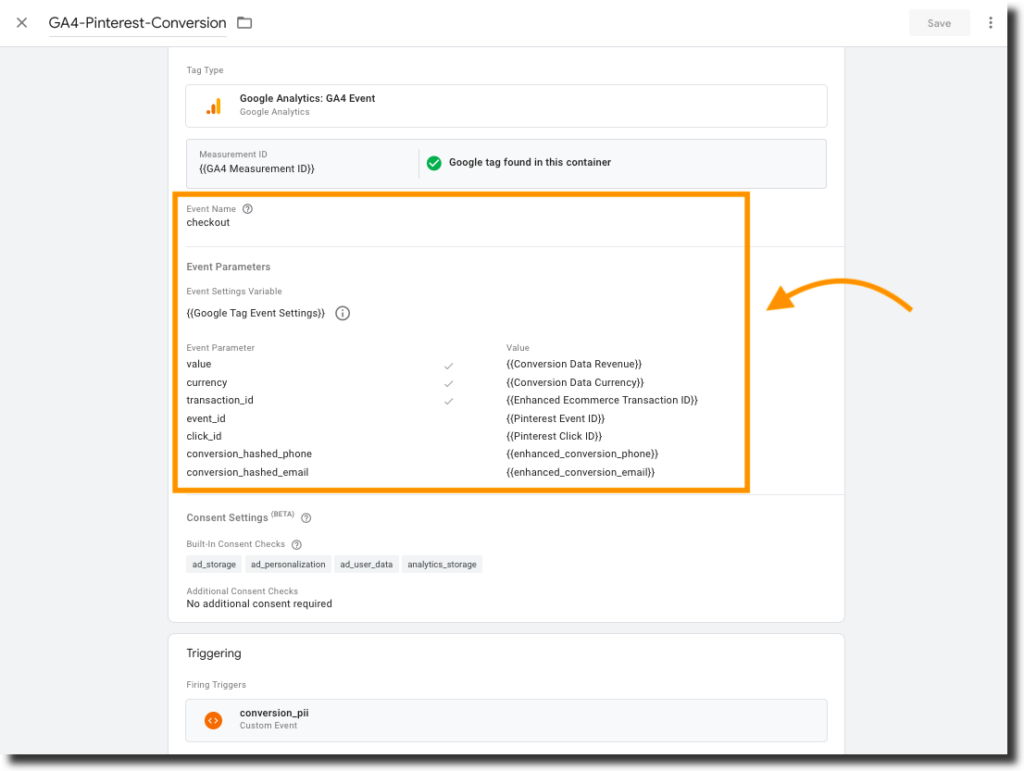
Now to let us create a new tag on the client side where we will send all the information needed for our pinterest tag in server side. Create the event based on the following settings:-
- Tag Name:- GA4-Pinterest-Conversion
- Tag Type:- Google Analytics: GA4 event
- MeasurementID :- {{GA4 Measurement ID}} (Add variable containing GA4 measurement ID)
- Event Name:- checkout
- Event Settings Variable:- {{Google Tag Event Settings}} ( Add variable containing event settings for GA4)
- Event Parameters
- value :- ( Add variable containing value from data layers )
- currency :- ( Add variable containing currency from data layers )
- transaction_id:- ( Add variable containing transaction_id from data layers )
- event_id:- (use the custom variable templates to generate unique event id for each time the event fires)
- click_id:- (click id can be stored and extracted from 1st party cookies)
- conversion_hashed_phone:- ( Add variable containing hashed phone from data layers )
- conversion_hashed_email:- ( Add variable containing hashed email from data layers )
- Trigger:- We will fire this event when our custom event “conversion_pii” is pushed into the data layers. This is done because on this push we have all the values that we need for pinterest.
Configure GTM Server-Side:
Before proceeding with the tag creation, go to the tag template gallery and add the Pinterest tag by stape.io.
Create required variables
We need to create the following variables that we will be sending alongwith the pinterest tag.
- Pinterest Event ID (this can be extracted from URL key as its part of pinterest ads URL)
- Pinterest Click ID (this can be extracted from URL key as its part of pinterest ads URL)
- Hashed email
- Hashed phone
- Currency
- Value
- Order ID
Now let us create these variables as per the information provided below:-
N.B:- Please make sure the variables are created as per your data layers, these variable settings are based on the data layers created by our module.
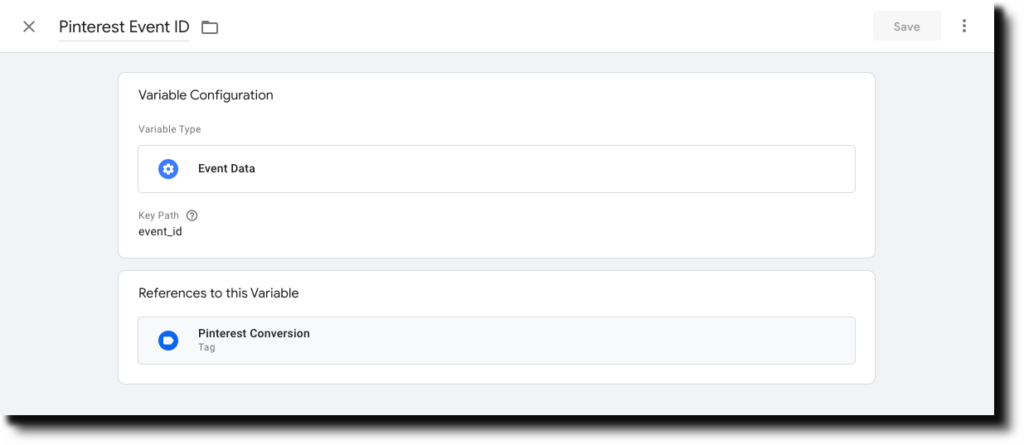
Variable Name:- Pinterest Event ID
- Variable Type:- Event Data
- Key Path:- event_id
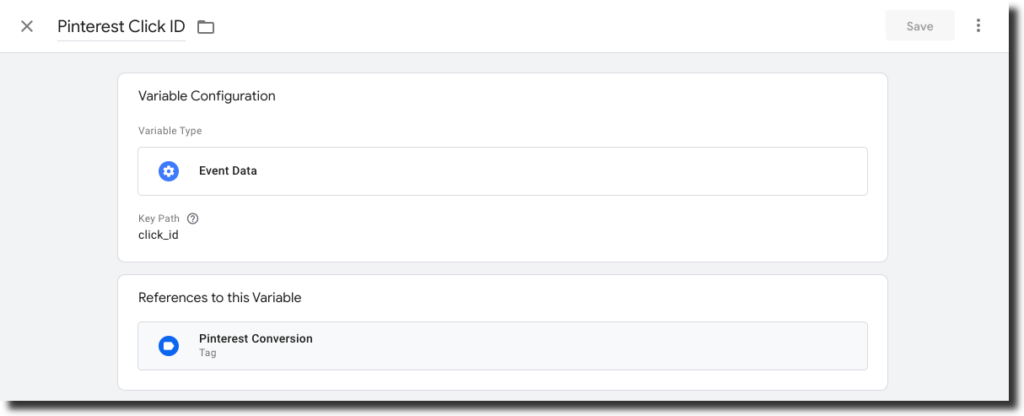
Variable Name:- Pinterest Click ID
- Variable Type:- Event Data
- Key Path:- click_id
Variable Name:- Conversion Hashed Phone
- Variable Type:- Event Data
- Key Path:- conversion_hashed_phone

Variable Name:- Conversion Hashed Email
- Variable Type:- Event Data
- Key Path:- conversion_hashed_email

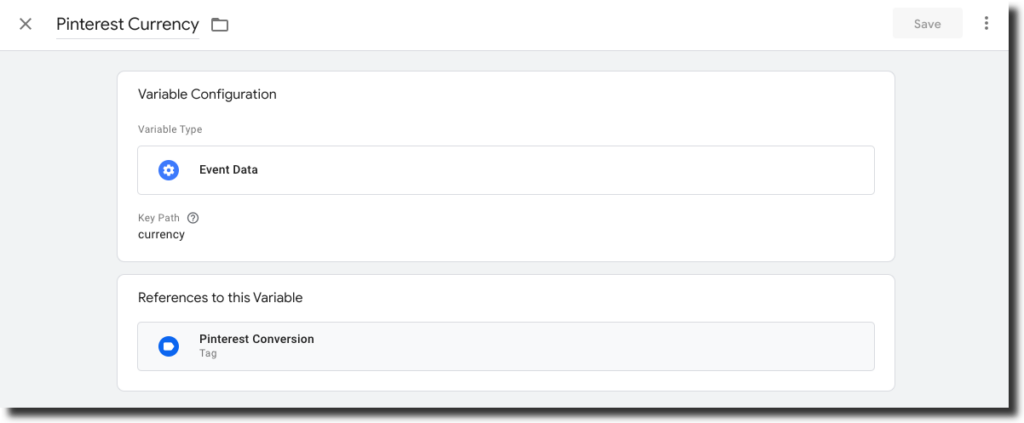
Variable Name:- Pinterest Currency
- Variable Type:- Event Data
- Key Path:- currency
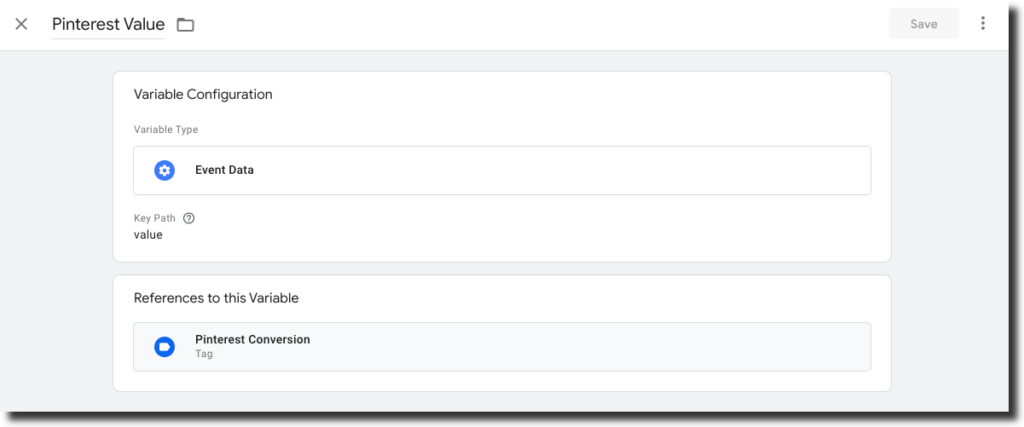
Variable Name:- Pinterest Value
- Variable Type:- Event Data
- Key Path:- value
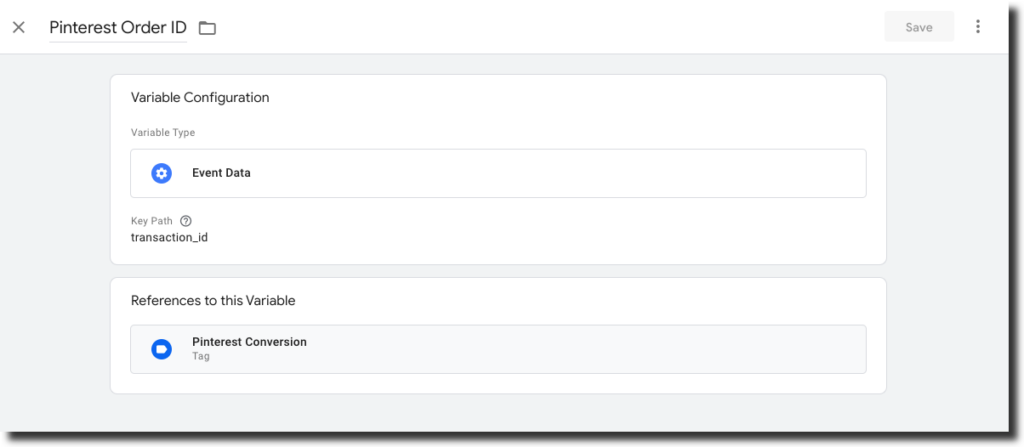
Variable Name:- Pinterest Order ID
- Variable Type:- Event Data
- Key Path:- transaction_id
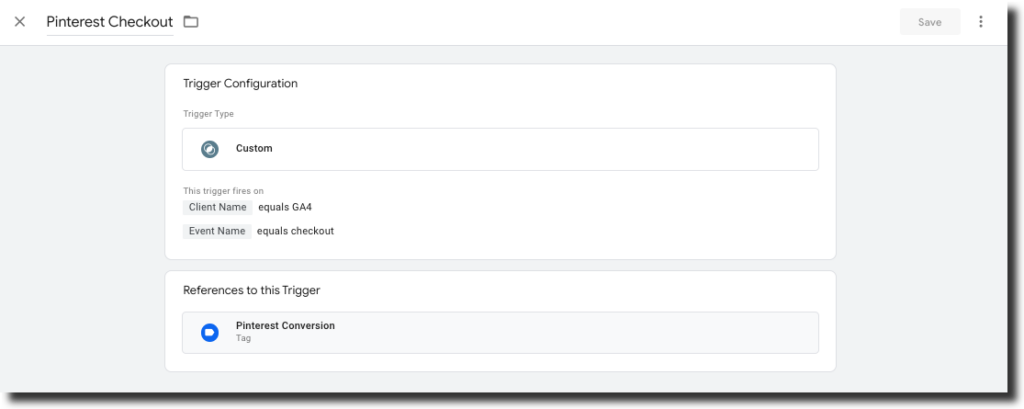
Create trigger
Create the trigger based on the following settings:-
- Trigger Name:- Pinterest Checkout
- Trigger Type:- Custom
- This trigger fires on:-
- “Client Name” Equals “GA4”
- “Event Name” Equals “checkout”
Create Tag
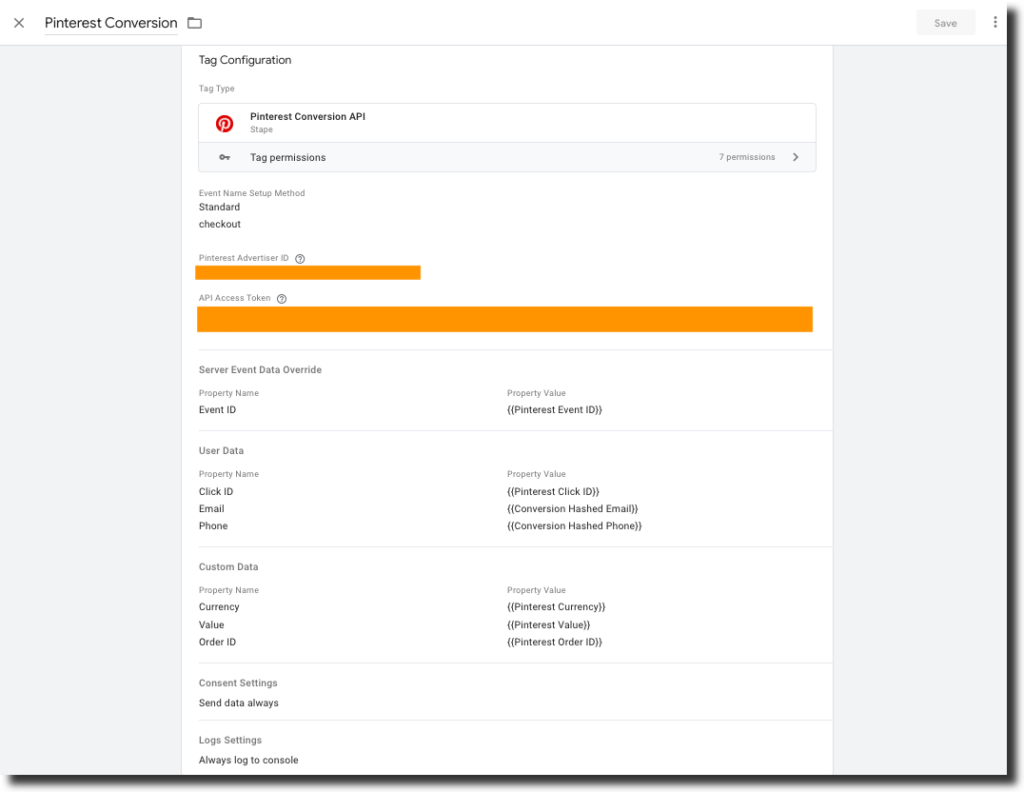
Create the tag based on the following settings:-
- Tag Name:- Pinterest Conversion
- Tag Type:- Pinterest Conversion API
- Event Name Setup Method: Standard : checkout
- Action Source: web
- Pinterest Advertiser ID :- add your advertiser ID
- API Access Token:- add API access token
- Server Event Data Override
- Event ID : {{Pinterest Event ID}}
- User Data:
- Click ID :{{Pinterest Click ID}}
- Email:{{Conversion Hashed Email}}
- Phone:{{Conversion Hashed Phone}}
- Custom Data:
- Currency: {{Pinterest Currency}}
- Value: {{Pinterest Value}}
- Order Id: {{Pinterest Order Id}}
- Logs Settings: Always log to console
- Triggering: Pinterest Checkout
Testing & Verification:
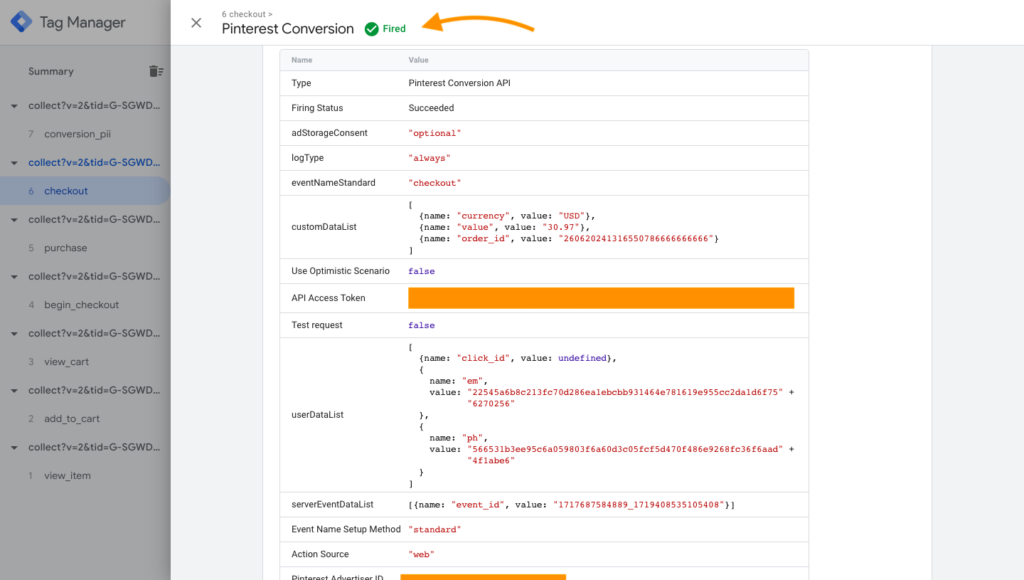
- Use the “Preview and Debug” mode in GTM to test your setup by triggering the desired conversion event on your website.
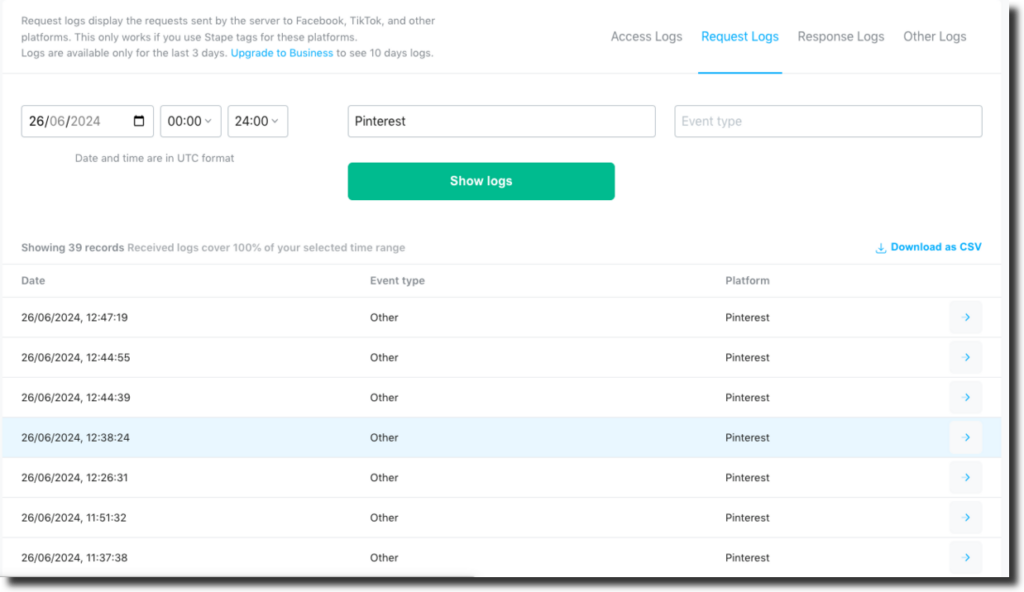
- Check Stape.io logs for incoming and outgoing requests.
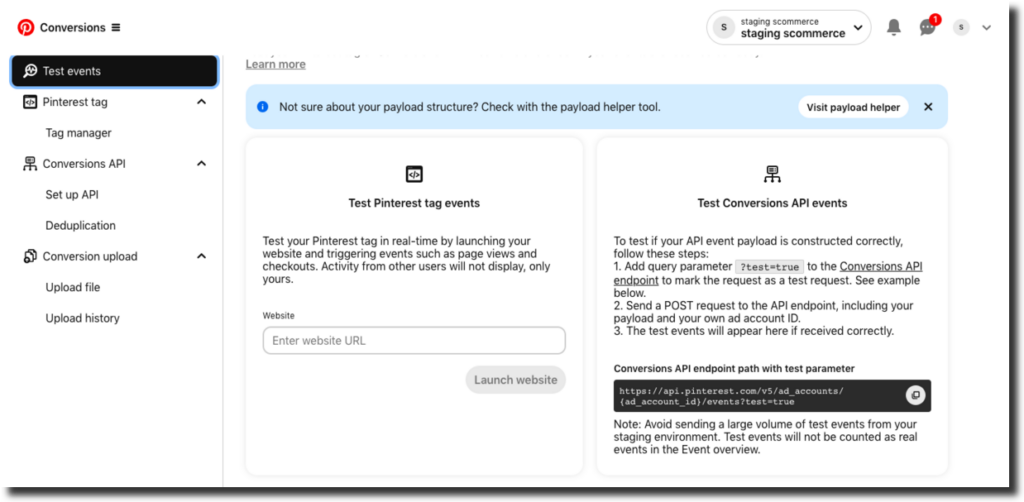
- Check the pinterest reports after 24hours or use the pinterest test events section to verify the setup
Conclusion
In conclusion, implementing Magento Pinterest Conversion API server-side tracking with Google Tag Manager and Stape.io offers a robust solution to overcome traditional tracking limitations and enhance data accuracy while respecting user privacy. By following the step-by-step guide outlined in this blog, you can seamlessly set up server-side tracking for Pinterest Conversion API in Magento and ensure reliable data transmission without browser restrictions.
To simplify this process further and save time, consider purchasing the module that contains all the necessary setup configurations in a convenient JSON file. This way, you can effortlessly implement server-side tracking for Pinterest Conversion API without the need for manual setup. Don’t miss out on this opportunity to optimize your conversion tracking and elevate your marketing efforts on Pinterest. Make the smart choice and streamline your tracking process today!
Magento 1:- https://www.scommerce-mage.com/magento-ga4-google-tag-manager.html
Magento 2:- https://www.scommerce-mage.com/magento-2-ga4-google-tag-manager.html


