Level Up Your Analytics: A Step-by-Step Guide to Implementing Server Side Tagging for GTM and GA4 for your Magento store
In the ever-evolving landscape of data collection, traditional methods like client-side tagging face limitations due to cookie restrictions and privacy concerns. This is where server-side tagging emerges as a powerful solution, offering enhanced data security, privacy, and regulation compliance.
This blog post serves as your comprehensive guide to implementing Magento server-side tagging for Google Tag Manager (GTM) and Google Analytics 4 (GA4) for your Magento store, complete with step-by-step instructions and visuals.
What is Server Side Tagging?
Server-side tagging is a method that allows you to manage your tags to measure user activity wherever it occurs. Instead of executing tags directly on a user’s browser (client-side), server-side tagging shifts part of this workload to a server. This server could be a cloud server or an on-premise server. Server-side tagging has several benefits, such as improved site performance, enhanced data privacy and security, increased data quality and accuracy, and easier integration with other services. Server-side tagging uses Google Tag Manager (GTM) to collect and process data from your website or app using the same tag, trigger, and variable model that you are used to, while also providing new tools to control how that data is shaped and routed.
Benefits of Server-Side Tagging:
- Enhanced Data Privacy: By leveraging server-side processing, you can collect data without relying solely on cookies, addressing privacy regulations and user opt-outs.
- Improved Data Security: Data is processed and sent to servers before reaching the user’s browser, minimizing the risk of exposure.
- Cross-Platform Flexibility: Server-side tagging ensures consistent data collection across various platforms and devices.
- Compliance with Regulations: Gain peace of mind with better control over data collection, helping you comply with evolving data privacy regulations like GDPR and CCPA.
- Improved site performance: Server-side tagging reduces the load on your website or app by moving the tag processing to a server that you control. This can speed up your site and enhance the user experience
- Increased data quality and accuracy: Server-side tagging allows you to validate and normalize your data before sending it to your analytics or marketing platforms. You can also avoid issues such as ad blockers, browser restrictions, or network failures that can affect your client-side data collection
- Easier integration with other services: Server-side tagging enables you to send data to multiple destinations from one place. You can also use server-side tagging to integrate with other Google products or third-party services that are not supported by GTM web or app containers
Before We Begin:
It’s crucial to note that server-side tagging requires some technical expertise in server-side development and understanding of Google Cloud Platform (GCP) or Stape.io or any third party services. Additionally, be prepared for a potential learning curve and potential infrastructure costs for maintaining server-side code.
Step by Step guide to implement Magento server side tagging for GA4 using GTM
1. Create a Server-Side Container in GTM:
- Log in to your Google Tag Manager account.
- Once there, go to Admin and click the + icon.
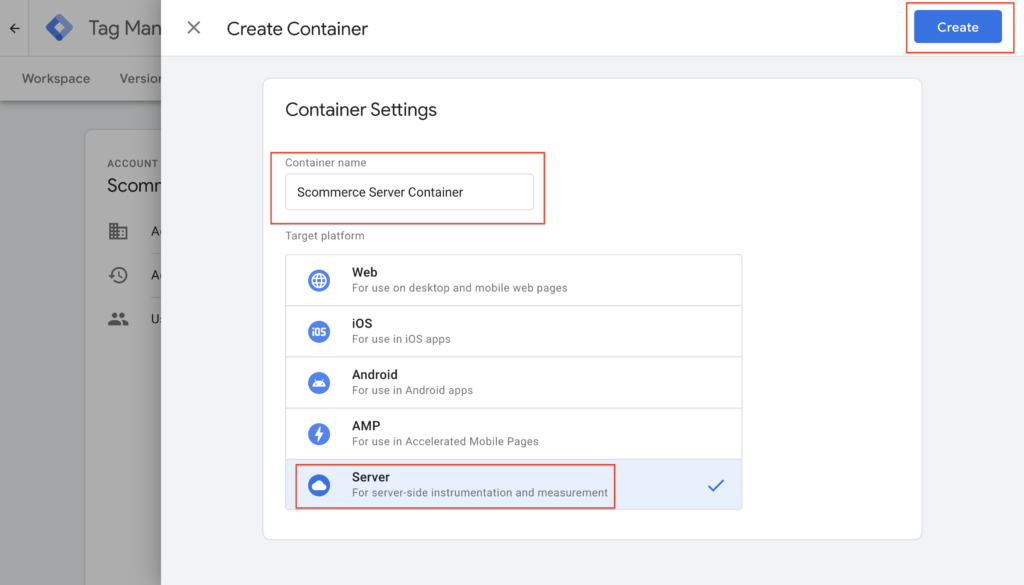
- Add container name, select “Server” and press create button as shown belwo
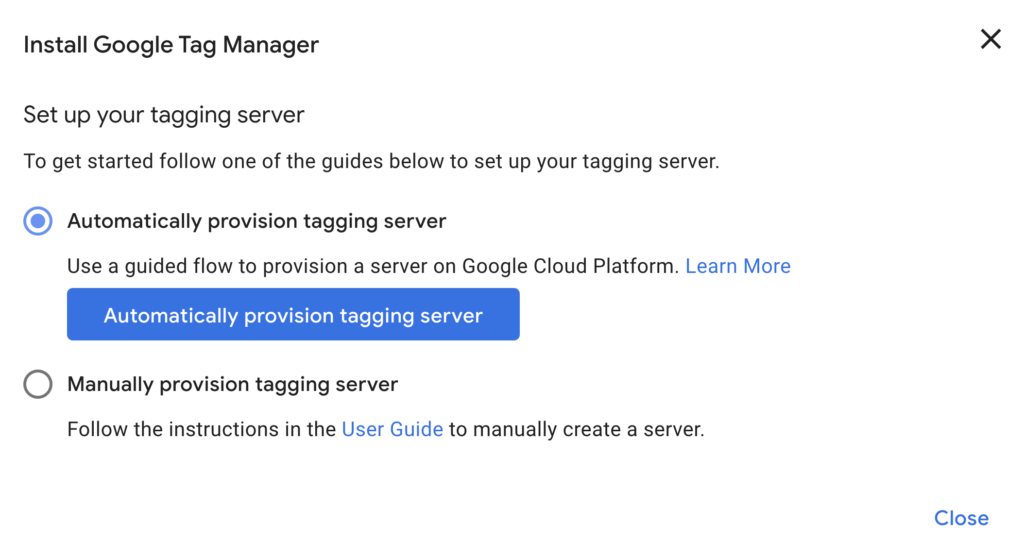
You will be presented with 2 options to set up your tagging server. Choose the Automatically provision tagging server option (for example Google Cloud Platform) and Manually provision tagging server (for example Stape.io) – Follow the instructions in this user guide to manually create a server https://developers.google.com/tag-platform/tag-manager/server-side/manual-setup-guide.
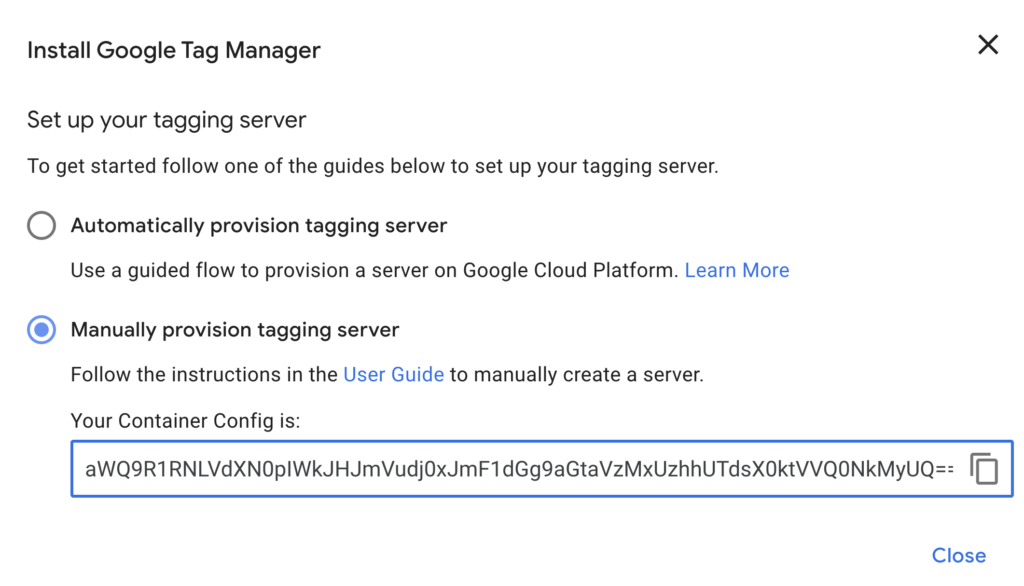
You will receive a URL at the end whether you choose Google Cloud Platform or Stape.io. Both options also require you to provide the container config ID as shown below.
In case you choose stape.io then you can create container and add above container config id as shown in the image below
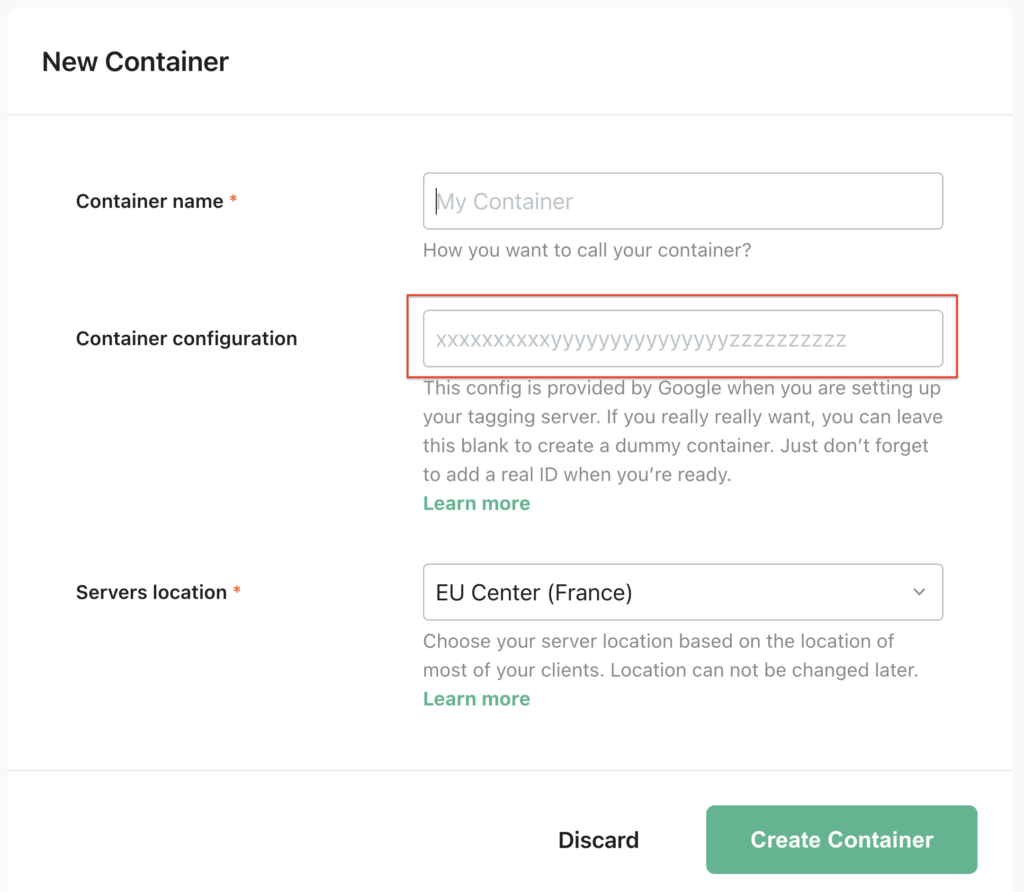
In case you decide to use Google Cloud Platform (GCP) then it will be pretty straight forward just choose “Automatically choosing tagging server” and follow the on screen instructions
2. Configure tags, triggers, variables, and clients in the server-side container
- Set up your client in your server side container
- Click new and select “Google Analytics GA4 (Web)”
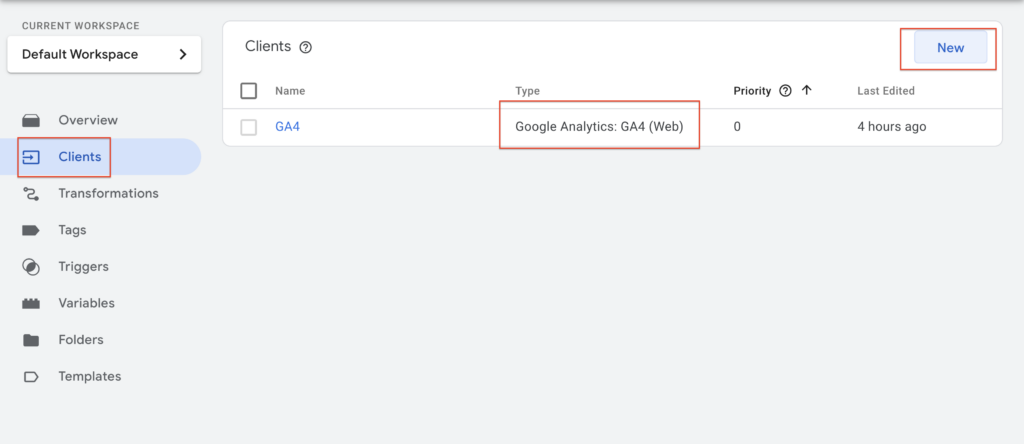
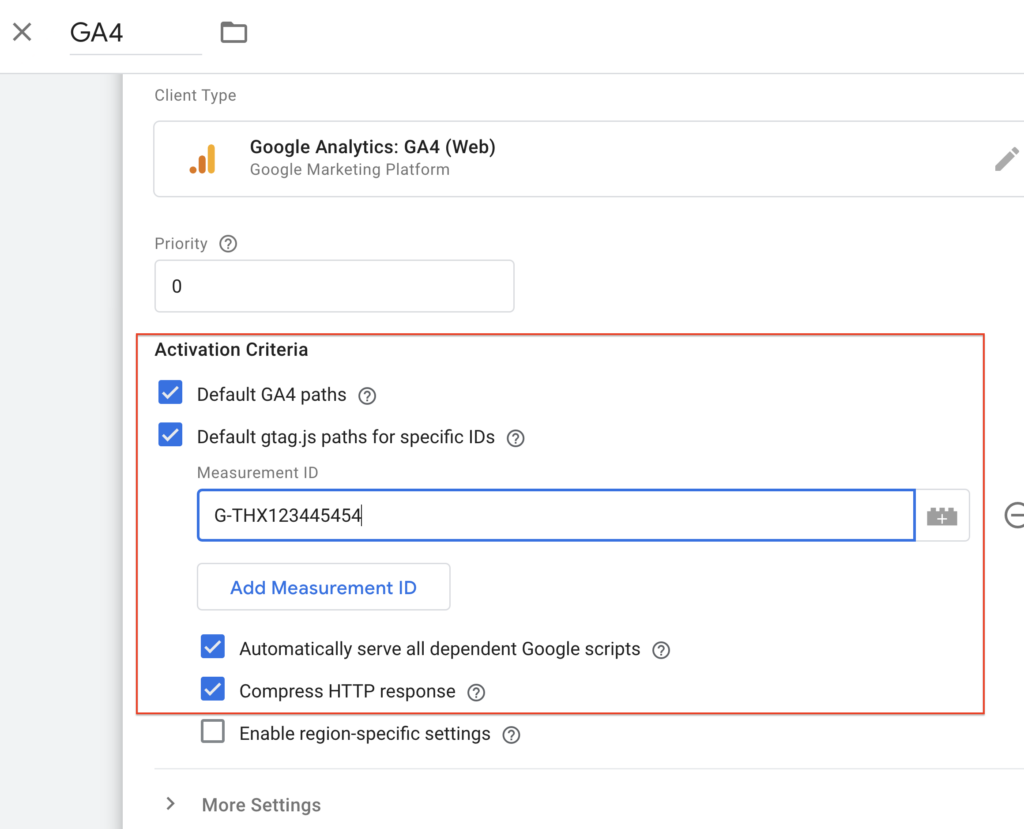
- Setup your trigger
- Click new and select “Custom” as trigger type
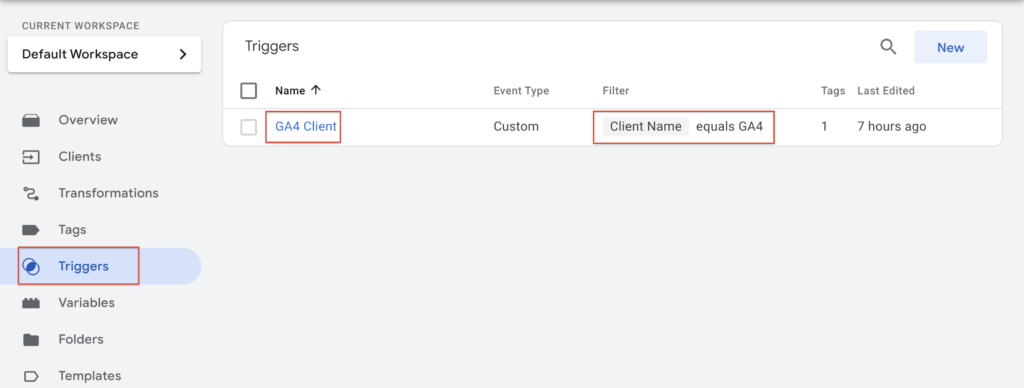
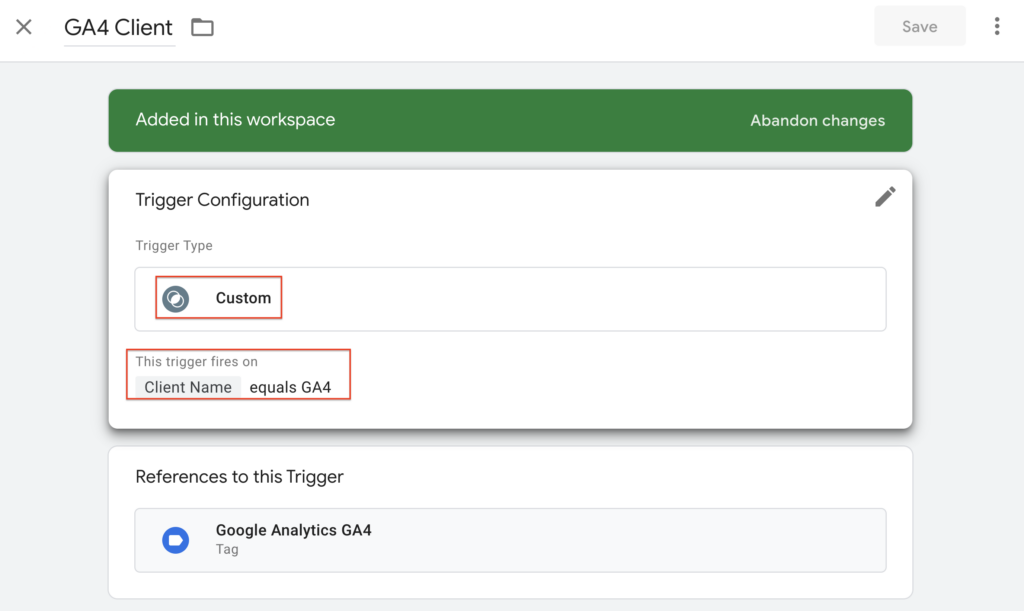
- Set up your GTM server-side tag
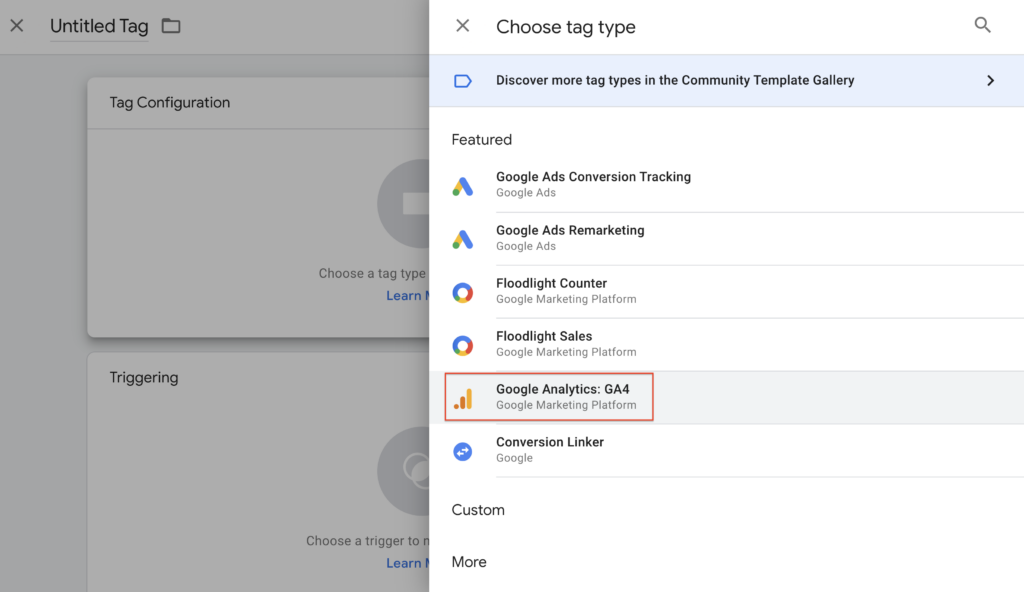
- Click new and select “Google Analytics GA4” as tag type
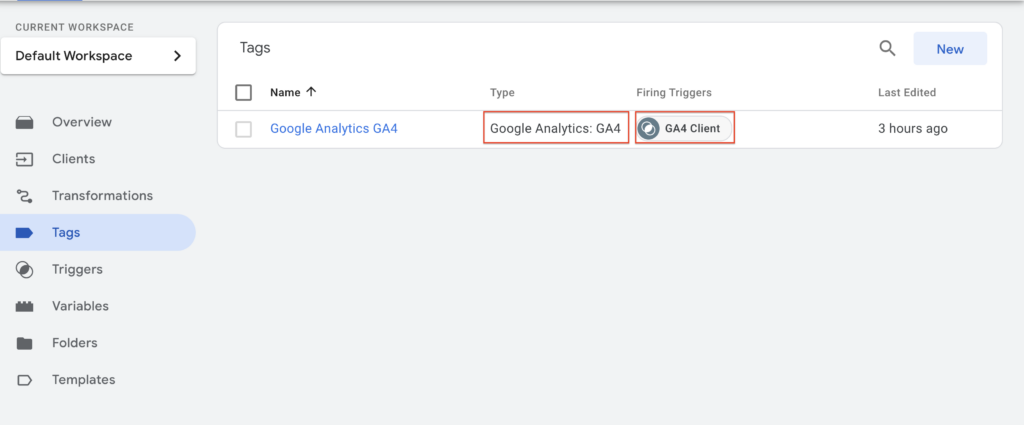
Once tag created add measurement ID of your GA4 property and add trigger “GA4 client” which you created in previous step.
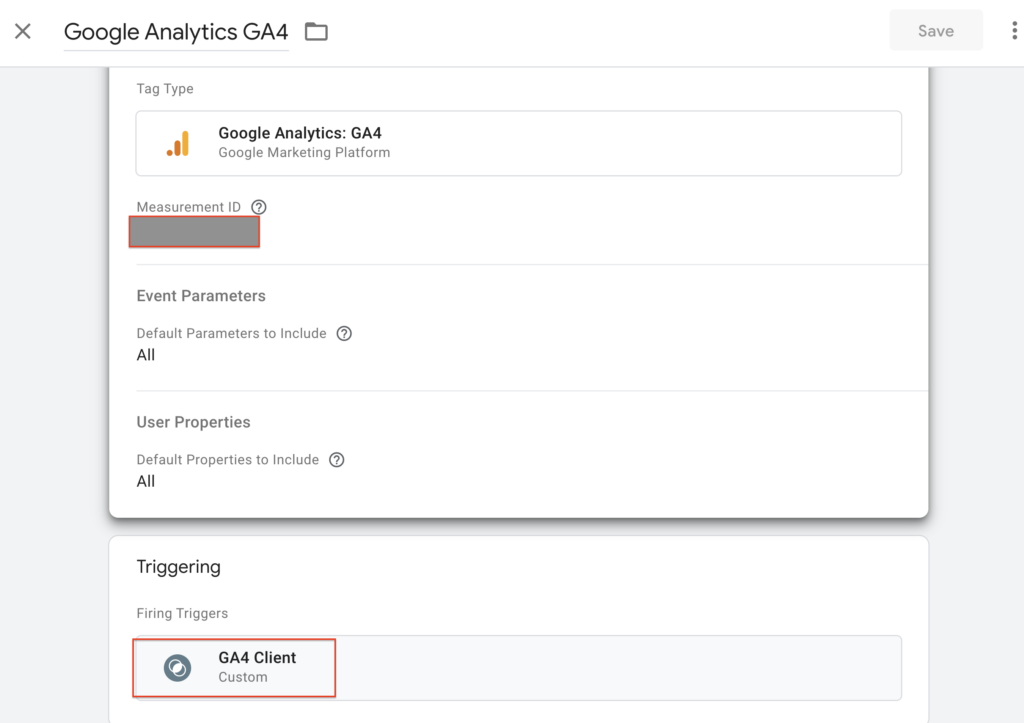
We have successfully configured server side tagging, so we can now receive calls from our client side and send the data to GA4 through our server side setup and tagging server. Let’s setup our web container which can pass data to our server container.
3. Setup our web container
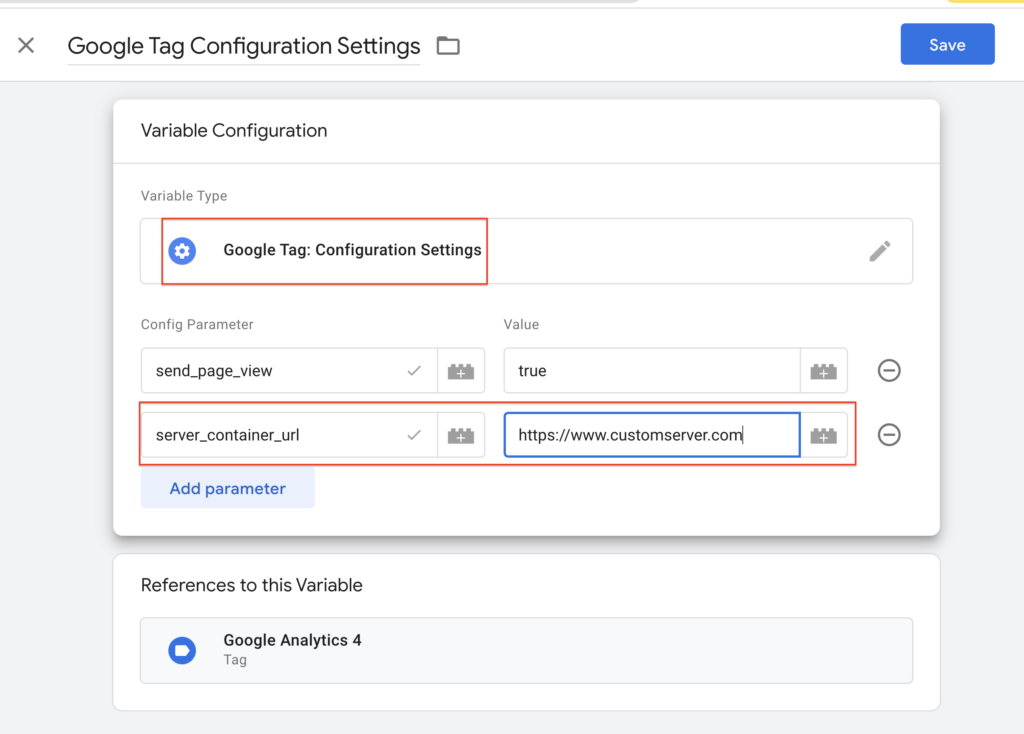
Create a configuration variable for the server container URL
- Select the web container you want to configure.
- Open the Variables menu.
- Create a New user-defined variable of the type Google tag: Configuration settings.
- Add the following parameters:
- Name:
server_container_url - Value: Set to the server container URL of your Tag Manager server container.
- Name:
- Name your variable, for example, “Server URL”, and Save it.
Assign the server container URL to a Google tag
- Open the
Tags menu.
- Add a new Google tag, or edit an existing one.
- In Configuration settings, select the server container variable you just created
- To ensure that the Google tag fires before other triggers, click Triggering and use the Initialization – All pages trigger.
- Save the tag and Publish the container.
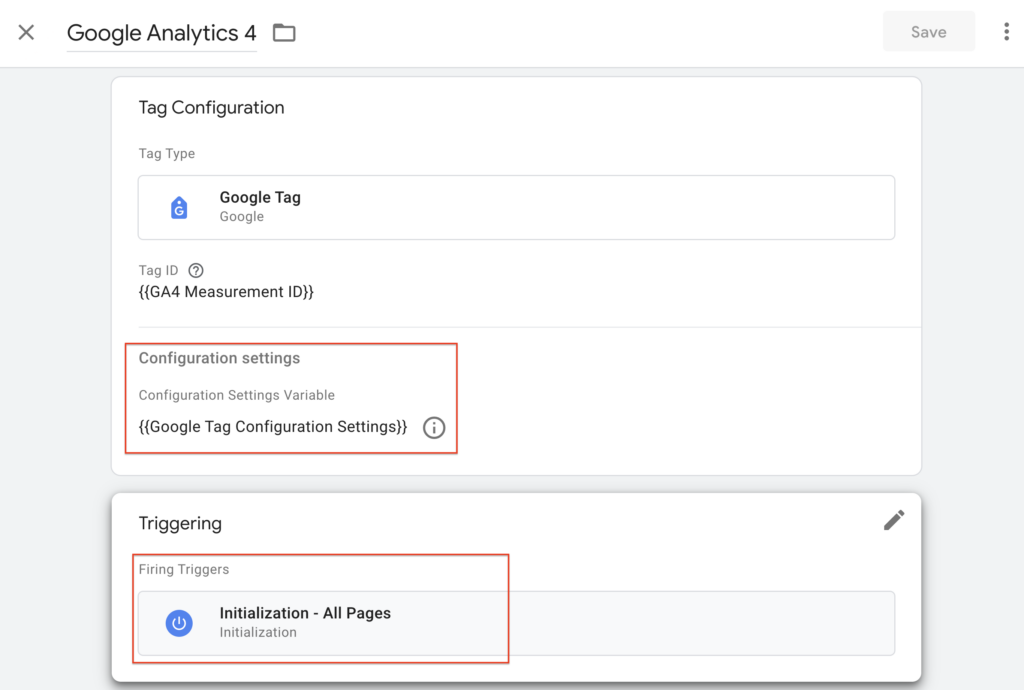
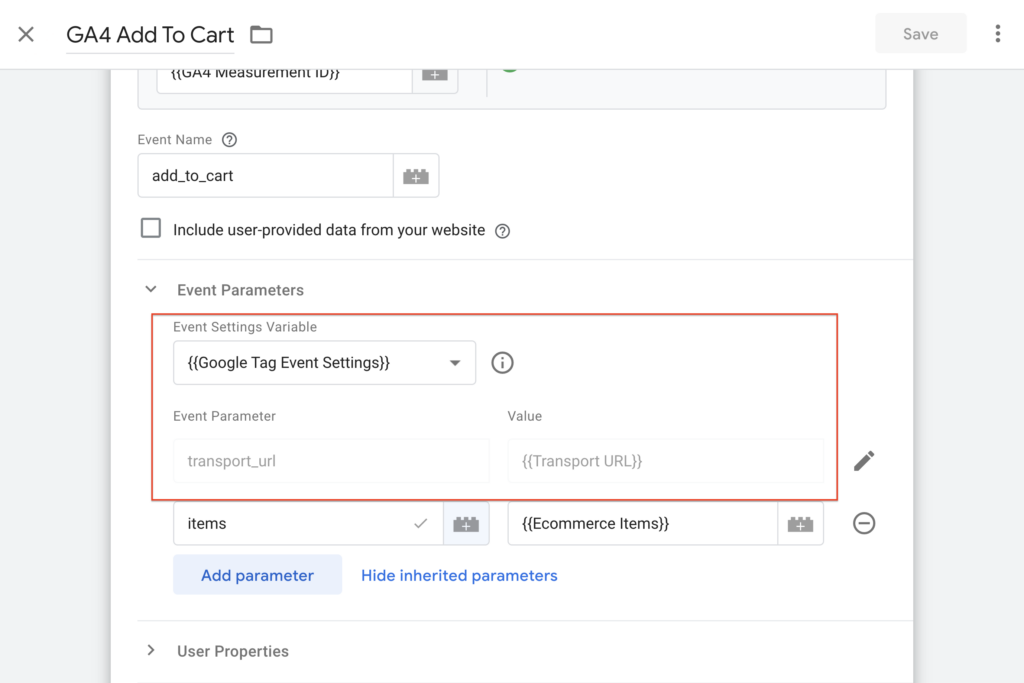
This will allow you to send all events from your web container to your server container but you want to send specific events to server side then make sure you add transport_url to each event as shown below and remove server_container_url from configuration settings variable.
4. Final testing
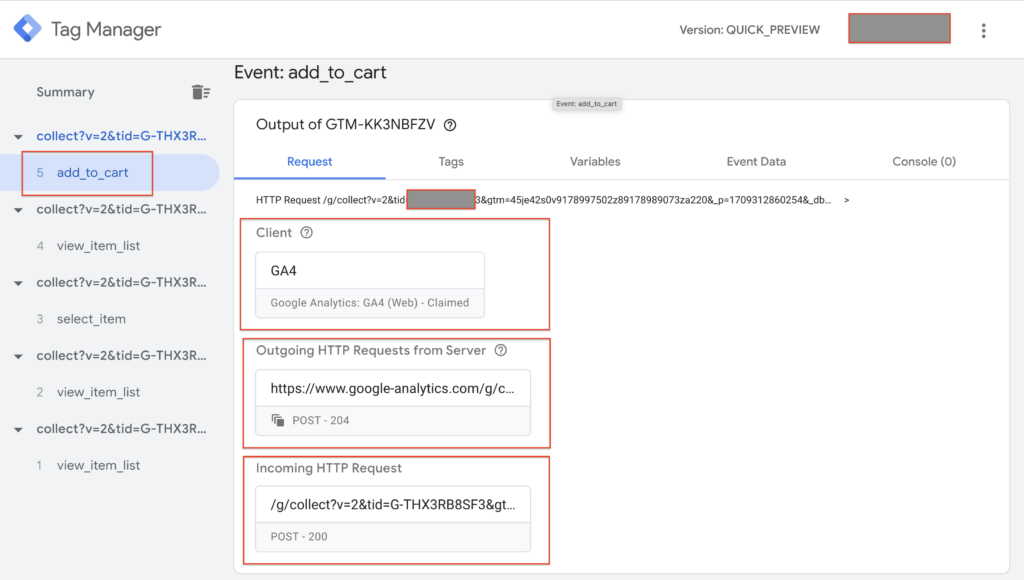
Turn on preview mode for both your web and server GTM containers. You will see how your web container sends GA4 client requests to your server container, which then forwards them to GA4.
Conclusion
Server-side tagging offers a powerful way to enhance data collection, improve privacy, and ensure compliance. While it requires technical expertise and planning, this guide provides a starting point for implementing it effectively. Remember to weigh the benefits and challenges and ensure you have the resources to manage your server-side infrastructure.
By following these steps and continuously refining your implementation, you can unlock the full potential of GTM and GA4 while prioritising data privacy and compliance in your analytics journey.
You can easily enable Magento Server Side Tagging on your store using our GTM extensions for Magento 1 and Magento 2. You can also use a custom domain and a custom loader to send data directly to your Tagging server, instead of gtm.js, which can be blocked by ad blockers and affect your tracking.

