Magento 2 Google Adwords Dynamic Remarketing is one of the most powerful trackings any e-commerce store can have. It enables stores to make and show targeted ads to a specific set of audiences. Targeted ads help rapidly increase conversions. Scommerce Mage offers Magento 2 Google Adwords Dynamic Remarketing extension which easily implements dynamic remarketing on Magento 2 stores. Today we will learn how to create audience lists and use them to create targetted ads in Google Adwords.
What is the Audience List?
An audience list is basically a list of users that visit your store and perform certain actions. The entire purpose of creating an audience list is to create of list of users that you want to target with your ads. Having such a list can increase the chances of conversion. For eg:- suppose you have an audience list of customers that have added products to the cart previously. If we target our ads only to such customers then they are highly likely to click on the ad and make the purchase. Audience lists help store owners to narrow down the entire pool of users to certain specific groups so that with the minimum investment in ads they can get more purchases in the store.
Setting Up Dynamic Remarketing with Google Analytics/Google Analytics 4
Dynamic remarketing setup involves six crucial steps as follows:-
- Install Dynamic remarketing tags on your store
- Enable Google Signals in Analytics
- Link Ads account to Google Analytics
- Audience List creation via Google Analytics
- Publish the audience list in Google Ads
- Set audience list in Google Ads Campaigns
Install Dynamic remarketing tags on your store
The very first step is to install the dynamic remarketing tags on your store. If you are running a Magento 2 store then we would recommend you to with our Magento 2 Google Adwords Dynamic Remarketing extension which will implement the dynamic remarketing tags on your store. If you prefer using GTM then you can also buy our GTM pro extension which comes with dynamic remarketing tags. The extension installs the tags which collect the information from your store and passes it down to Google Analytics. If you want to manually install the tags then we would recommend you this documentation from google https://support.google.com/google-ads/answer/3103357?hl=en .
Enable Google Signals in Analytics
Once you have your tags perfectly installed on the store then it’s time to enable Google Signals in Analytics. We will show you how you can enable google signals in both Google Analytics and Google Analytics 4.
Google Analytics
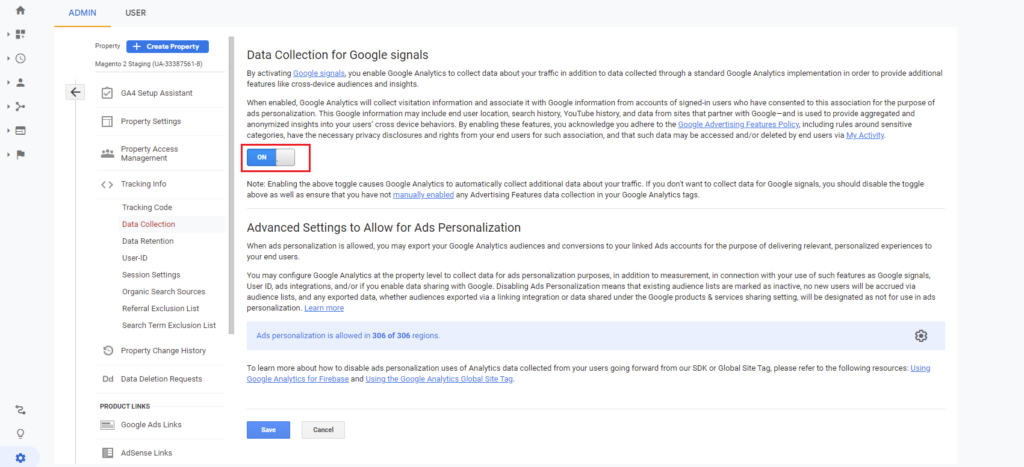
Go to admin>Tracking info>Data Collection. Make sure data collection acknowledgement has been acknowledged and simply turn on Google Signals.
Google Analytics 4
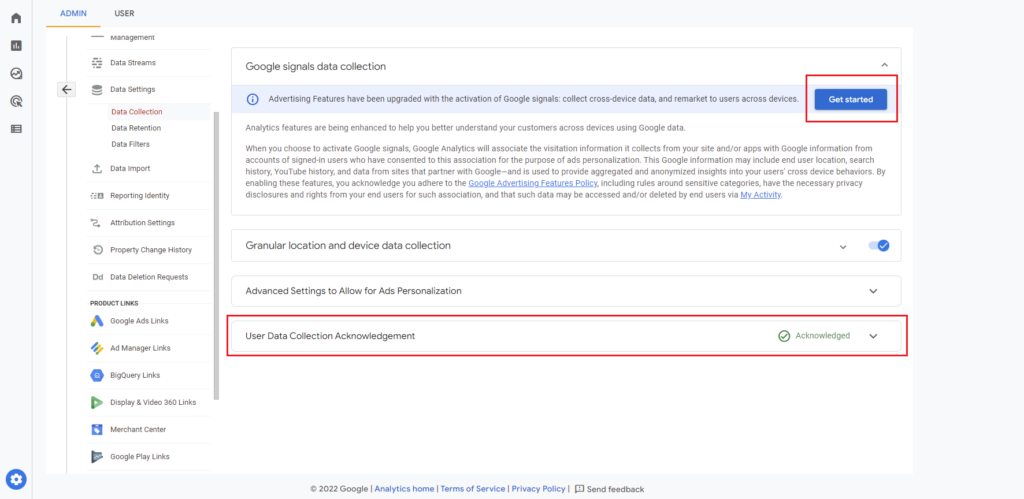
Go to Admin>Data Settings>Data Collection. Make sure data collection acknowledgement has been acknowledged and simply click on get started and follow the path to turn on Google Signals.
Link Ads account to Google Analytics
Next, we will be linking our Google Analytics account to Google Adwords. Please follow the steps below to link your Google Ads account to your Google Analytics account:-
Step1:- Login to your Google Adwords account.
Step2:- Click on Tools & Settings then from the dropdown select linked accounts under Setup.
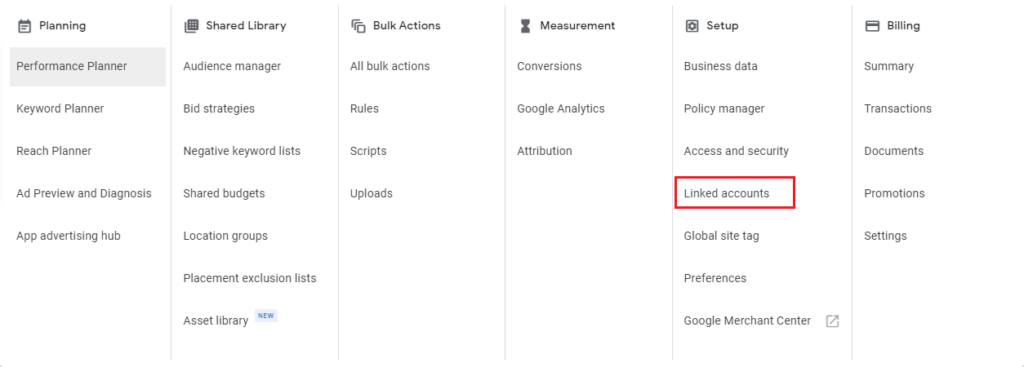
Step3:- Click on Manage & Link besides Google Analytics(UA)
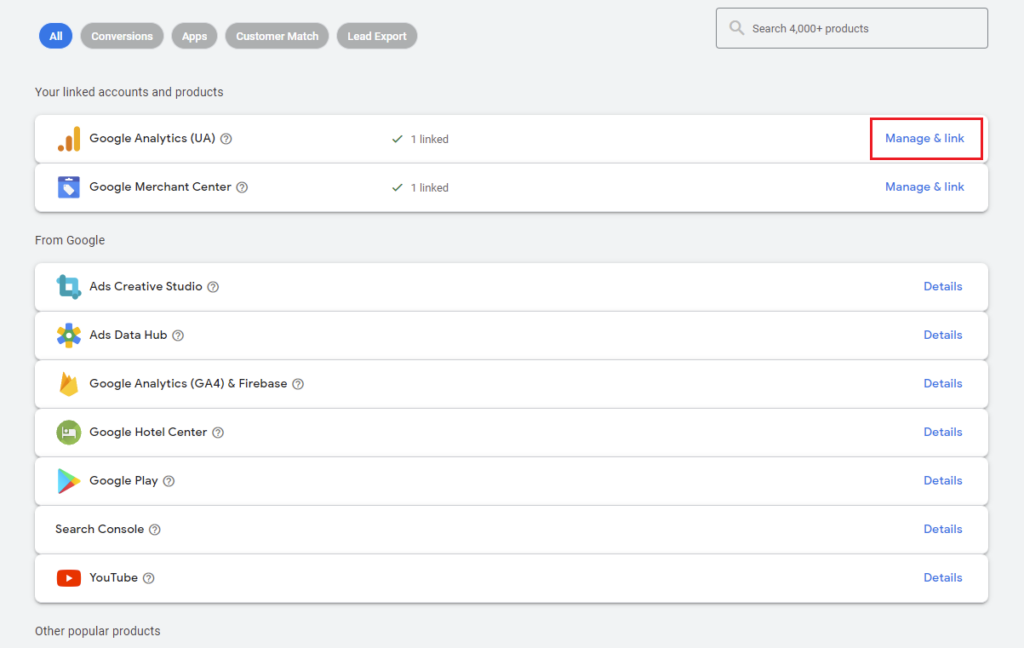
Step 4:- Finally, click on the link besides the UA or GA4 account that you want to link. Make sure the account you are using with Google AdWords has at least write access to the Google Analytics account only then will those accounts appear in this list. If not then you can provide access under Property access management in Google Analytics.
Audience List creation via Google Analytics
Now, let’s create our audience list in Analytics:-
Google Analytics
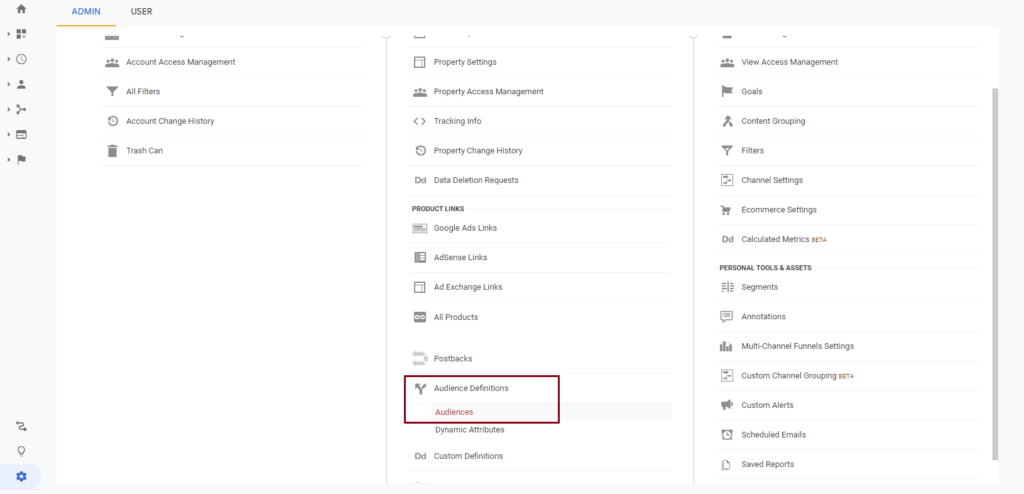
Go to admin>Audience Definations>Audiences and click on the new audience to create an audience list.
Google Analytics 4
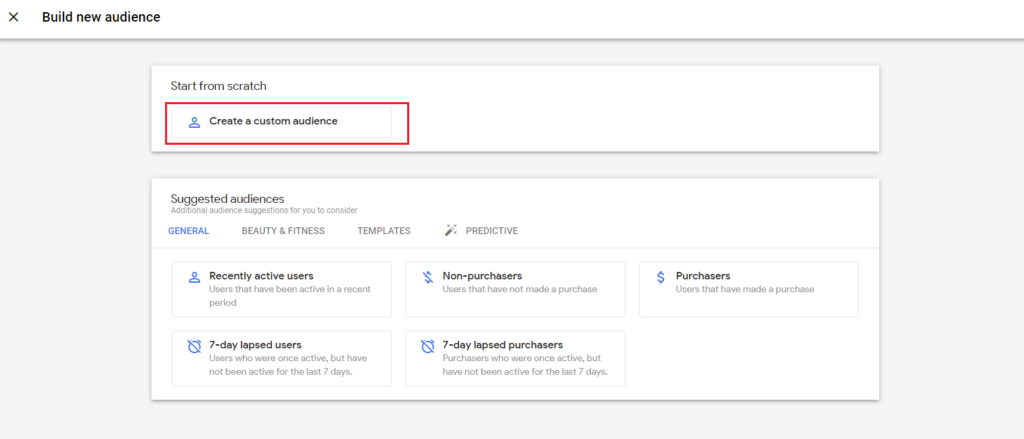
Go to Admin and from the left menu click on configure>Audiences>New Audience.

Now you can create a custom audience list or use one of the suggested segments to quickly create an audience list.
Publish the audience list in Google Ads
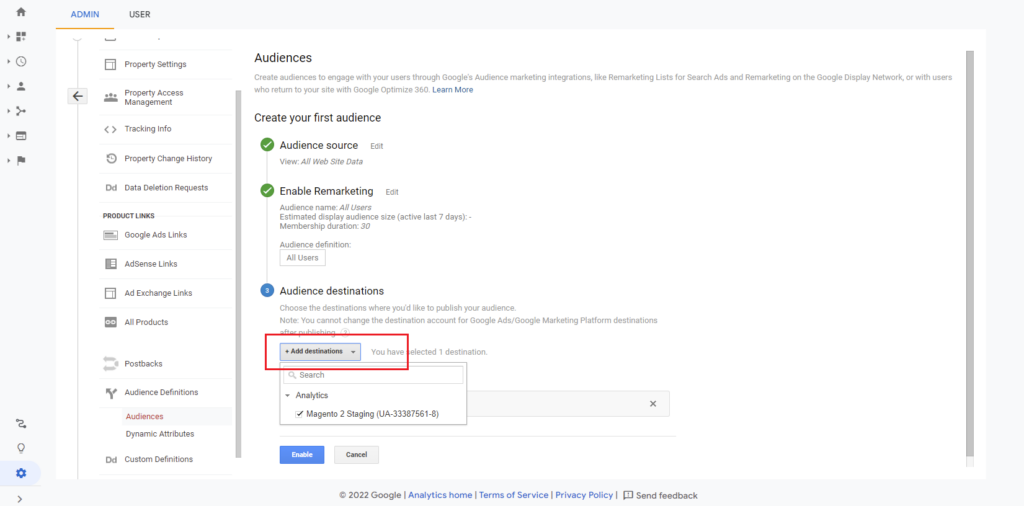
To Publish the audience list from GA to Google Ads simply cheek Google Adwords while creating audience list on step Audience Destinations. Click on add destination and select Google Adwords. Now you have published your Audience list in Google Adwords.
Set audience list in Google Ads Campaigns
Finally we can use these audience lists in our Google Ads Campaigns.
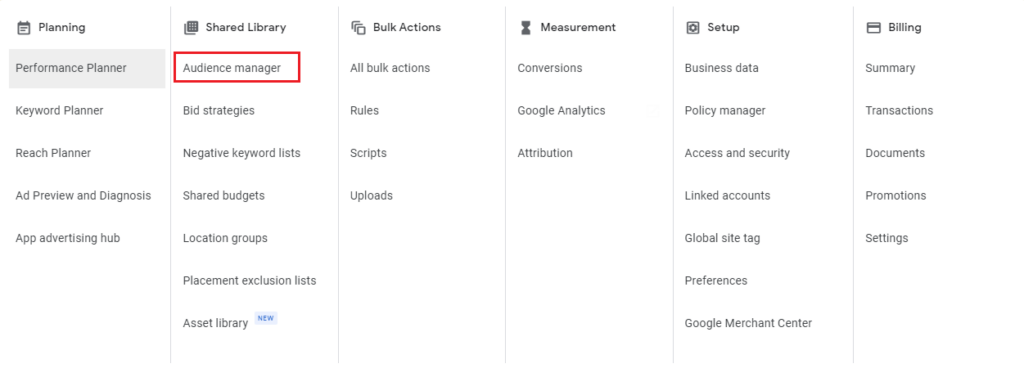
You will be able to see your audience list under Auudience Manager>Segtments.

Once you have everything set up using Magento 2 Google Adwords Dynamic Remarketing will enable you to make customer-specific ads and target a set of audience to increase conversions rapidly on the store.


