
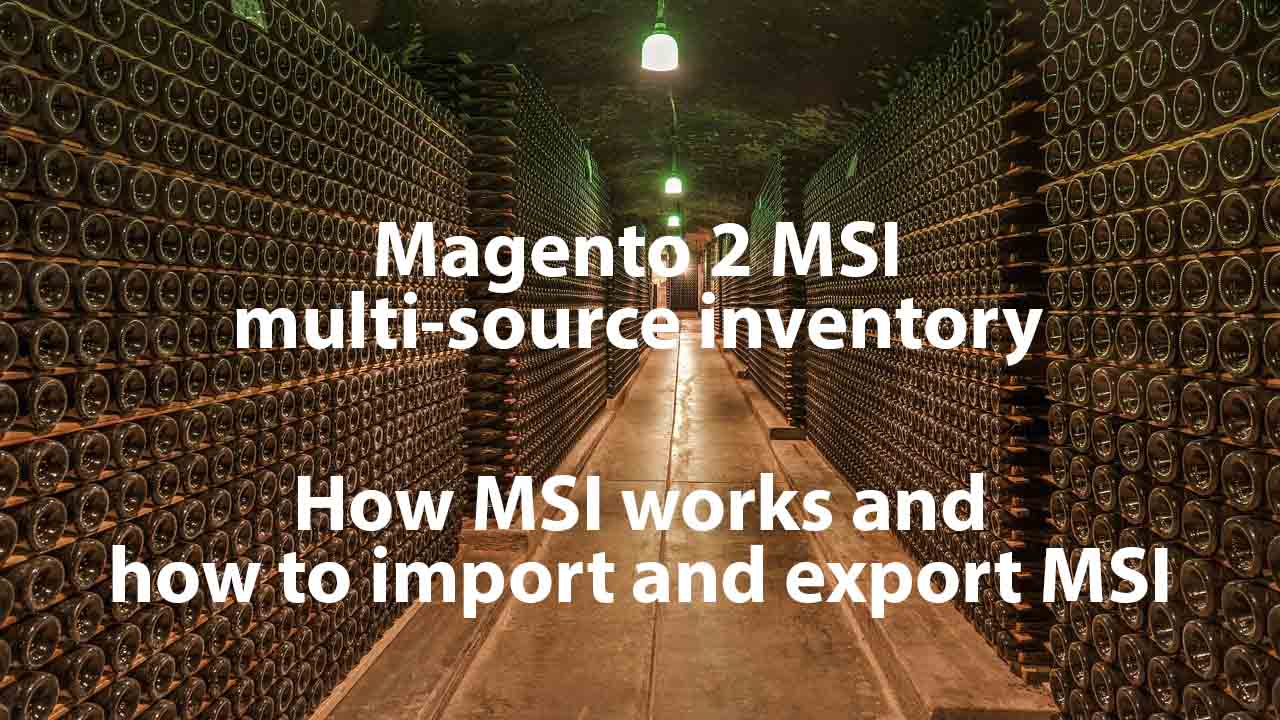
Magento version 2.3 came out with the long-awaited Multi-Source Inventory (MSI) support. The feature is available right after you install the MSI extension. Although the module dramatically improves the basic experience associated with inventory management, it still lacks various vital functionalities, especially in the area of data synchronization. Luckily, you can always address the existing issues with the help of third-party solutions. When it comes to the Magento 2 MSI module and data transfers, the Improved Import & Export extension and its MSI add-on are at your service.
In this blog post, you will learn how to import and export all Magento 2 MSI entities: sources and quantity of the products per source. We describe what the MSI module is and how to install it. After that, you will find out what to do with the MSI add-on of the Improved Import & Export extension. All the existing requirements associated with Magento 2 MSI import and export processes are also listed in the article.
Besides, we focus on the table formatting of MSI entities. You will learn how the stock sources MSI table works and what to do with the stock sources qty MSI table. Next, the blog post sheds light upon how to import and export Magento 2 products with multiple MSI warehouses.
The last chapter of this Magento 2 MSI import/export guide describes how MSI source import/export works. We put emphasis on how to export and import Magento 2 stock sources. You will find out how to edit an import table and import it to your website.

Table of contents
Magento 2 MSI – is a multi-source inventory management system. This system allows you to allocate product stock per warehouse, decide from which warehouse the product should be shipped to the customer. Basically, if you are using multiple warehouses to store your products – this feature is a must for your Magento 2 store.
Before Magento 2.3 release the MSI functionality could have been added to your store using third-party extensions. We have already discussed such third-party extensions in the article here. If you are looking for the full picture on Magento 2 MSI, or want to replace the native MSI functionality you may actually want to read it.
Read how to work with MSI functionality
In this article, however, we will talk about how to import and export Magento 2 MSI entities, namely sources and product quantity per source.
Before installing MSI add-on for Improved Import and Export extension, you need to install MSI extension for Magento 2.
Installation instructions written by Magento team can be found here.
NOTE: Before installing MSI Add-On make sure you have installed Improved Import and Export extension.
- Navigate to your store root folder in the SSH console of your server:
cd path_to_the_store_root_folder
- Install MSI Add-On by running command:
composer require firebear/importexport–msi
- Enable MSI Add-On by running:
php bin/magento module:enable Firebear_ImportExportMsi
- Deploy content and flush store cache, log out from the backend and log in again. Run:
php bin/magento setup:static–content:deploy –f
and:
php –f bin/magento cache:clean
Congratulations, you have installed MSI Add-On for Improved Import and Export extension.
To import and export MSI sources and product quantity you will require Improved Import and Export extension with MSI Add-On installed. Improved Import and Export is a full-featured Magento 2 extension operational from both administrator panel and command line.
The extension covers almost all Magento 2 entities import and export and comes with the following features:
- Import and export of products, categories, CMS blocks and pages, orders, cart price rules, customers, product attributes, advanced pricing.
- Import and export of all Magento 2 B2B entities: companies, shared catalogs, requisition lists, quotes and negotiable quotes.
- Support multiple file formats including CSV, XML (with XSLT templates), Excel XLSX, OpenOffice ODS, Json.
- Support of Google Sheets – import CSV files by pasting a Google Sheet links.
- Support of REST and SOAP API connections to different software.
- Price adjustments.
- Category mapping.
- Custom logic and many more. Read full feature list at the extension product page.
That’s pretty much it, you only need to have Improved Import and Export extension installed. The extension comes with explicit user manual, sample files and extensive guides on every entity. Additionally, Firebear team composed sample Google Sheet Master Table and B2B Master table for you with every attribute described and sample values assigned.
Use all the information you can to master import and export procedures of your store and create required integrations with CRM, ERP or supplier services.
There are two MSI entities available for import and export: Stock Sources and Stock Sources Qty.
As you can see, these entities are pretty simple and, if you have ever worked with MSI functionality, should be easy to get into. Anyways, before you proceed we advise reading through the attributes of both entities to understand which values required and can be used for different settings.
Stock Sources MSI table
Stock Sources are the warehouses you create at Stores > Inventory > Sources.

Here you can add new Magento 2 Sources. The required attributes include:
- Name – the name of the warehouse;
- Code – the code of the warehouse used for internal identification purposes and serves as a reference when assigning product quantity;
- Country – the country of the warehouse location;
- Postcode – the postcode of the warehouse region.
The rest of the attributes are optional. When creating warehouses using the import procedure make sure to at least provide information for these attributes, otherwise your Magento 2 store won’t be able to create a warehouse.
Having explored warehouse creation from the administrator panel gives a better understanding of all the attributes in the import and export tables. Before proceeding to compose an import table or gathering data for it, make sure to experience manual warehouse creation.
Below you will find all Stock Source attributes available for import and export. For reference we suggest opening an MSI Stock Sources sample table in a separate tab of your browser.
| Attribute name | Reference | Values | Value example |
| source_code | Code of the warehouse. Is used for identification purposes. | Can be up to 64 Latin characters in length, without spaces, can contain “-“, “_”. | my_warehouse |
| name | Name of the source | Can be any value | My First Warehouse |
| enabled | Defines if the source is enabled | 1 – enabled
0 – disabled |
1 |
| description | Description of the source | Can be any value | This is my first warehouse |
| latitude | Latitude of the source location | Can only be geographic latitude value | 123.12 |
| longitude | Longitude of the source location | Can only be geographic longitude value | 321.32 |
| country_id | ID of the Country of the source Address Data | Can be only country code ID of Magento variant of ISO 3166-1 | AT |
| region_id | ID of the Region of the source Address Data | Can be only Region code ID of Magento region codes | 95 |
| region | Region of the source Address Data | Can be any value – text field. Doesn’t work with ID. | Moscovia |
| city | City of the source Address Data | Can be any value | New York |
| street | Street of the source Address Data | Can be any value | Street st. |
| postcode | Postcode of the source Address Data | Can contain only numerals | 12345 |
| contact_name | Contact Name of the source Contact Info | Can be any value | John Doe |
| Contact Email of the source Contact Info | Can be only email value | john@doe.com | |
| phone | Phone of the source Contact Info | Phone number | +123123123 |
| fax | Fax of the source Contact Info | Fax number | +123123123 |
| use_default_carrier_config | System attribute of the source with no particular use case in setting up a new source | – | – |
| carrier_links | System attribute of the source with no particular use case in setting up a new source | – | – |
NOTE: When creating Stock Sources using import jobs, make sure to provide information for the attributes: name, source_code, country_id, postcode. These attributes are required by Magento 2 system to create new warehouses. Without them a warehouse cannot be created.
Stock Sources Qty MSI table
Stock Sources quantity is applied at the product level once the warehouses are assigned to stocks at Stores > Inventory > Stocks. To check the quantity per warehouse navigate to the product of interest.

At the screenshot above you can see that we have two warehouses new-warehouse and old-warehouse. Both are assigned to a single product, and this very product has stock in both warehouses. When managing order shipping you will be given an opportunity to decide from which warehouse you want to send the item.
Below you will find all Stock Sources Qty attributes available for import and export. For reference we suggest opening an MSI Stock Sources sample table in a separate tab of your browser.
| Attribute name | Reference | Values | Value example |
| source_code | Code of the warehouse. Is used for identification purposes. | Make sure to specify the exact code value. The code is used to tie product stock to source. | my_warehouse |
| sku | SKU of the product which stock is tied to a particular source (warehouse) | Can be up to 64 Latin characters in length, without spaces, can contain “-“, “_” | TST-01 |
| status | Source Item Status. Defines if the products in a particular source are in- or out-of-stock. | 1 – in stock
0 – out of stock |
1 |
| quantity | Quantity of products in a particular stock (warehouse) | Can only contain numerals | 123 |
NOTE: if your product belongs to several stock sources (warehouses) for every warehouse in the import table you need to have a dedicated row. For example:

As you can see at the screenshot above we have three warehouses:
- new-warehouse
- old-warehouse
- default
And four products:
- 24-MB01
- 24-MB02
- 24-MB04
- 24-MB06
All these products belong to all three warehouses. That’s why for every warehouse every product has a separate row. When importing such files, the product quantities per warehouse are imported in order they appear in the file.
How to import and export Magento 2 products with multiple MSI warehouses
With the 3.5.2 release of Improved Import & Export you can now import products and assign them to multiple warehouses if you are using Magento 2 MSI extension.
Improved Import & Export for Magento 2 allows you to specify:
- To which warehouse the product is assigned to
- Quantity of the product at a particular warehouse
- If the product can be purchased from the specific warehouse
To import products to Magento 2 with the warehouse reference you need to add three custom attributes to your product import file:
| Attribute name | Reference | Values | Value examples |
| msi_{warehouse_name} | Allows you to assign an imported product to a particular warehouse.
{warehouse_name} should be replaced by the name of the warehouse you want to assign the product. |
Possible attribute values are:
1 – product is assigned to warehouse 0 – product is not assigned to warehouse |
1 |
| msi_{warehouse_name}_qty | Allows you to specify a product quantity available at the particular warehouse.
{warehouse_name} should be replaced by the name of the warehouse you want to assign the product. |
Only numeral values are allowed | 123 |
| msi_{warehouse_name}_status | Allows you to specify if the product can be purchased from the specified warehouse.
{warehouse_name} should be replaced by the name of the warehouse you want to assign the product. |
Possible attribute values are:
1 – product can be purchased from the warehouse 0 – product cannot be purchased from the warehouse |
1 |
When exporting products with multiple warehouses, Improved Import & Export extension for Magento 2 automatically includes these three attributes into the exported file.
You can use multiple msi_{warehouse_name}, msi_{warehouse_name}_qty, msi_{warehouse_name}_status attributes to assign the product to multiple warehouses.
You can use a sample Master Table to see how these attributes can be used during the product import.
Below you will find an example of how to export MSI source from Magento 2 and how to import it back to Magento 2 with a new source included. The screenshots are taken from the Improved Import and Export extension which is different from native Magento 2 import/export tool.
Please refer to Improved Import and Export extension manual for explicit instructions on how to use every feature of the extension. The sample below is a sample to give you an idea of how Improved Import works. It doesn’t cover every feature of the extension and doesn’t provide step by step instructions.
For reference you can use Firebear demo store in a separate browser tab.
Exporting Magento 2 stock sources
Navigate to System > Improved Import/Export > Export jobs. At the export jobs grid you will see all already created jobs.

To create a new export job click ‘Add New Job’ button. You will be redirected to the job settings screen.

In the General Settings specify the export job name and set a required frequency if you plan scheduling the job to run automatically. Scroll down to the Export Settings section.
Select ‘Stock Sources’ from the Entity drop-down and proceed to the Export Behavior.

Select required file format from the File Format drop-down and apply necessary mapping if required. Scroll down to specify the source where you want to export the stock sources.

Select the source you want to export to from the Export Source drop-down. Specify the path to the file with the file name you want to create (don’t forget the file format). If required you can also add a current timestamp to the file name automatically using HTML date format preferred.
That’s it. You can now click big orange ‘Save & Run’ button at the top right corner of the screen to execute the export job and get a file with Magento 2 stock sources already created at your store.
Importing Magento 2 stock sources
First, let’s add another stock source to the file we have just exported. If you have been exporting stock sources to the CSV format the best way to edit it is to use Google Sheets. Excel and OpenOffice have tendencies of adjusting to CSV files so it is better to use Google Sheets.
Editing import table
The export file will look something like this if you love colors:

Sample Google Sheet stock source table
Looking at the columns A source_code and B name we can see that we have two sources:
- Default Source with code default
- Old Warehouse with code old-warehouse
To add a new source you will need to another row with the source information that you have. Let’s complete row 4 with the information we want. Say, we have:
- New Warehouse (name warehouse)
- In US, Texas, postcode 12345 (address)
- With contact point being John Doe, phone +123123123, email john@doe.com (contact)
Now we need to get this information into the table we have. Using the attribute table from this blog post you can find all the required attributes to fill in this information like this:

The only thing we had to come up with was the source_code for the new warehouse. Think of it the same as product SKU, this is a unique identifier of the stock source. All other information in the row 4 is the same we had written for the warehouse.
Let’s now import this very table we have edited.
Importing edited import table
To create a new import job proceed to System > Improved Import/Export > Import jobs. And click ‘Add New Job’ at the import job grid.

In the general settings of the import job specify the name and schedule if you want to run the job automatically on the regular basis.

Scroll down to the Import Settings and select the entity you want to import ‘Stock Sources’

From the Entity drop-down you can select the entity you want to import. When finished scroll down for Import Behavior section.

Here you decide how do you want the import job to proceed. Currently there are three scenarios:
- Add/Update – new entities are added and existing entities are updated
- Replace – existing entities are replaced if the ID matches to the entities in the imported table
- Delete – entities from the imported table are deleted from the store
For this article purposes we go with ‘Add/Update’, as we want to add another stock source to the Magento 2 store. Scroll down to the Import Source section.

Considering you have been editing the table in the Google Sheets, you can just share this table and paste its link to the import source. The extension will get the file and import it to your store.
Import Sources include:
- File upload
- FTP/SFTP
- Dropbox
- Direct URL
- Rest and Soap APIs
- Google Sheets
Once the link to the file pasted – click ‘Validate file’ button and after the validation is complete click ‘Save & Run’ button at the top right corner of the screen.
That’s it. Once the import is complete you can check your stock sources for the new source.

This is a simple case of running both import and export jobs. Improved Import and Export extension many more settings and flexibility. To get full list of features visit the extension product page or read Improved Import and Export manual and Guide List where we give explicit instructions on how to import any entity to your Magento 2.
Magento 2 MSI FAQ
Below, we summarize the most important inventory management aspects of Magento 2 in a form of questions and answers.
What is MSI in Magento 2?
As we’ve already mentioned, Multi Source Inventory (MSI) is a long-awaited feature that firstly appeared in Magento 2.3.0. The tool provides store merchants with the ability to control their single or multi-channel inventories and sale channels much more efficiently.
How do I turn off MSI in Magento 2?
If you don’t need the revolutionary functionality, it can be disabled with the help of the following command:
php bin/magento module:status | grep Magento_Inventory | grep -v List | grep -v None | grep -v -e ‘^$’ | xargs php bin/magento module:disable
php bin/magento s:upgrade
php bin/magento s:s:deploy -f
php bin/magento c:flush
php bin/magento i:reindex
How do I check inventory in Magento 2?
You can check the Magento 2 inventory only after configuring the corresponding feature. Go to your admin panel and open the ‘Stores’ menu. Choose the ‘Configuration’ option and expand the ‘Catalog’ tab. Here, you will see the ‘Inventory’ section. It provides the ability to manage the Stock Options and Product Stock Options settings.
Does Magento manage inventory?
With Magento Inventory Management, you get tools to manage your product inventory. No matter whether you run a single store or use multiple warehouses, stores, and pickup locations – the corresponding features will help you to maintain quantities for sales and handle shipments to complete orders. With MAgento 2 MSI, you get lots of extra capabilities that let you automate numerous daily tasks.
How do I change the default stock in Magento 2?
You should enable the corresponding functionality to be able to change the default stock in Magento 2:
– Go to your admin sidebar;
– Proceed to Stores -> Settings -> Configuration.
– Expand the Catalog section and choose Inventory.
– In the Product Stock Options section, set Manage Stock to Yes.
– Click Save Config when complete.
What is salable quantity?
Under Salable Quantity, we assume the sum of all available resources grouped in stocks. Note that the quantity of a product does not decrease when the customer places an order. It happens during the next stage.
How to import Magento 2 MSI data automatically?
If you want to automate data transfers associated with your Magento 2 inventory, you need to install the Improved Import & Export Magento 2 extension and its MSI addon. Both tools let you leverage a cron scheduler. With this tool, you decide within which time frame to launch a corresponding import or export process automatically.
How to import inventory data to Magento 2 from external systems?
If you need to transfer inventory data from external platforms but it doesn’t follow the Magento 2 requirements, there is no need to edit it manually. The Improved Import & Export Magento 2 module and its MSI add-on let you apply all the required changes right within your admin. The tools let you create mapping schemes, teaching Magento 2 how to react to the unknown attributes. After that, the system replaces them automatically, importing inventory data from any external sources.
How to import inventory data to Magento 2 via API?
If you need to establish an API connection between Magento 2 and any external platform, you can also use Improved Import & export along with its MSI add-on. The tools provide the ability to synchronize the two systems with the help of APIs. Thus, you establish a direct flow of inventory data.


