
Today, we explore the Shopware 6 snippets and snippet sets. The following article sheds light on the corresponding screen in your Shopware 6 admin. We explain what Shopware 6 snippets are and how to manage them. You will find out how to create new snippets in Shopware 6 as well as apply several management tricks to simplify your daily routine.
 ‘
‘
Note that we provide Shopware integration with external platforms. Contact our support for further information or try our Improved Import & Export Extension for Shopware.
Table of contents
Snippet Settings in Shopware 6 Admin
You can find the Snippet settings page in the Shopware 6 administration as follows:
- Go to your Shopware 6 administration;
- Open its main menu;
- Proceed to the Settings section;
- Open the Shop subsection;
- Hit the Snippets icon.
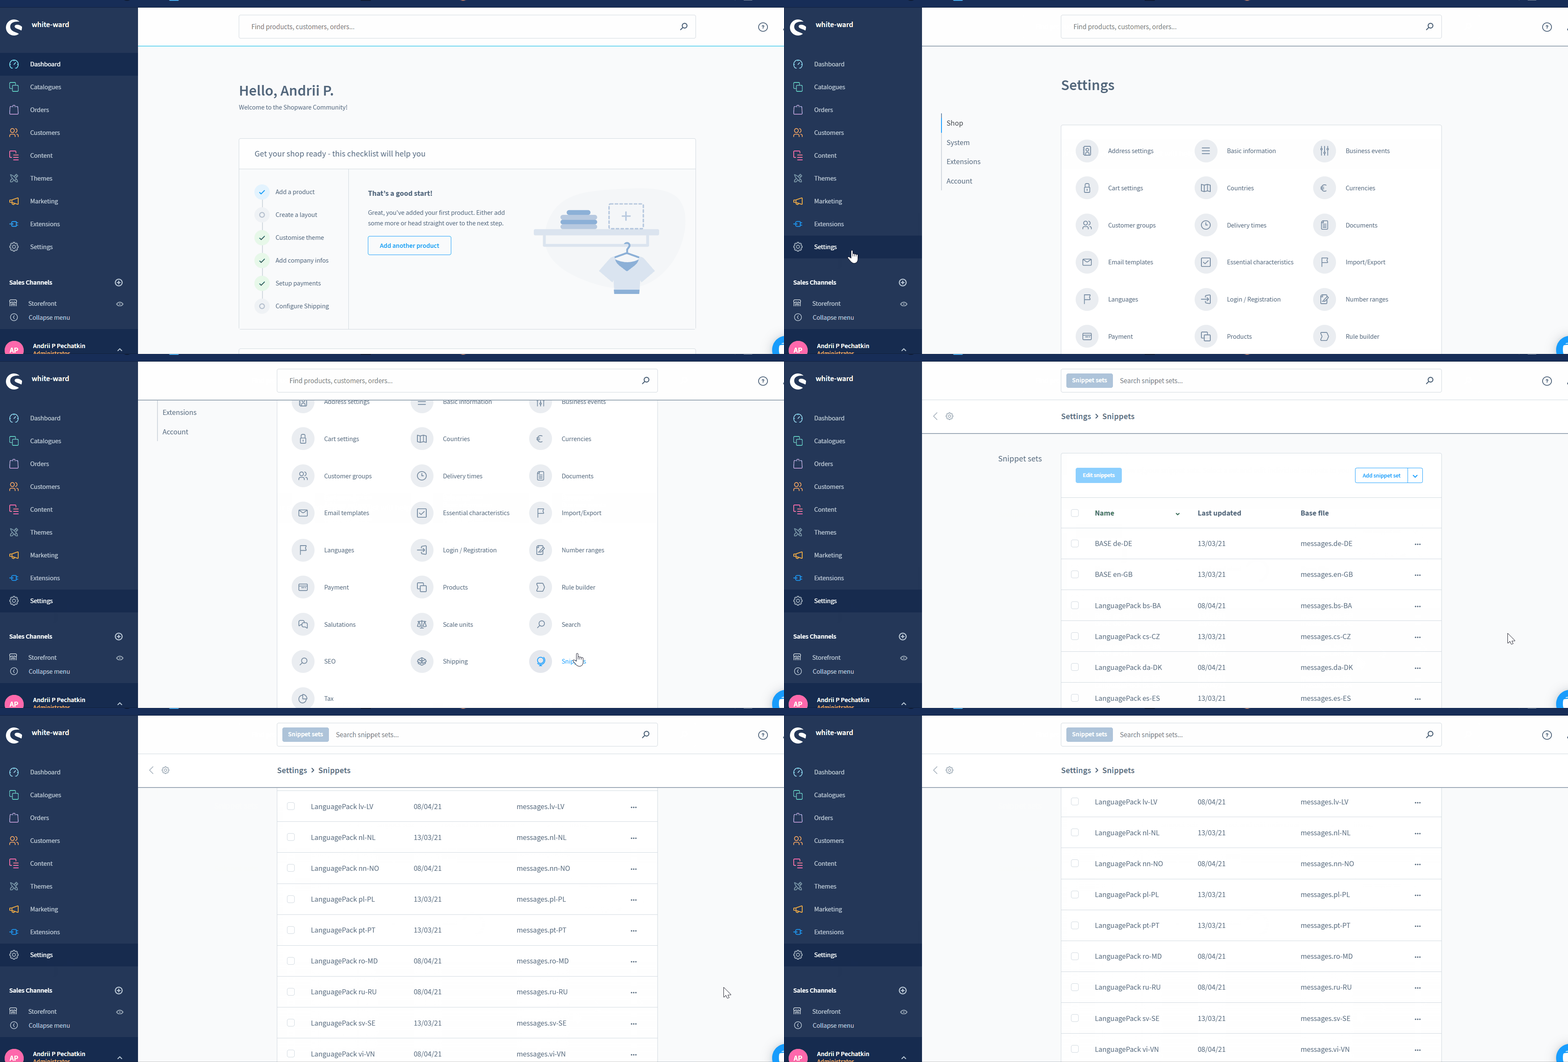
Now, when you know where snippets are hidden in the Shopware 6 backend, let’s explain their purpose. The e-commerce system relies on snippets to translate and customize texts displayed on the storefront.
The overview section looks as follows:
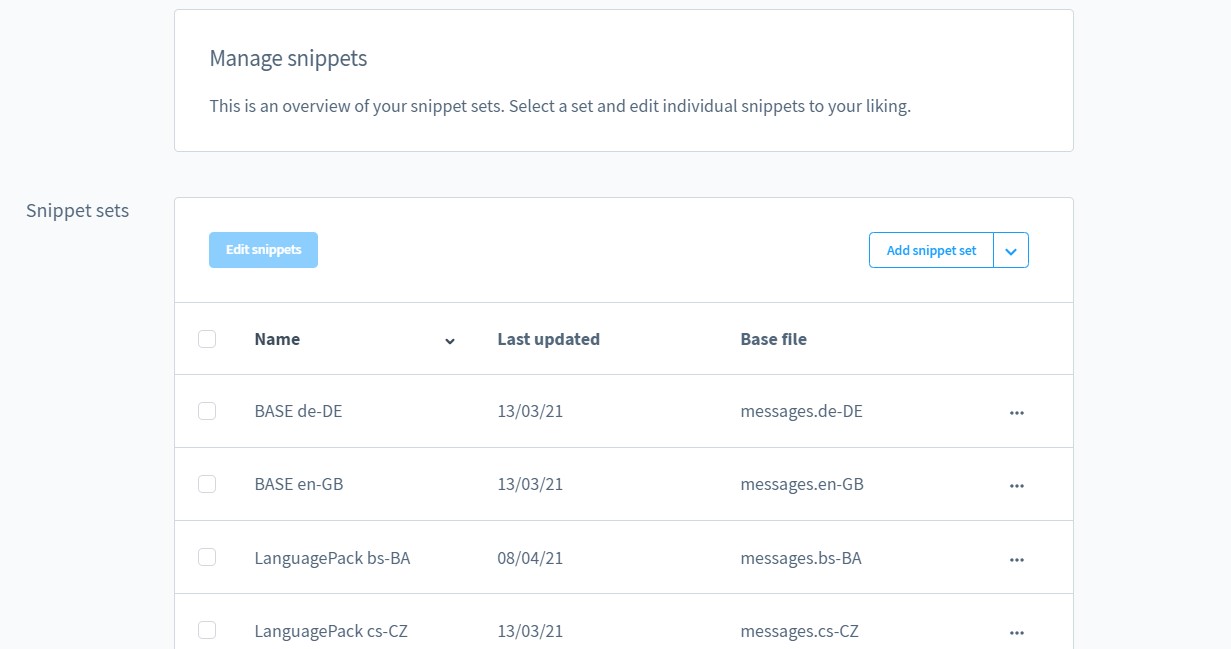
As you can see, all snippets are combined within sets. By default, you get the following two snippet sets in Shopware 6: BASE de_DE and BASE en_GB. As you’ve probably guessed already, they include the translations for German and English storefronts. Each set uses the respective base file: messages.de_DE and messages.en_GB. Shopware 6 uses them to store the standard values of the snippet sets. As a result, it is possible to reset the snippets at any moment. Also, it is not recommended to apply changes to these files. Otherwise, you won’t be able to reset the snippets to a basic value.
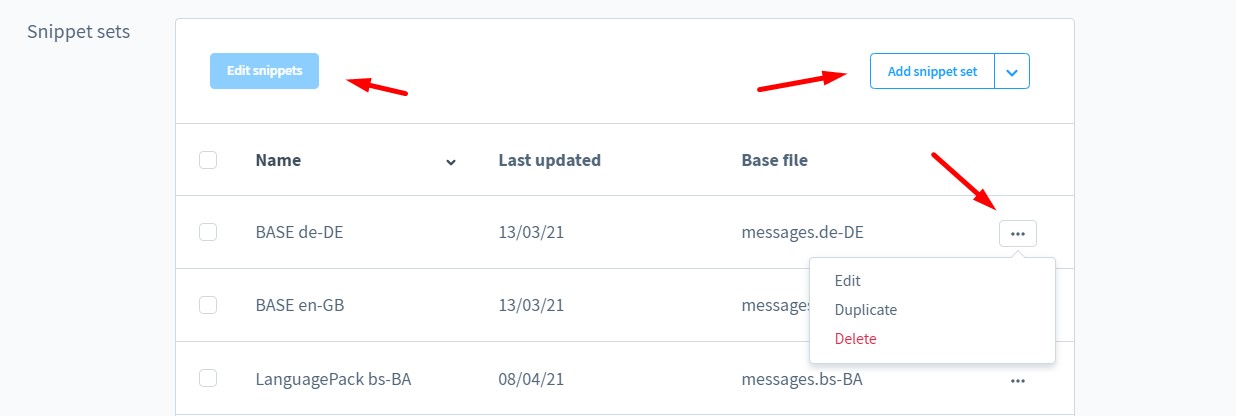
As usual, you can use the context menu to edit, duplicate, or delete snippet sets. As for the Edit snippets button, it lets you apply changes to the previously selected sets.
Editing Snippets in Shopware 6
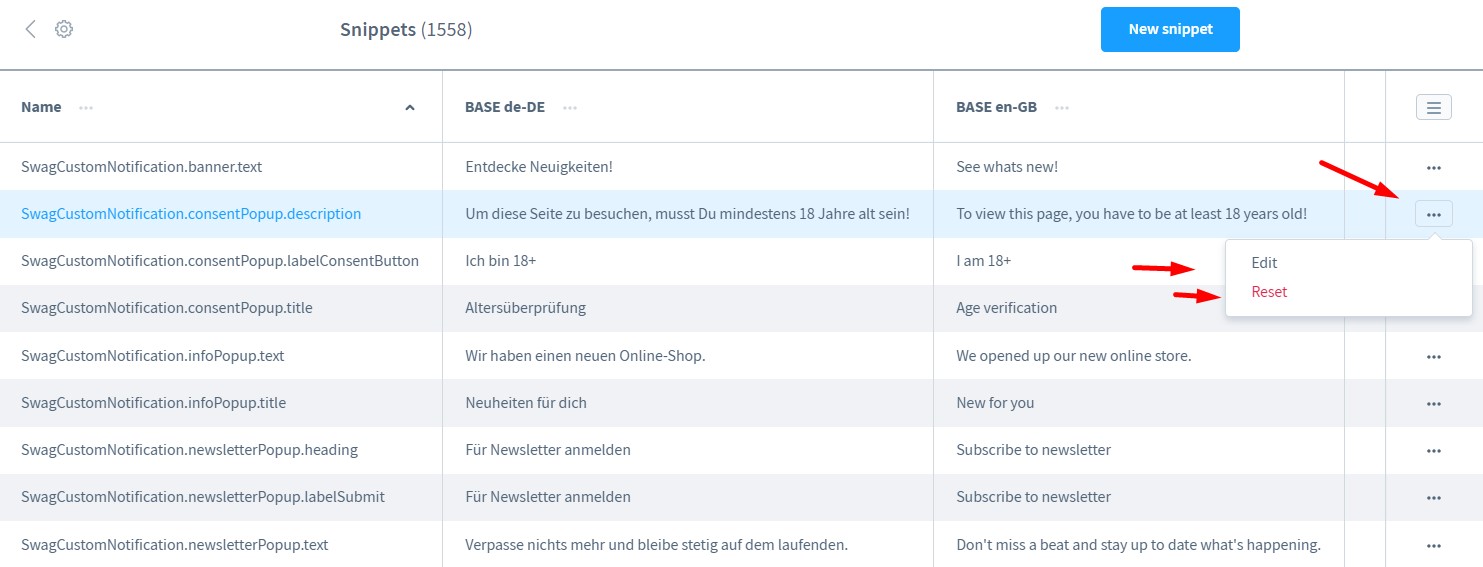
Shopware 6 lets you edit a snippet by clicking on the respective set. Note that it is possible to edit a snippet in several sets. For that, you need to select them with the help of the respective checkboxes. Next, click the Edit snippets button. You will see the following screen:
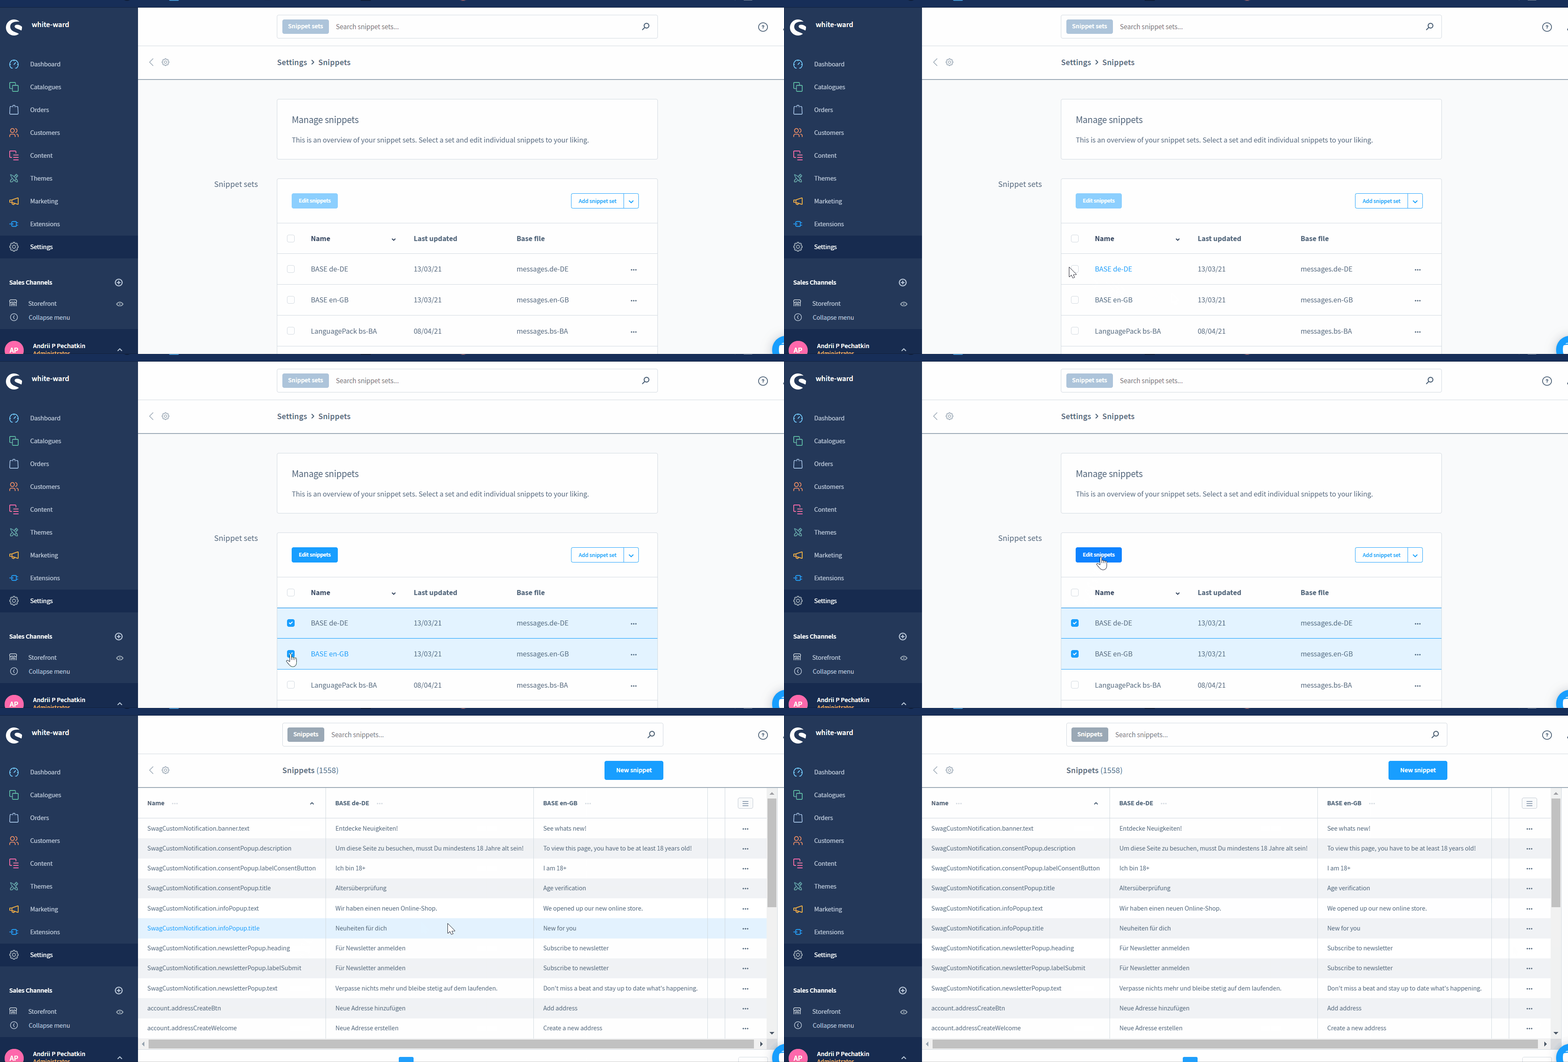
The grid contains all the snippets stored in the database table snippets for the selected sets. You can see snippet names and translations per set. The context menu lets you edit snippets or reset them to the default values stored in the base file.
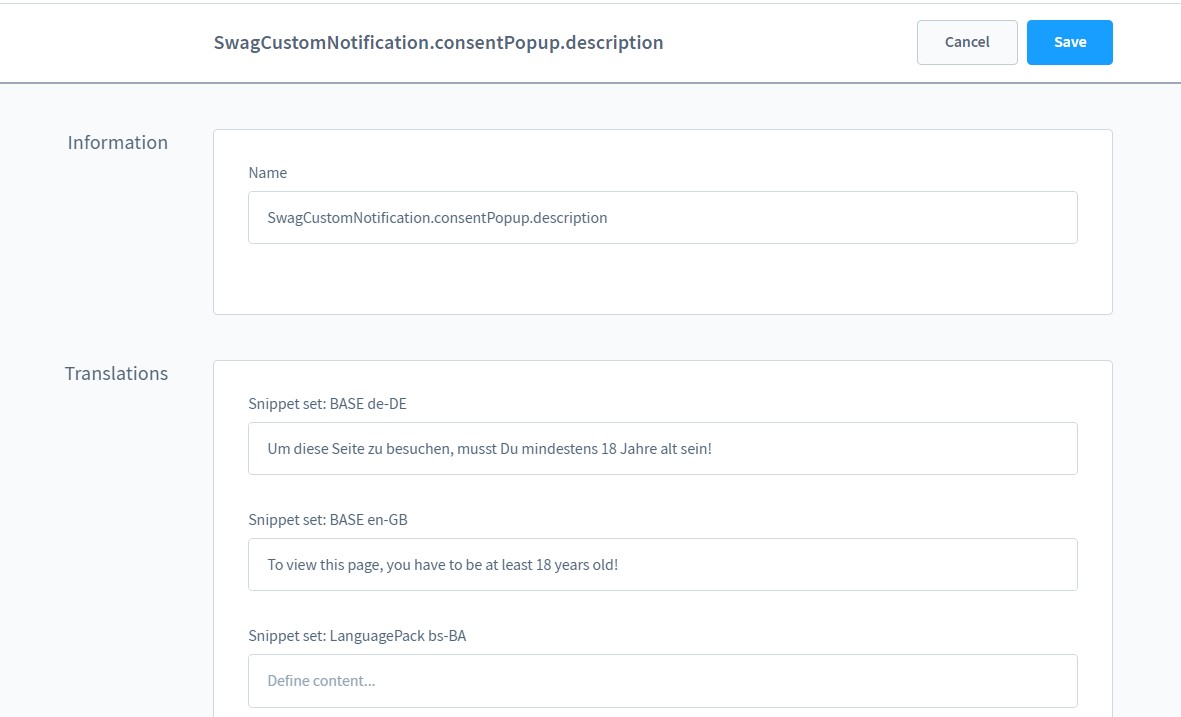
So, hit the edit option of the context menu. Shopware displays the variable name and translations. Now, you can edit snippet translations.
Creating a new snippet
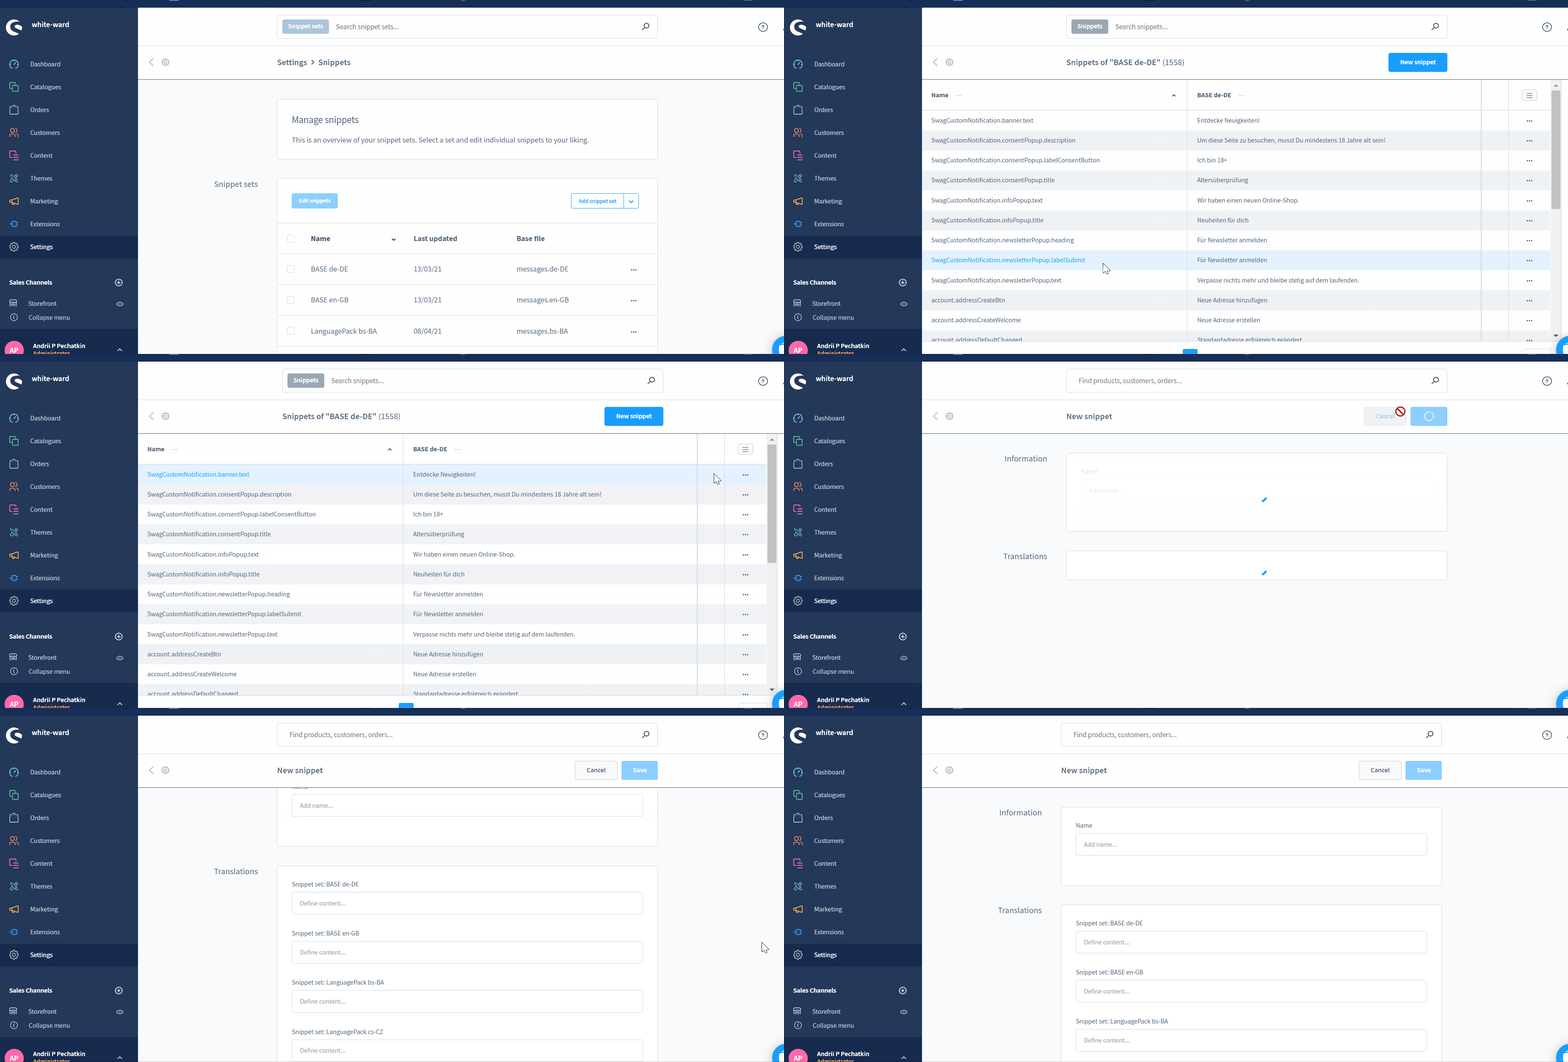
It is possible to create a new snippet within a snippet set. Note that each new value is created globally. Switch to a snippet set via its context menu or by clicking on its name.
Click the New Snippet button to create a new snippet.
The system transfers you to a new screen where you can specify the name of your new snippet – do not use spaces or special characters. After that, provide translations and save your new snippet.
Creating a new snippet set
To use snippets in a sales channel that differs from the standard, you need to create a custom snippet set. Thus, you also keep the standard set unchanged.
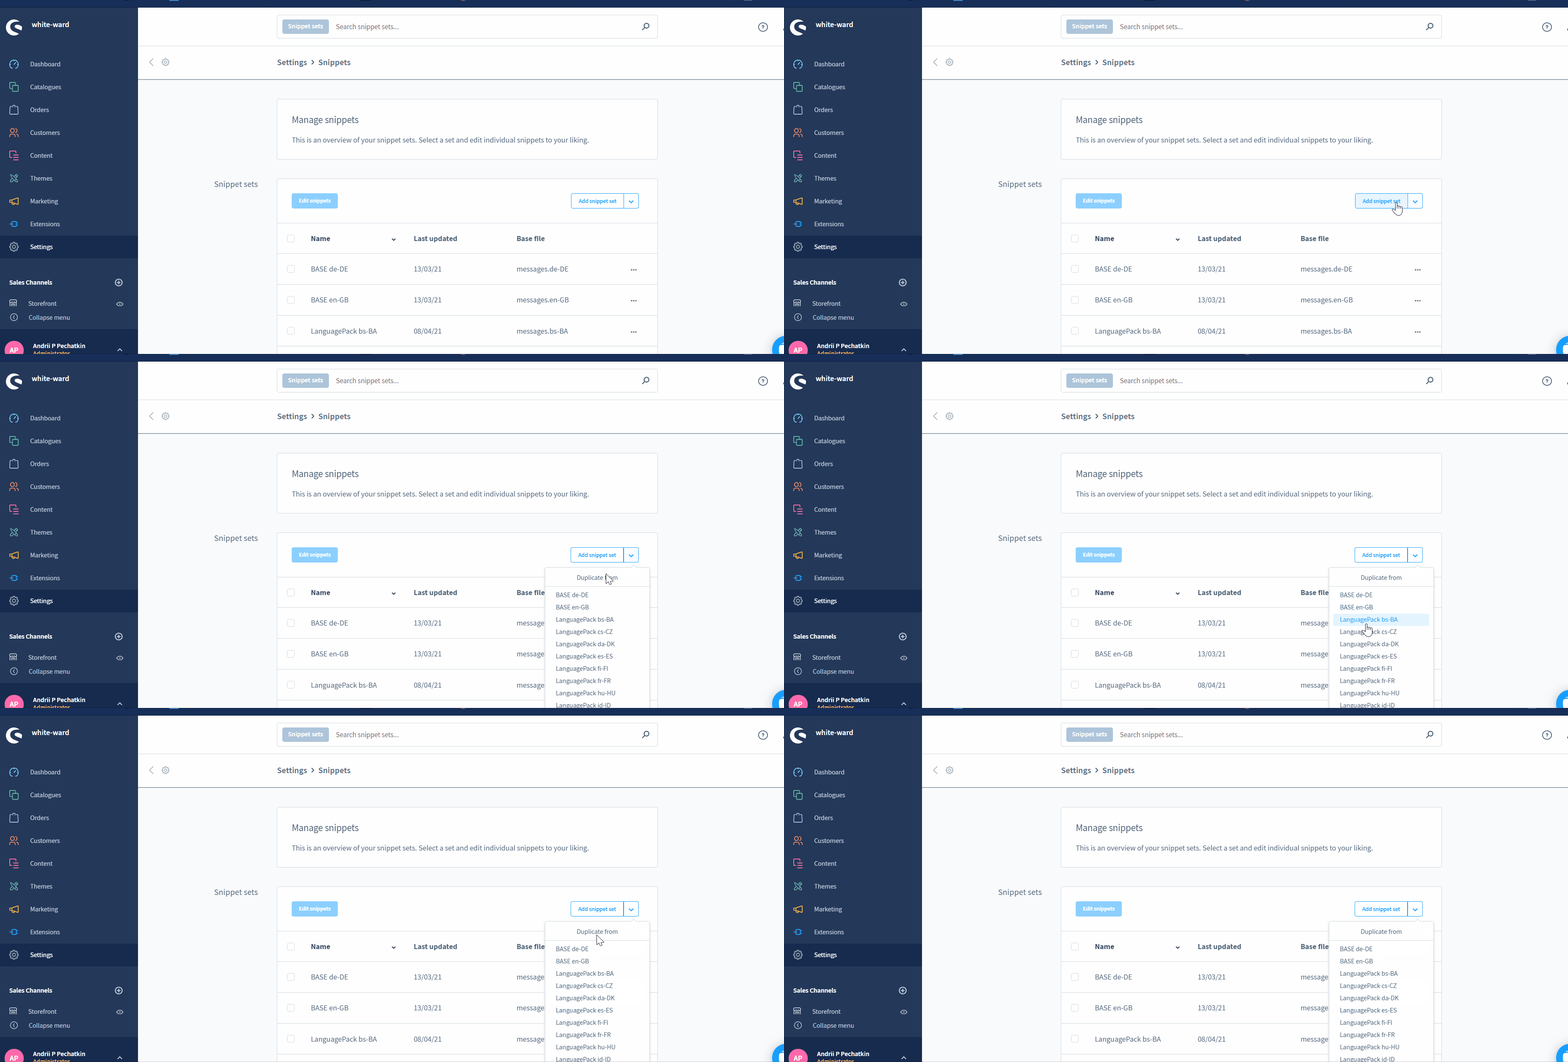
Hit the Add snippet set button to create a new collection of snippets. Shopware 6 lets you use a new base file as a background of your new set. Alternatively, it is possible to duplicate an already existing set.
Add
After you hit the Add snippet set button, Shopware 6 opens a form where you have to provide the relevant information: the name of your new set and its base file.

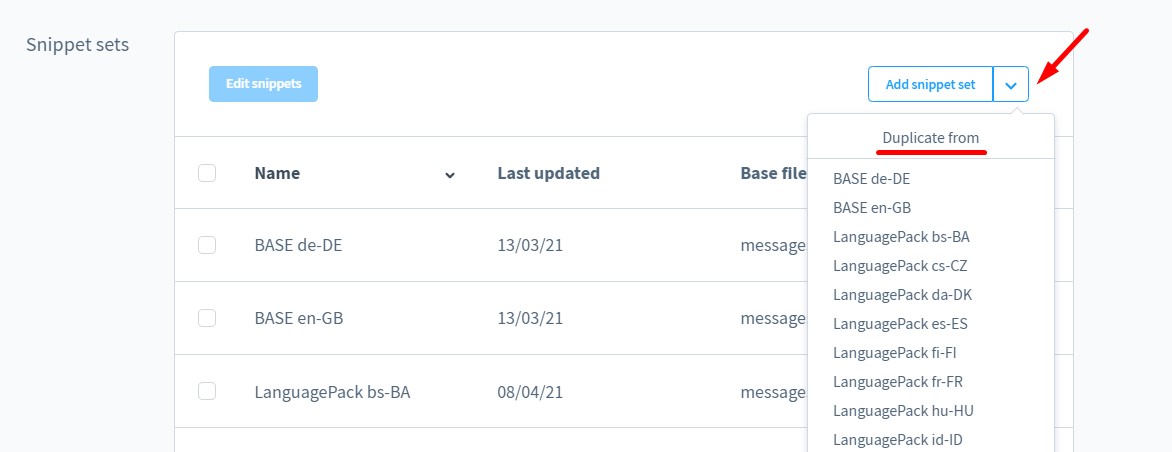
Duplicate
When duplicating a snippet set, you can choose from the existing sets. Shopware 6 generates a duplicate with the same name as the parent set but adding “copy” to its name. To change the new set name, proceed to the overview and edit the default title by double-clicking on the line of the snippet set.
Adding links
If you want to add a link to a text area, use the default HTML rules. In Shopware 6, you can use the a href attribute, like on many platforms:
<a href=”URL”>link text</a>
As a result, your built-in link may look as follows:
<a href=”https://firebearstudio.com/blog/exploring-shopware-getting-started-with-the-platform.html”>Exploring Shopware: Getting Started With The Platform</a>
How to import snippet sets to Shopware 6
Importing snippets and snippet sets to Shopware 6 may dramatically improve your migration to the platform. Instead of recreating everything manually, you may provide the necessary files as described above. However, there may be a necessity to transfer numerous other entities to your Shopware 6 website. With the help of our team, there is no need to recreate them manually. You can simplify and automate these processes. Contact our support for more details and try our Improved Import & Export Extension for Shopware. You can use it to import any entity to Shopware 6.
Shopware 6 Snippet Sets FAQ
How to find snippet sets in Shopware 6?
The Shopware 6 Shipping settings are situated under Settings -> Shop -> Snippets.
How to edit snippet sets in Shopware 6?
Go to Settings -> Shop -> Snippets and use the context menu to edit your snippet sets.
How to delete snippet sets in Shopware 6?
Go to Settings -> Shop -> Snippets and use the context menu to delete your snippet sets. Don’t delete the default sets since you won’t be able to restore the initial settings.
How to edit snippets in Shopware 6?
You can edit snippets in Shopware 6 within a snippet set. Go to Settings -> Shop -> Snippets, select snippet sets, and hit the Edit snippet button. Choose a snippet you want to edit, open its context menu, and choose the editing option. Apply changes.
How to delete snippets in Shopware 6?
Shopware 6 doesn’t let you delete snippets. You can only remove snippet sets.
 ‘
‘


