
Shopware 6 lets you create different admin roles with certain access levels. You may empower your employees with the ability to change anything in your Shopware administration. On the other hand, the system lets you create admin roles bound to several actions only. Below, you will find out how to configure the Users & Permissions screen in Shopware 6. We shed light on where it is situated, what information is listed there, and how to create admin roles in Shopware 6.

Note that we provide Shopware integration with external platforms. Contact our support for further information or try our Improved Import & Export Extension for Shopware. We can even import your products to Shopware 6.
Table of contents
How to Find Users & Permissions in Shopware 6
The Users & Permissions menu item is available straight in your Shopware administration under Settings -> System -> Users & Permissions.
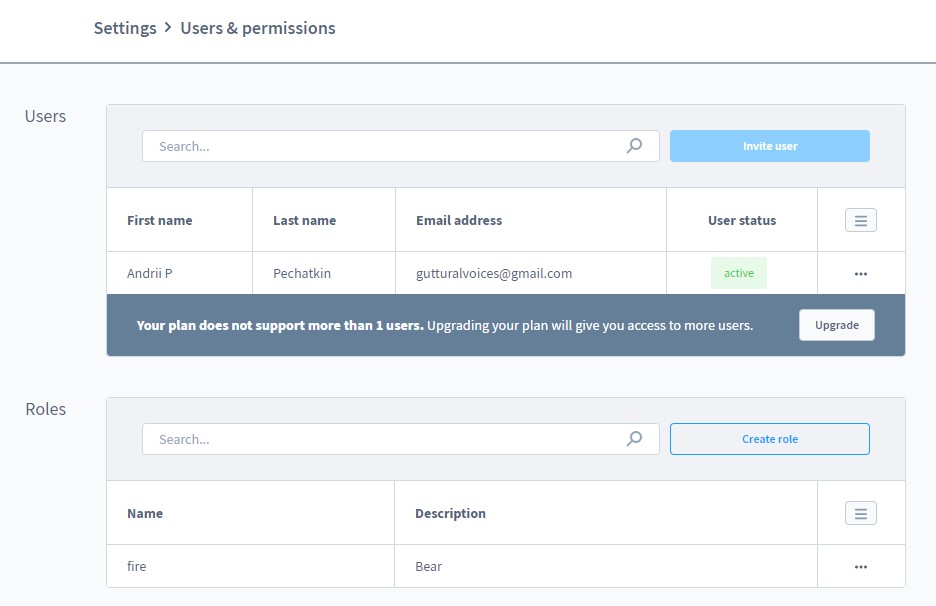
Here, you can find all users registered in the admin section of your e-commerce website as well as user roles already created. You can edit the existing users and roles as well as create new ones.
Use the context menu (select Edit) to display a structured overview of a user or role. You get the ability to create additional users and assign new or existing permissions to them.
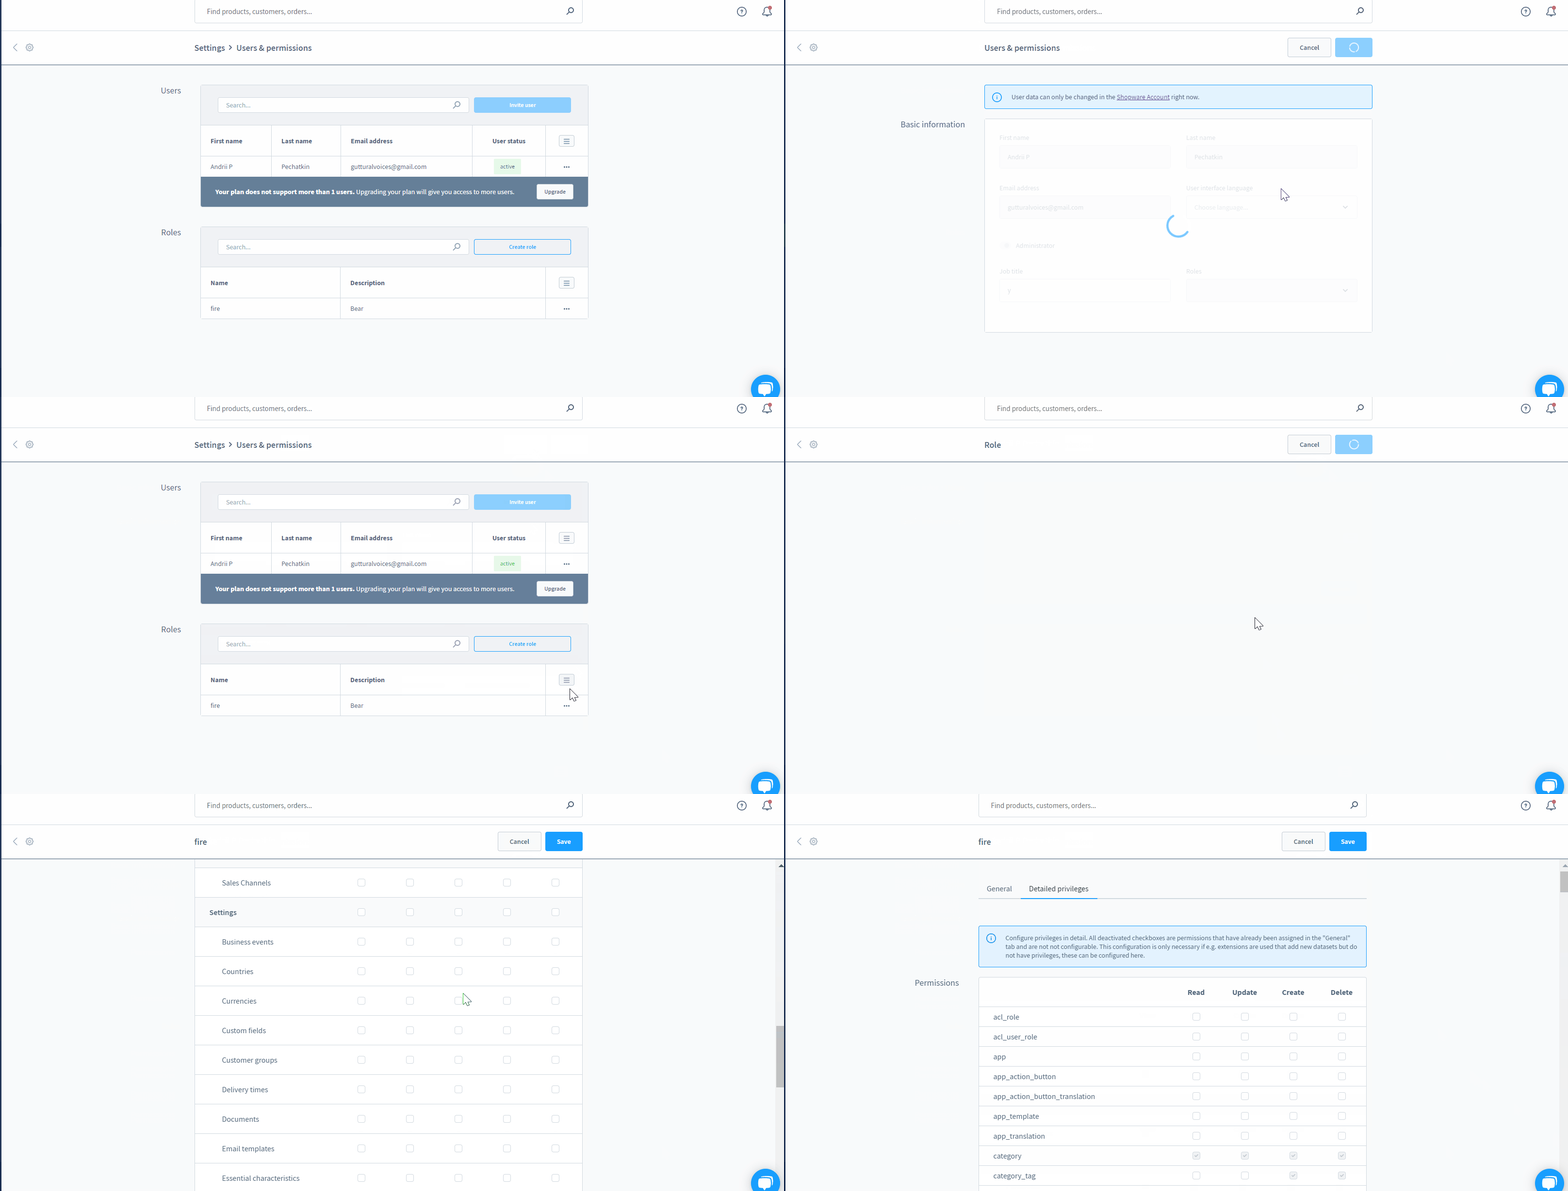
Let’s explore each section individually.
Users
The Users area contains an overview of all already created users. Note that their maximum number depends on the booked plan. In our case, there is only one administrator available. However, the system provides the ability to upgrade the existing plan, increasing the maximum number of employees. On any plan, you can edit and remove the existing users. More advanced plans let you add new users to your Shopware administration.
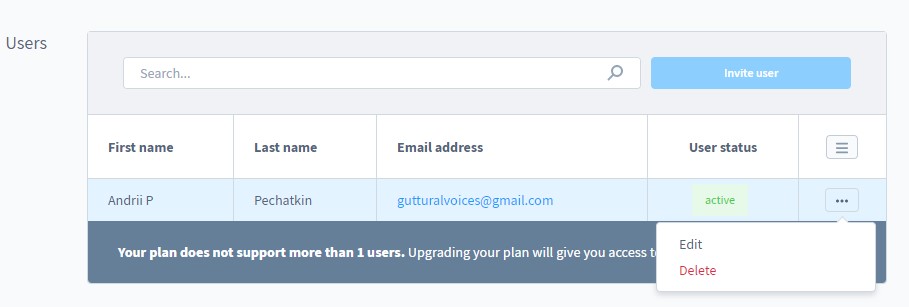
The user overview displays all created users with the most important information, such as name, role, and email. You can use the context menu on the right side of each grid record to edit or delete users. Depending on the plan, you may also see the Create new user button.
How to create a new user in Shopware 6
To create a new user in Shopware 6, click on the Create new user button situated next to the search field. It opens a new interface for providing data about a new user:
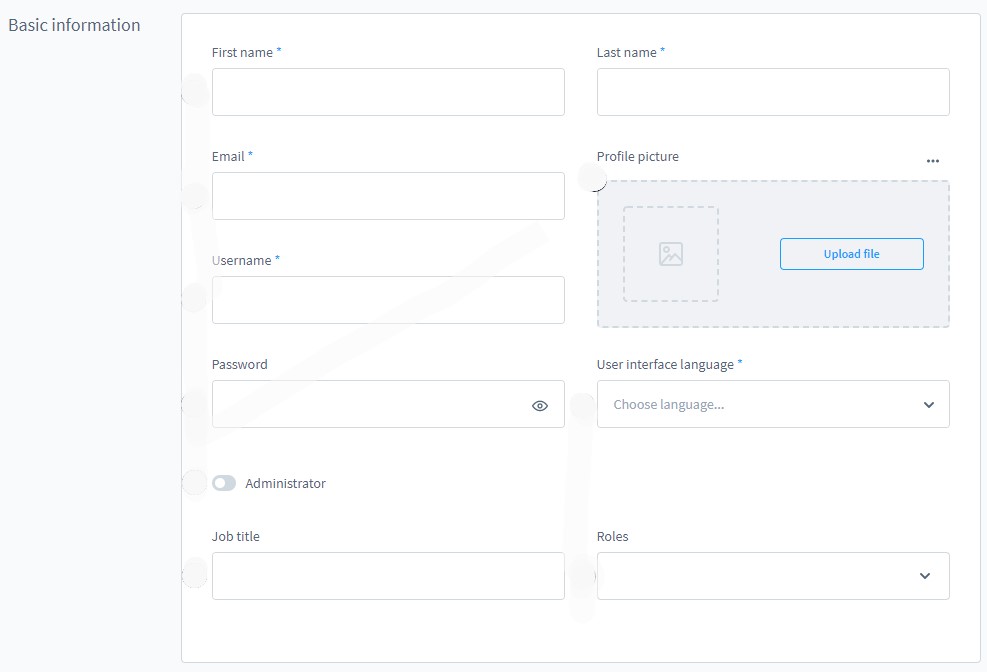
Specify the first/last name, add an email address, type a username, set a password, upload a profile picture, choose a user interface language, specify whether your new user is an administrator – has all available permissions (as a result, you cannot assign any roles to them), create an internal job title, and assign a role if the Admin status is not set for the user.
How to edit an existing user in Shopware 6
As we’ve already mentioned above, you can edit a user in Shopware 6 using the context menu.
Since our plan is limited to a single admin user, the corresponding screen looks as follows:
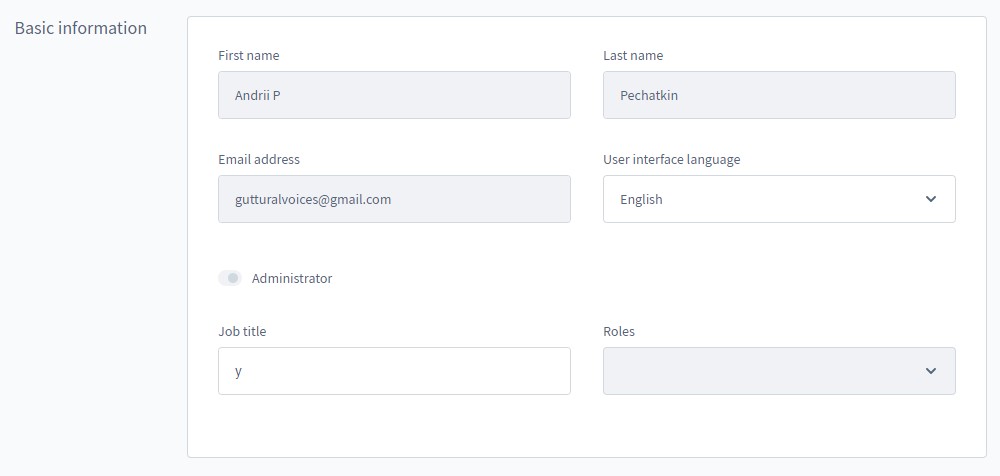
You cannot assign any roles here since the administrator status is associated with all backend permissions.
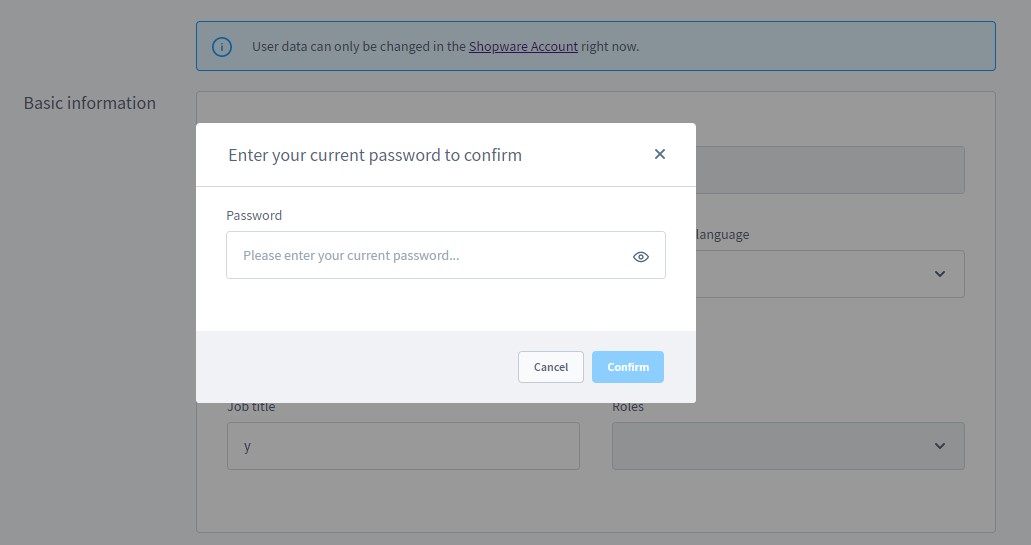
Also, note that applying any changes to an existing user requires password confirmation.
Roles
Now, let’s take a look at the Roles section. Shopware 6 provides the ability to create different user roles with access permissions for the various areas of your Shopware 6 administration.

You can overview all created roles in the grid, listed by name and description. There is a context menu next to each created role that lets you remove or edit the respective user. At the same time, there is the Create new role button that lets you open the interface for creating a new role.
How to create new user roles in Shopware 6
Click on the New role button to display the interface for creating new roles.
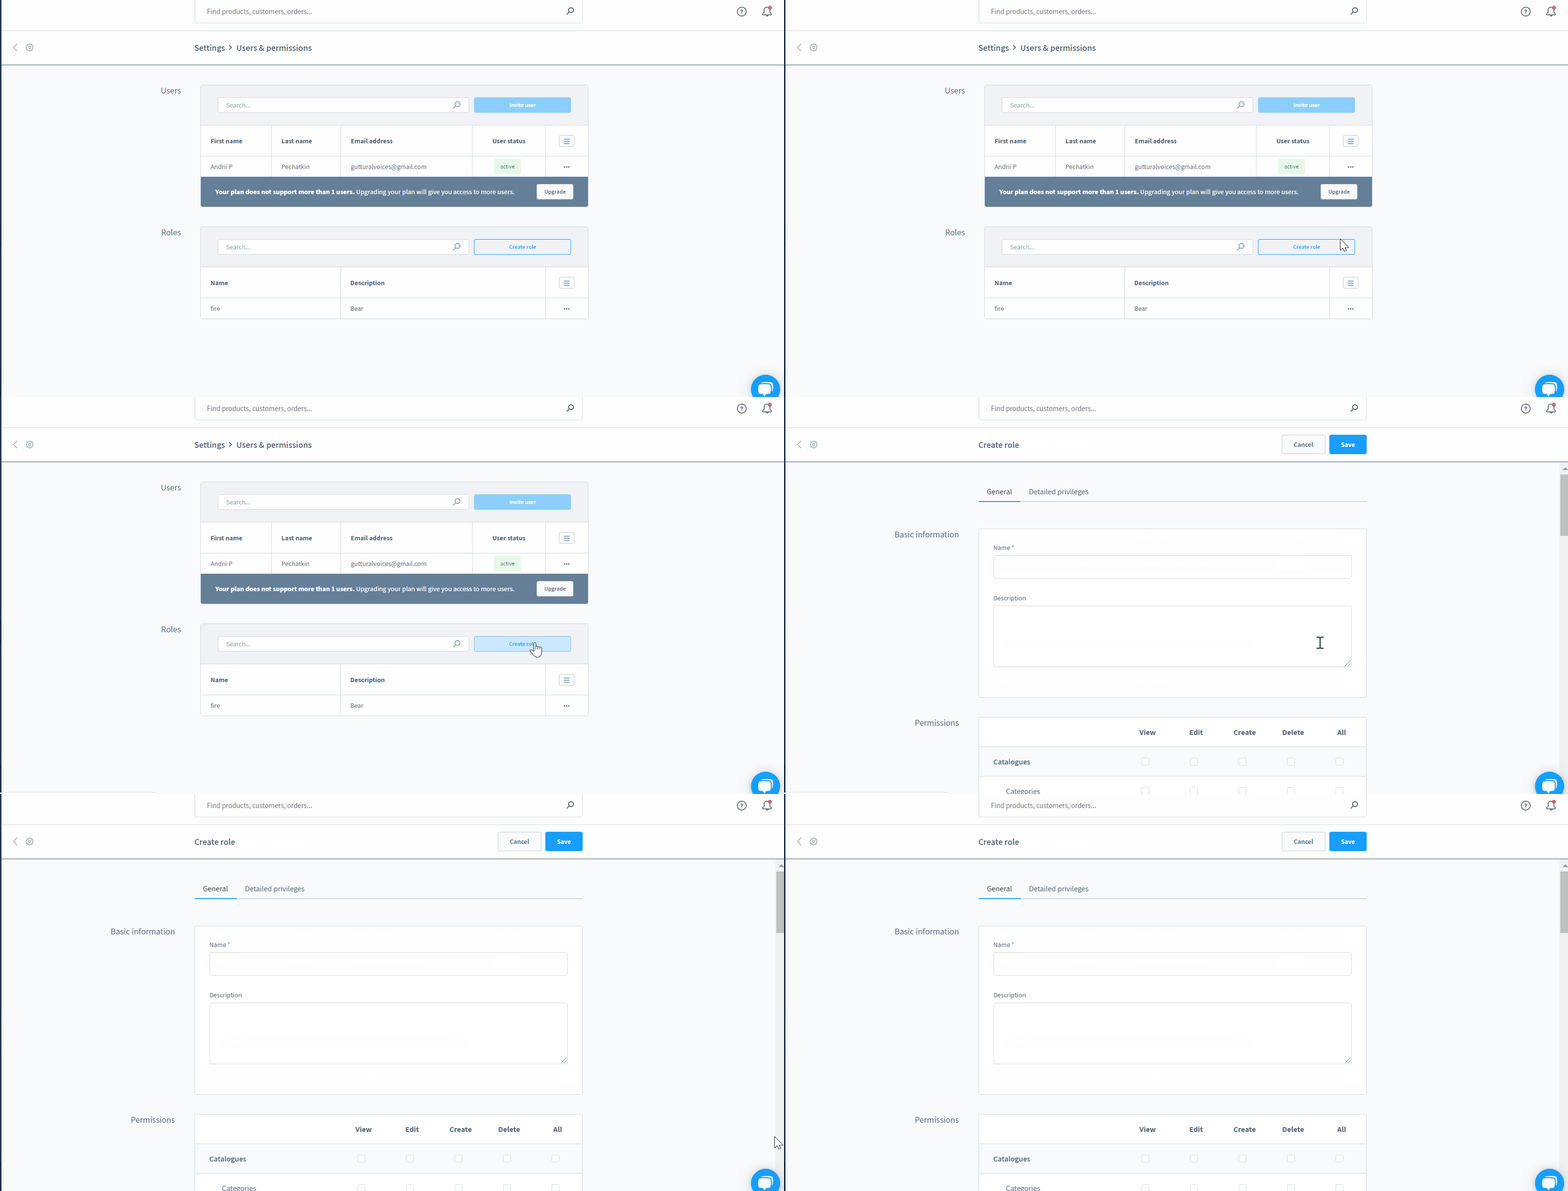
The interface is divided into the following tabs and sections:
- General:
- Basic information,
- Permissions,
- Additional permissions;
- Detailed privileges:
- Permissions,
- Additional permissions.
General
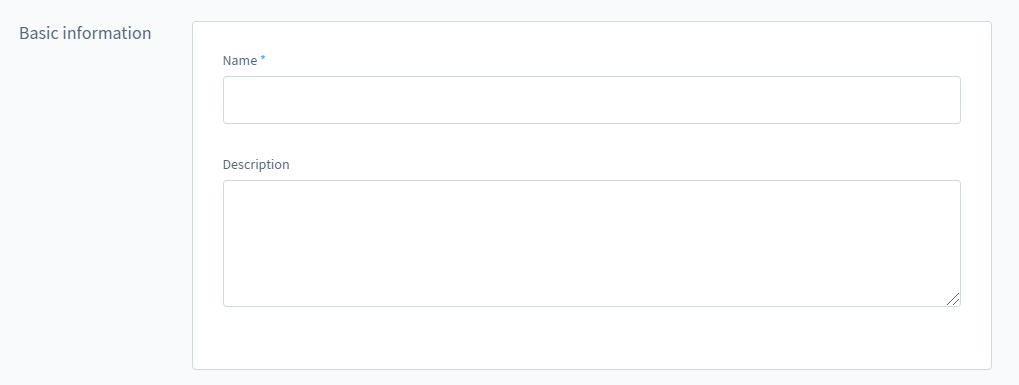
In the first section of the General tab, you enter the basic information about your new role. It consists of its title and description displayed in the role overview.
As for the permissions area, it is the heart of the roles since you specify permissions associated with the role here. All Shopware admin areas are listed here:
- Catalogs:
- Categories,
- Dynamic product groups,
- Landing pages,
- Manufacturers,
- Products,
- Properties,
- Reviews;
- Content:
- Media,
- Shopping Experiences,
- Themes;
- Customers:
- Customers;
- Marketing:
- Newsletter recipients,
- Promotions;
- Orders:
- Other:
- Sales Channels;
- Settings:
- Business events,
- Countries,
- Currencies,
- Custom fields,
- Customer groups,
- Delivery times,
- Documents,
- Email templates,
- Essential characteristics,
- Integrations,
- Languages,
- Number ranges,
- Payment methods,
- Rule builder,
- Salutations,
- Scale units,
- Search,
- Shipping,
- Snippets,
- Tax,
- Users & permissions.
Shopware 6 lets you assign permissions for the complete area by activating the checkboxes in the line of the area in the All column. On the other hand, you can configure each subarea individually.
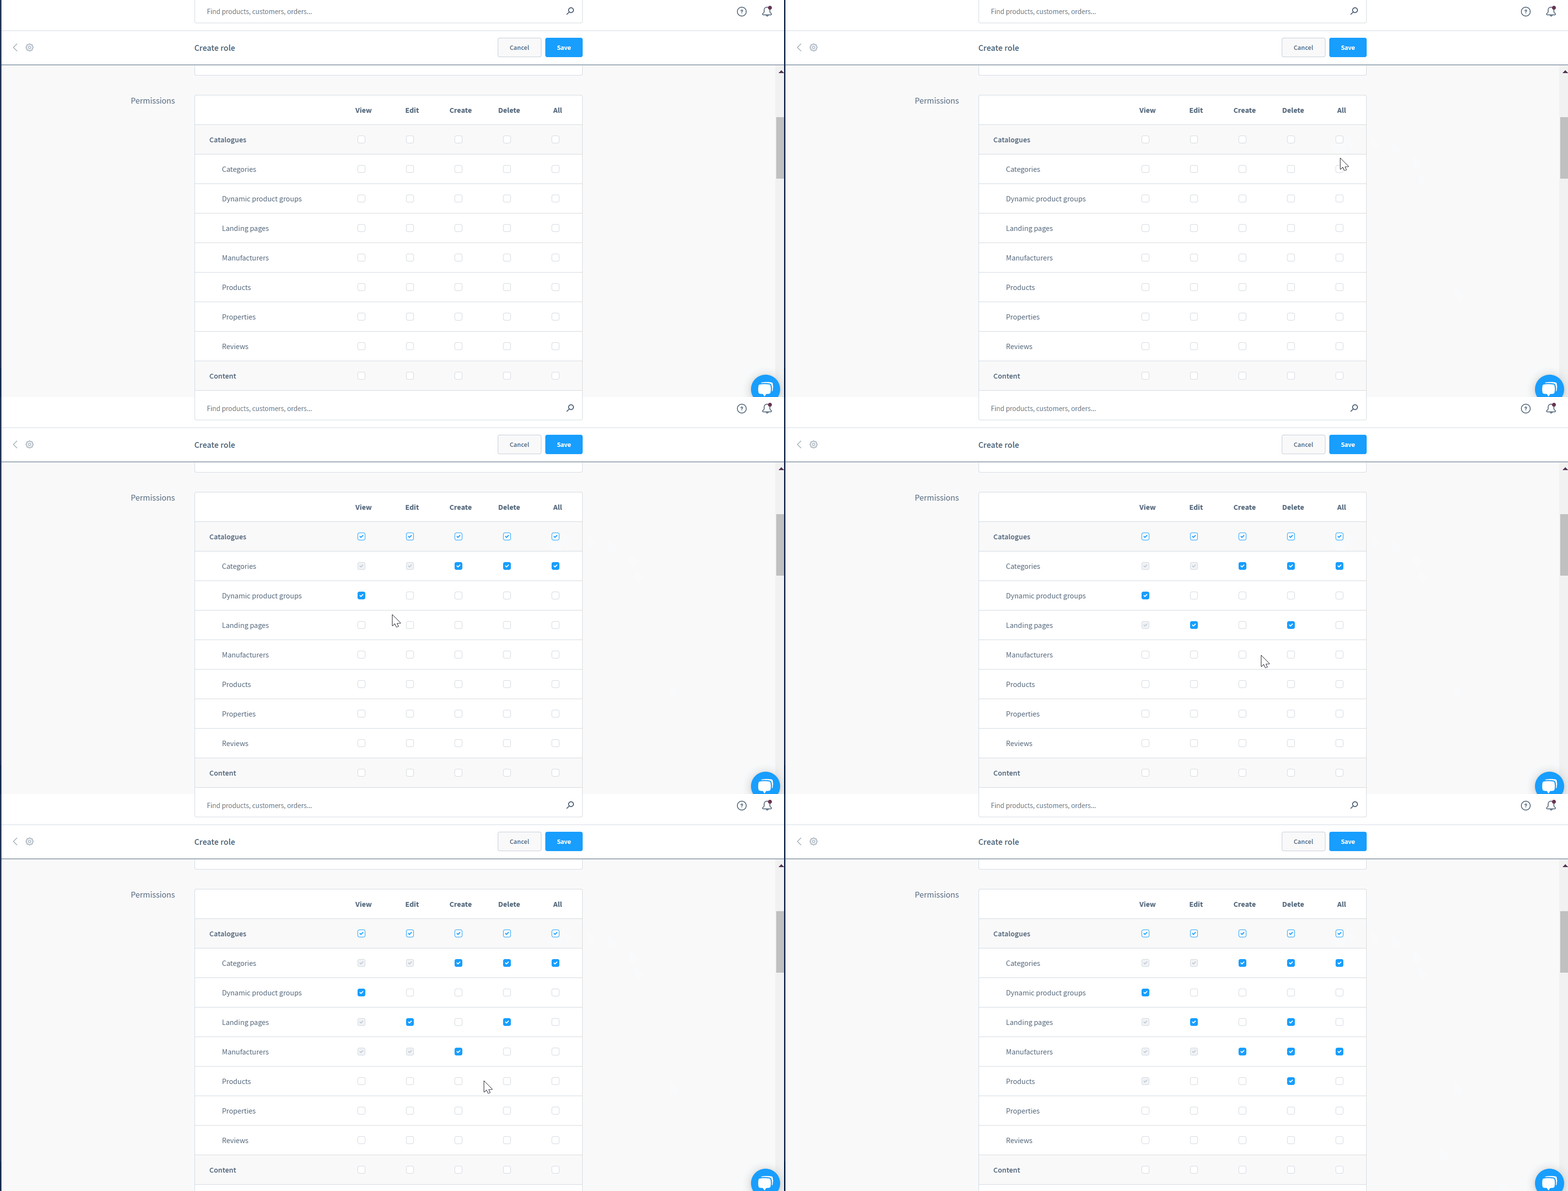
Let’s explain the main rights you can assign to the role:
- View – a user can see the configurations but cannot change them;
- Edit – a user can see and edit the configurations;
- Create – a user can create entities like products and categories but cannot delete them;
- Delete – a user can remove entities such as products and categories;
- All – activate this checkbox to provide full access to the respective area.
The additional permissions section contains general authorizations that cannot be assigned to a direct area:
- Settings:
- Basic configuration,
- Import/Export;
- User:
- Update own profile;
- Orders:
- Create credit items.
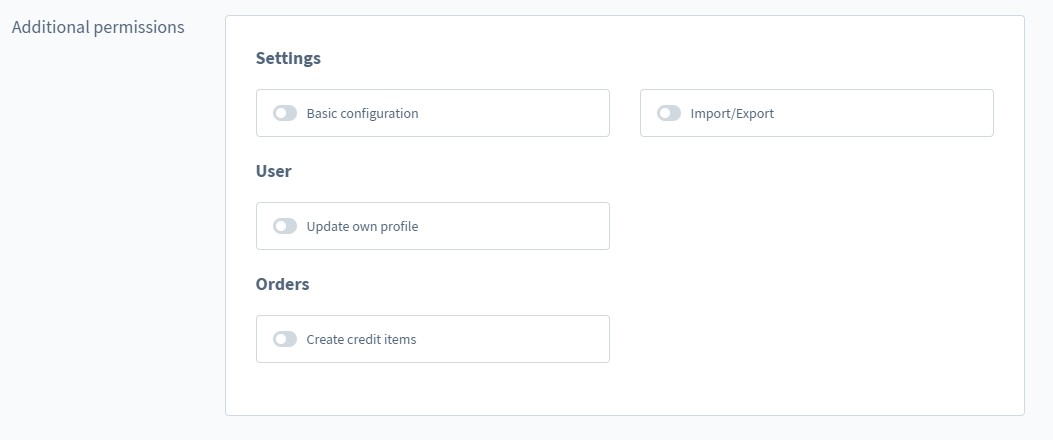
Since you assign the right to edit in these areas generally, no distinction is made between viewing, editing, creating and deleting.
Depending on the software version and plan, you may have different settings here:
- Basic configurations – the ability to change basic settings from the Shopware admin area:
- Settings -> Shop – Addresses, Login/Registration, Products, SEO, Sitemap, Master Data, and Shopping Cart,
- Settings -> System – Mailer and Shopware Account;
- Run Updates – the ability to install updates under Settings -> System -> Shopware Update;
- Maintain plugins – the ability to change settings under Settings -> System -> Plugins as well as install, uninstall, activate, and deactivate extensions;
- Logging – access to system logs under Settings -> System -> Logging;
- Clear cache – the ability to change settings under Settings -> System -> Caches & Indexes;
- Import/Export – the ability to import and export data under Settings -> Shop -> Import/Export as well as manage import/export profiles;
- Update own profile – the ability to apply changes to the user’s own profile;
- Create discounts – the ability to create vouchers in the orders module.
Detailed privileges
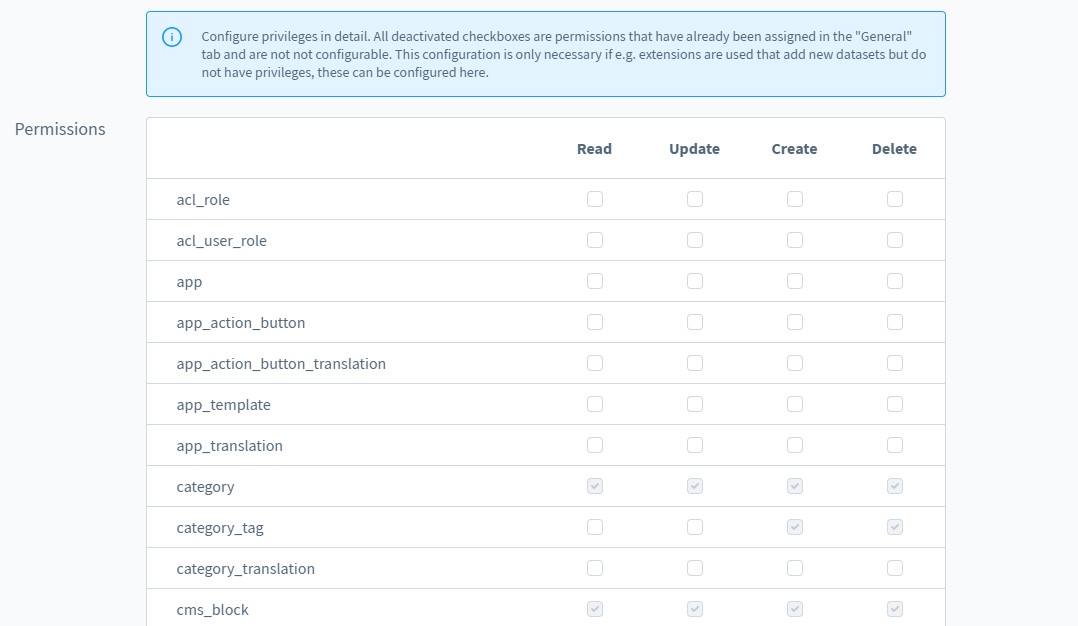
Although this tab empowers you to configure permissions in detail, it is only necessary for exceptional situations. Here, you can find all permissions listed under their technical name. Assign the rights to read, write, create, and delete per function.
Error message
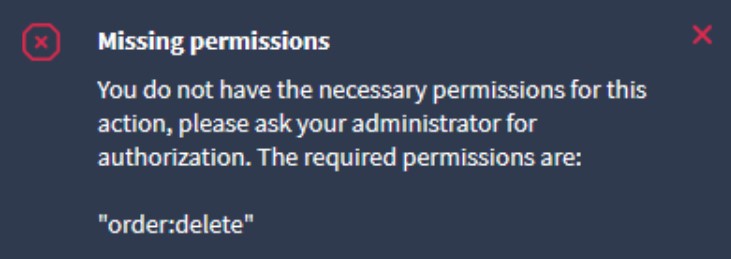
If a user has no permission to perform an action but still does that, an error message displays, notifying about authorizations that are missing. Next, you can use the Detailed privileges tab to get the necessary rights.
How to Import User Roles & Permissions to Shopware 6
Our team lets you simplify and automate various processes associated with data transfers to Shopware 6, including integrations with third-party systems. Contact our support for more details and try our Improved Import & Export Extension for Shopware. You can use it to import any entities to Shopware 6 from any external platform, including admin users and customers. Please, consult our specialists before using the module for transferring user roles and permissions to Shopware 6.


