

Now, let’s talk about Shopware 6 customers. Both system’s admin and storefront sections provide broad possibilities here. In the following article, we shed light on where to find all the registered buyers, how to view/edit your clients, and how to add Shopware 6 customers. You will find out how to manage general information about your clients, including their addresses and orders. The system allows for a comfortable administration of your client base. You get a view of all the relevant data and various possibilities related to editing. Furthermore, you can make it even more simple with the Improved Import & Export extension. We also describe this process below.

Note that we provide Shopware integration with external platforms. Contact our support for further information or try our Improved Import & Export Extension for Shopware. We can even import your products to Shopware 6.
Get Improved Import & Export for Shopware by Firebear Studio
Explore Shopware

Table of contents
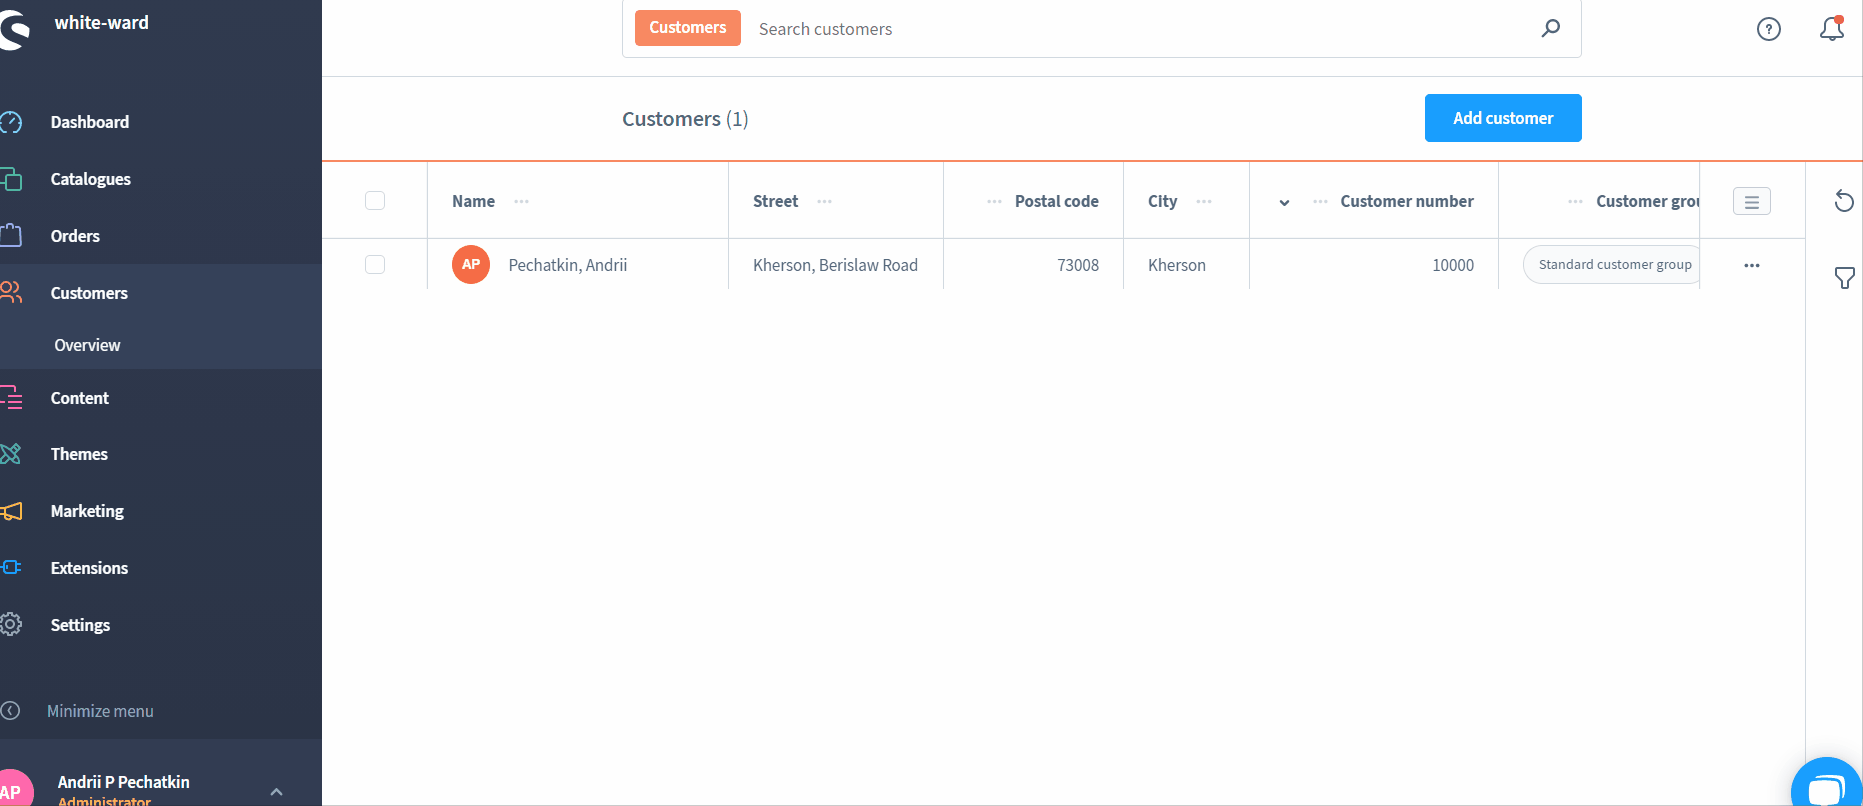
Shopware 6 Customer Overview
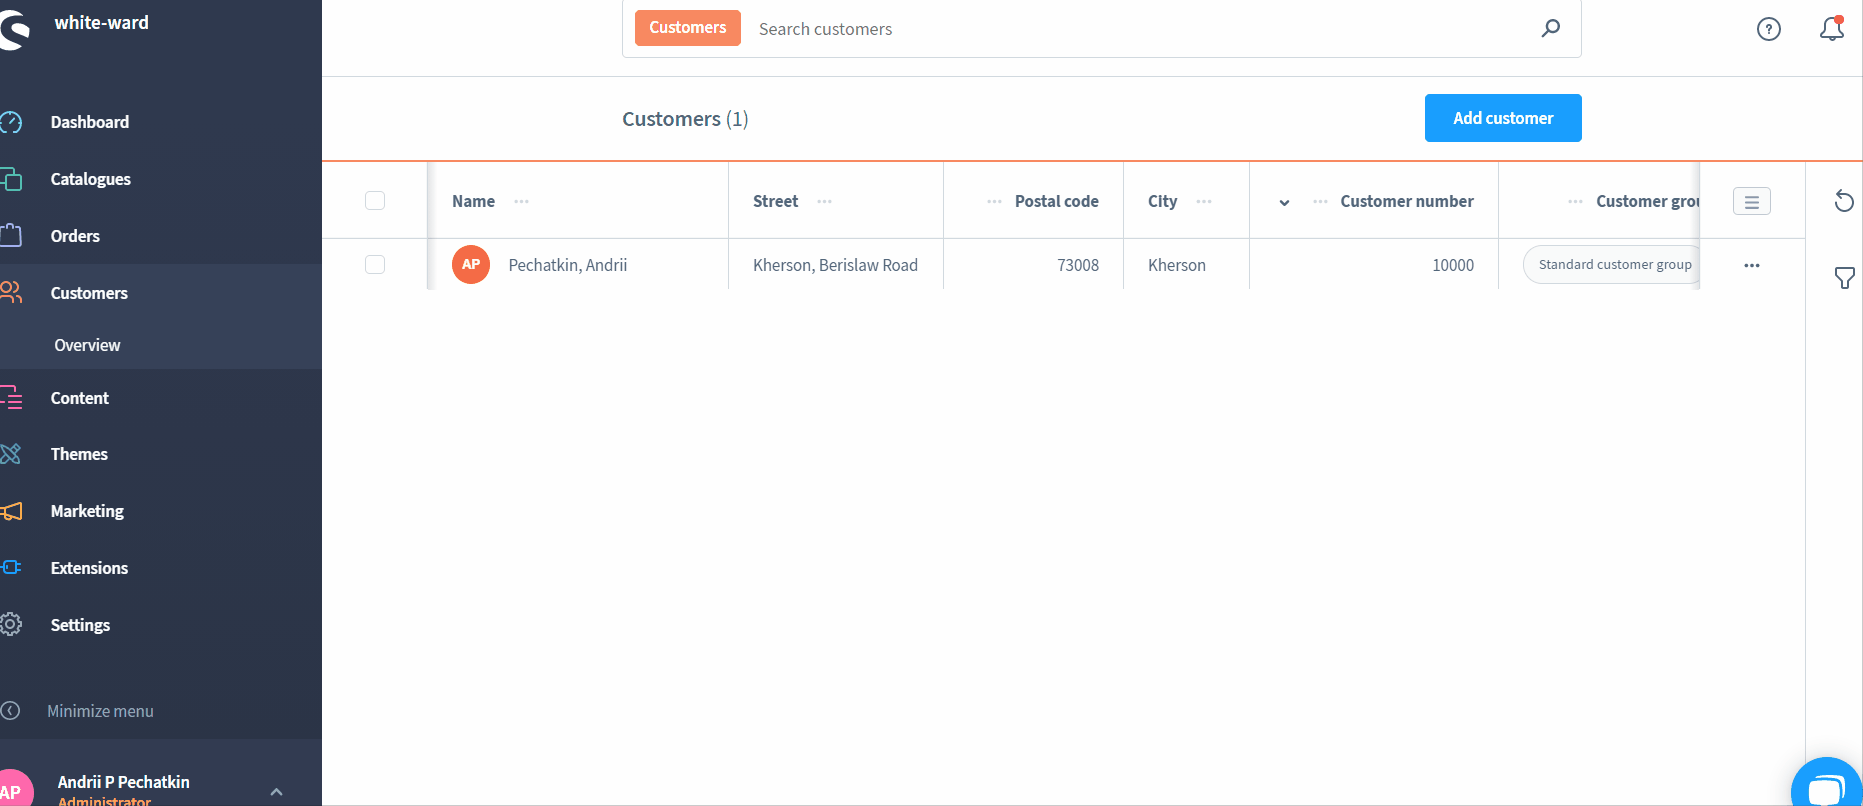
You can find the Shopware customer overview screen in your main menu. Open the Customers section and proceed to its Overview part.
This part of the Shopware 6 administration enables you to manage the existing customer base as well as create new client records. In addition to the direct view of all your buyers, Shopware 6 also offers the following opportunities:
- Search for customers;
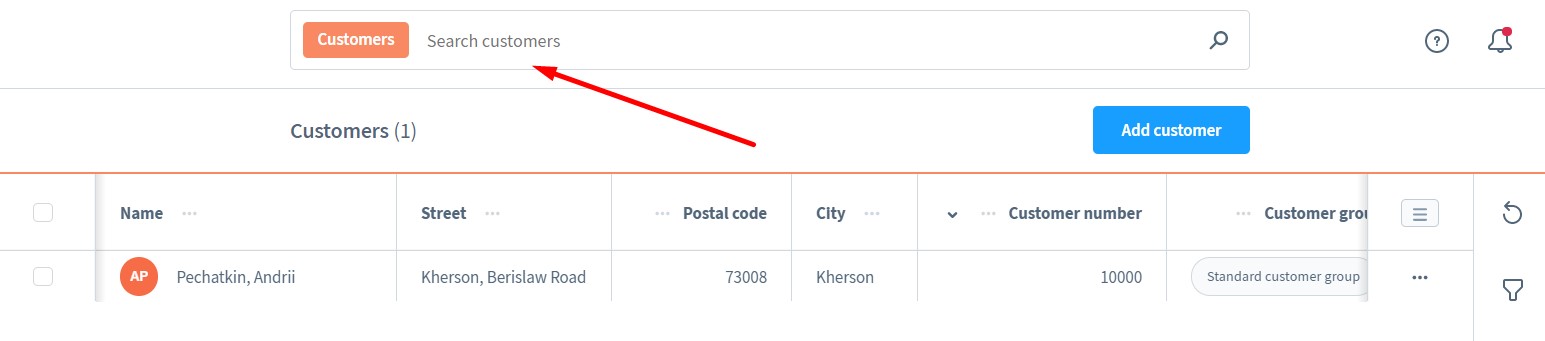
- Proceed to the detailed view;
- Edit customer records;
- Duplicate registered clients;
- Delete customers.


Besides, it is possible to add a new customer to your database. Hit the Add customer button and fill in the form. We describe this process in more detail below. Also, on the right side of the screen, you can see tools for updating the overview and narrowing it down.

Grid editing is available upon clicking the hamburger menu icon. The system lets you show/hide columns as well as rearrange them. You can also switch to the compact view as well as enable/disable image previews.
As for the grid columns, they include Customer ID which contains internally assigned customer numbers as well as various contact details, such as name, address, and email. Note that Shopware 6 displays the customer’s standard billing address.
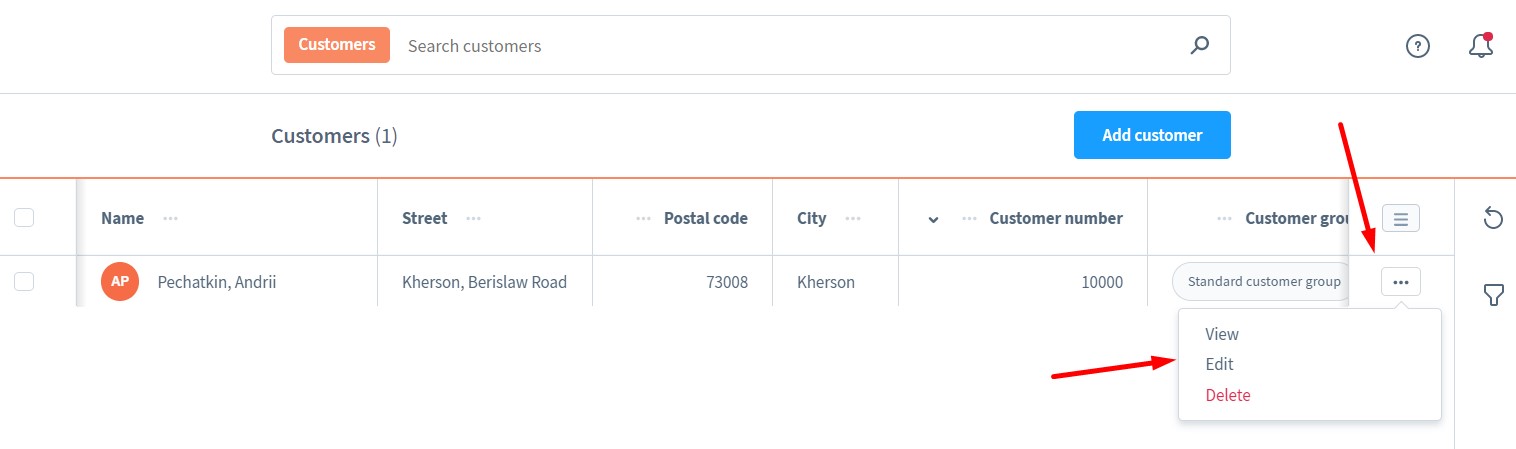
How to View Customers in Shopware 6
You can view a Shopware 6 customers as follows:
- Go to the Customer Overview screen;
- Open the context menu for the customer you want to view;
- Choose View.
The detailed overview contains all the data about your registered client. The information is divided into the following three tabs:
- General;
- Addresses;
- Order.
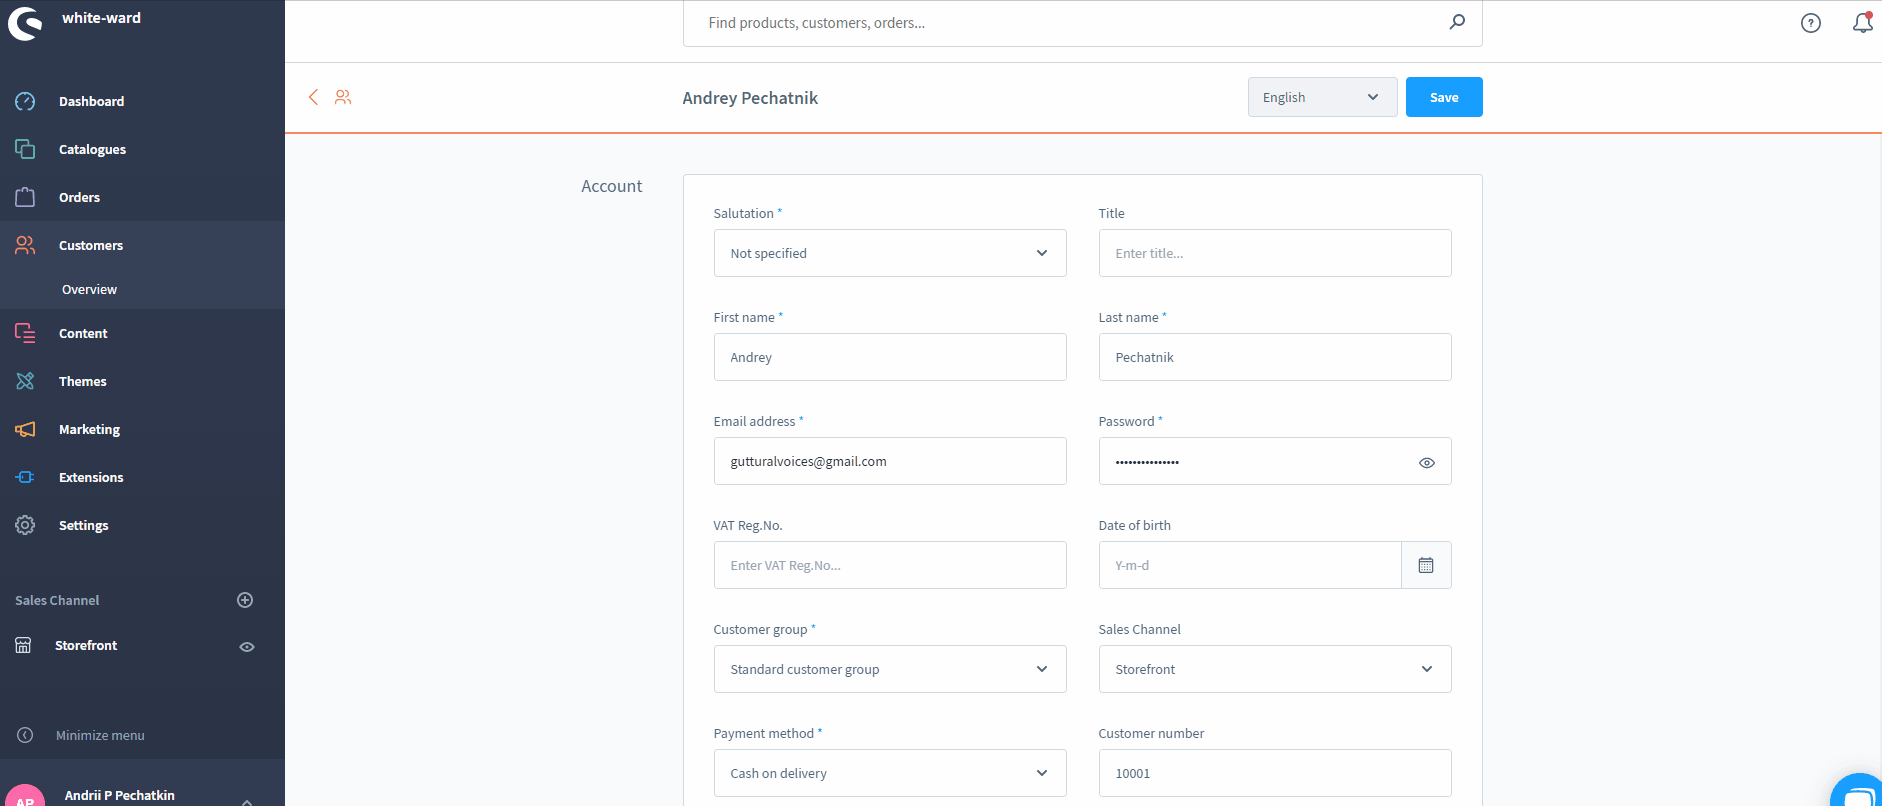
General
This tab reveals a more detailed overview of your customer. It is divided into two sections: Account and Addresses. The first one shows the customer name and email as well as the following information:
- Customer group;
- Default payment method;
- Account status;
- Language;
- Affiliate code;
- Campaign code;
- Customer number;
- Sales Channel;
- Last login;
- Turnover;
- Order value;
- Date of birth.

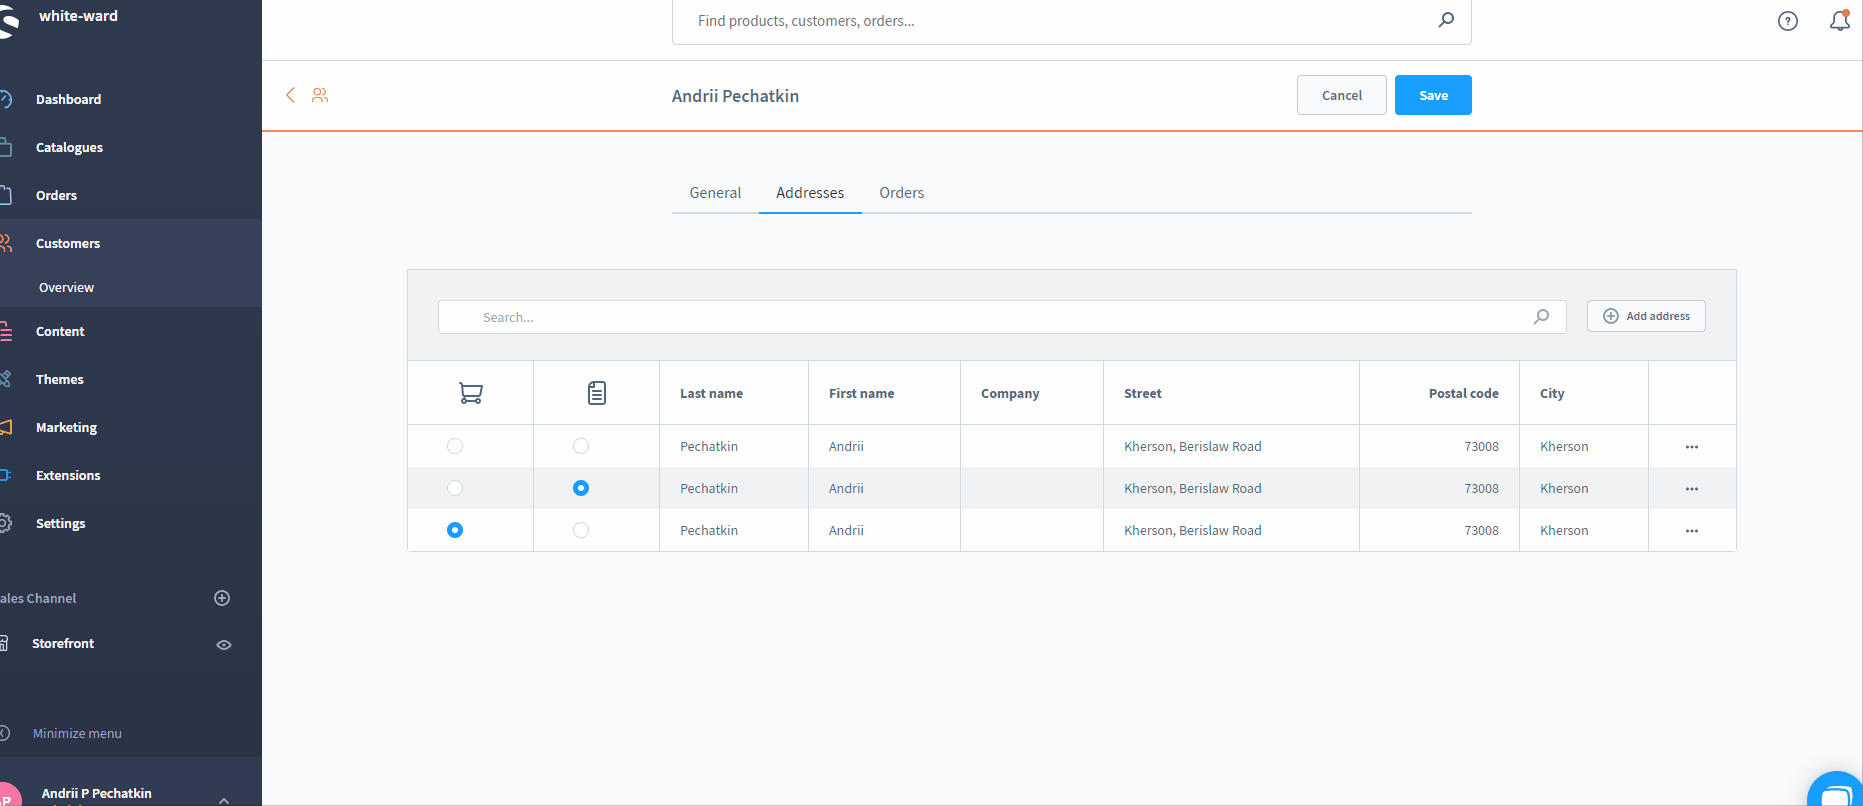
The Addresses section looks as follows:

Addresses
As for the addresses tab, it contains all the addresses associated with your customer.
Similar to the customer overview, you can find structured information about the customer’s addresses here.

You can select the standard shipping and billing addresses as well as add new ones here. Besides, there is a search section if the selection is too big.

With the help of the context menu, you can edit, duplicate, or delete addresses. It also lets you set the standard shipping and billing contact details.

Orders
Under the orders tab, you can find all orders associated with your customer. The section displays relevant information including the order number, amount, status, and date. Besides, there is a search function above the grid.
As for the context menu, it lets you open the selected order to get more information.

How to Edit Customers in Shopware 6
You can edit a Shopware 6 customers as follows:
- Go to the Customer Overview screen;
- Open the context menu for the customer you want to update;
- Choose Edit.

The edit mode provides you with the same three tabs: General, Addresses, and Orders.
You can update almost all the information from the Account section:
- Salutation;
- Title;
- First name;
- Last name;
- Company;
- VAT Reg.No.;
- Email;
- Password;
- Tags.

Besides, you can select a customer group and default payment method, enable/disable the account, and choose its language.

As for editing the existing addresses, the corresponding link transfers you to the Addresses tab:

Configuring standard delivery and billing addresses looks as follows:
Or you can use the context menu:

Adding or editing addresses looks as follows:

You can specify data for the following fields:
- Company;
- Department;
- Salutation;
- Title;
- First name;
- Last name;
- Street;
- Additional address line 1;
- Additional address line 2;
- Postal code;
- City;
- Country;
- Phone number.
It is possible to set the address you are editing as a default billing or/and shipping address.
How to Create A Customer in Shopware 6
You can create customers right in the Shopware 6 administrations. It is a useful functionality if you want to work on behalf of your business partners. Register a new customer account and create orders from the backend section of your e-commerce storefront.
Go to the Customer Overview screen and hit the Add customer button.

Specify common entries for the newly created customer. Add account data and addresses. You can also assign the customer to one of your sales channels, add tags, and configure other parameters we’ve already discussed above. Note that the red-marked fields are mandatory.
How to Import Customers to Shopware 6
As we’ve mentioned above, our team lets you simplify and automate various routine processes associated with your Shopware 6 backend management, and its Customers section is not an exception. Contact our support for more details and try our Improved Import & Export Extension for Shopware. You can use it to import any entities to Shopware 6, including your registered clients. Please, consult our specialists before using the module for transferring customers to Shopware 6. The extension will help you avoid the necessity to create customer accounts manually if you move from another e-commerce website. Instead, you will import all the necessary data, creating customers automatically. The opposite process is possible as well. For instance, you can export customer data to a CRM system.
Shopware 6 Essentials FAQ
How to create a Shopware ID?
Creating a ShopwareID is the initial step in your e-commerce journey within the ecosystem. The platform provides it along with a Shopware account. You create the latter upon registration.
How to create a Shopware account?
To create a Shopware account, go to a registration page. Hit the Register Now link and provide the required data. The system will send a confirmation message with a link to your email address.
What is Shopware master data?
You provide information while creating a Shopware account. This information is called master data. It combines such contact details and company facts as an address, email, phone, company name, etc.
How to add a shop in Shopware?
You can create a new shop in Shopware 6 in your merchant area. A link that initiates a store creation is situated on the start screen’s right section. Choose between a cloud storefront or an on-premise installation, specify information about your new shop, and save changes.
How to add a payment method to your Shopware account?
A payment method in Shopware 6 can be configured under Basic Information -> Accounting. Choose between PayPal, credit card, or direct debit.
How to create a deposit in Shopware?
Now, use your payment method to create a deposit for purchasing extensions. Go to Merchant Area -> Shops and specify a shop to provide funds to. Click Open Account Details and add funds.
How to purchase Shopware extensions?
After the deposit is placed, it is possible to purchase Shopware 6 extensions and themes on the Shopware Marketplace or in the Plugin Manager. Choose a tool you want to buy and complete the purchase.
How to get support in Shopware?
Shopware lets you send inquiries regarding your account or license to info@shopware.com. As for accounting and financial services, the corresponding source of help is available under financial.services@shopware.com. Alternatively, you get help by these phone numbers respectively: +49 2555 9288 50 and +49 2555 9288 510.
How to migrate to Shopware 6?
Use the Improved Import & Export tool to run the migration to your new Shopware 6 website. The module provides the ability to move core entities to Shopware 6 from any external platform or Shopware’s previous versions. You can automate and simplify all the related processes. Contact our team for more information.
How to automate import and export processes in Shopware 6?
As for regular data updates, the Improved Import & Export extension for Shopware 6 provides the ability to create a schedule of import and export processes. You specify it per each data transfer. Next, the extension launches them following the time frames you set.
How to integrate Shopware 6 with external systems?
The integration with external platforms and tools is also associated with the Improved Import & Export extension. It makes the Shopware connection with various external systems possible. You can integrate your store with ERPs, CRMs, accounting tools, etc. The extension automates repetitive import and export processes and modifies data according to the requirements of your Shopware store and the connected platforms.
Get Improved Import & Export for Shopware by Firebear Studio
Explore Shopware


