

In the article below, you’ll find out how to install Shopware 6. This Shopware guide highlights only the basic aspects of this procedure. However, this information is enough to understand how to start your work with a new e-commerce website. We describe Shopware 6 installation prerequisites, shed light on how to download Shopware 6, and explore how to run the Shopware 6 Installer. Also, you will discover how to run various basic tasks associated with the initial e-commerce website configuration. So, let’s see what’s hidden behind the hood of the Shopware 6 installation and proceed to other aspects.

Note that we provide Shopware integration with external platforms. Contact our support for further information or try our Improved Import & Export Extension for Shopware.
Get Improved Import & Export for Shopware by Firebear Studio
Explore Shopware
Table of contents
Shopware 6 Installation Prerequisites
Prior to installing Shopware 6, you should take a look at its system requirements. At the same time, there is a shortlist of Shopware 6 installation prerequisites. Let’s explore them in further detail.
Htaccess Adjustments
Due to the .htaccess protection, you may face a situation when the admin cannot open it. The official guide recommends the following short term solution:
- It would help if you disabled the request authentication to the URL “/api” in the .htaccess.
- Use the following code snippet to complete this goal:
|
1 2 3 4 5 6 7 8 |
AuthType Basic AuthName “Please login.” AuthUserFile /pfad/zur/.htpasswd <RequireAny> Require expr %{THE_REQUEST} =~ m#.*?s+/api.*?# Require valid–user </RequireAny> |
This step should help you disable the .htaccess protection, providing your administrators with access to it.
Routing Settings
You should also configure the routing settings of your web server. Note that this step is recommended, so it may not be necessary. Below, we provide an example of the corresponding Apache configuration. Please, replace _SHOPWARE_DIR and _HOST_NAME_ with settings suitable for your project.
|
1 2 3 4 5 6 7 8 9 10 11 12 13 |
<VirtualHost *:80> ServerName “_HOST_NAME_” DocumentRoot _SHOPWARE_DIR_/public <Directory _SHOPWARE_DIR_> Options Indexes FollowSymLinks MultiViews AllowOverride All Order allow,deny allow from all </Directory> ErrorLog ${APACHE_LOG_DIR}/shopware–platform.error.log CustomLog ${APACHE_LOG_DIR}/shopware–platform.access.log combined LogLevel debug </VirtualHost> |
Note that the Document root directory points to the Shopware 6 installation directory and its /public folder since the frontend and admin interfaces are located behind it. Consequently, it is not necessary to refer to the corresponding public directories in the URL when you use the browser to call the appropriate interfaces (frontend or admin).
Further routing configuration for Shopware 6 may require additional enhancements. Therefore, you may need to discuss them with your hosting partner.
How to Download Shopware 6
Now, when you know how to follow the system requirements for Shopware 6 and configure your web server’s routing settings, it is time to download the Shopware 6 installer. Do that as follows:
- Follow this link: Shopware 6 Installer.
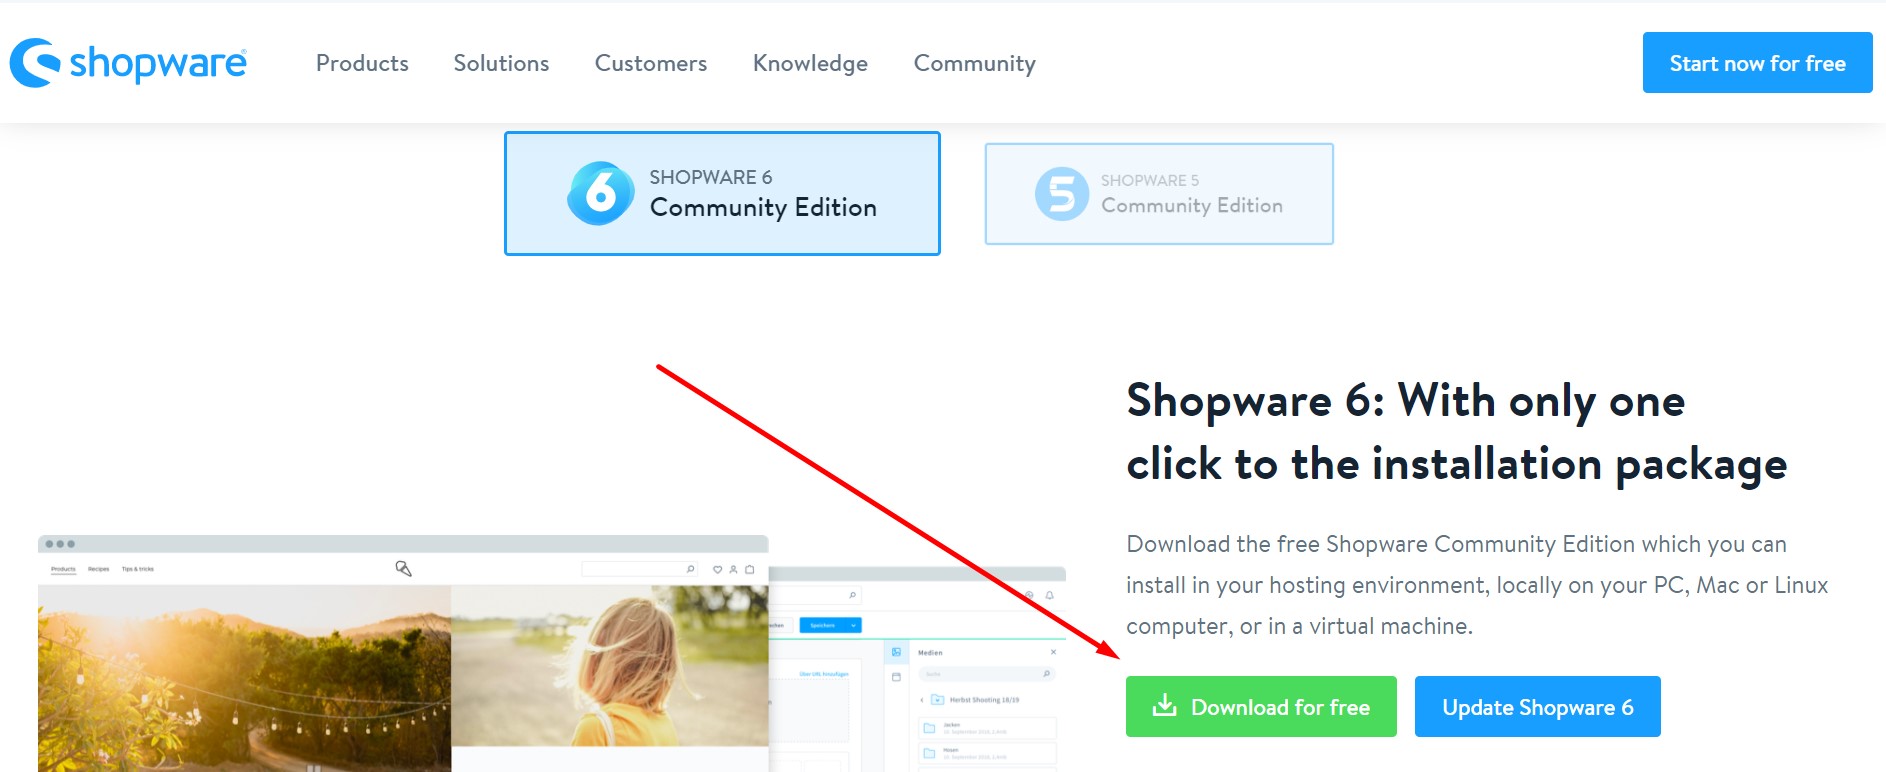
- Download the tool and unpack it in the desired system directory.
- Provide write permissions to the unpacked files and directories.

Checksum
Checksums are important in the Shopware 6 installation. If you haven’t’ heard about them, you’ve come to the right place. In the following chapter, we describe what checksums are and what they are used for.
You can utilize program extensions to determine checksums from a downloaded file. Shopware 6 requires using the set algorithm, such as MD5 or SHA. You can compare the checksum from the downloaded file against the one specified on the download page. How to find a Shopware checksum, you will ask?
It is available on the Shopware download page. You can find the Shopware checksums using the SHA256 algorithm. Displaying different Shopware versions shows a checksum on the right-hand side next to the Installation and Update buttons. Move the mouse over them to view the corresponding checksum.

What about comparing checksums for Shopware 6?
You can do that within a program that displays the checksum for a downloaded file, such as FileVerifier++. Add the file to the program using one of the algorithms mentioned above.

If you spot that the checksums are different, it means that the data transfer didn’t pass correctly. Simultaneously, the checksum may not be correct anymore due to the data changes applied during the transfer. In both situations, you should delete such files and never open them.
If the new download results in the same situation, you should inform Shopware about that.
How to Run Shopware 6 Installer
Now, we focus on how to run the Shopware 6 installer. First of all, you should confirm that all the system requirements for Shopware 6 are met. Secondly, ensure that the routing settings of your web server are correctly configured. After downloading and extracting the Shopware 6 installer, you can launch it.
You can run the Shopware installer by visiting the URL of your shop. Open the link in your browser, and the system will display the Shopware 6 installer window, guiding you through the entire installation process. Note that running the Shopware 6 installer is associated with a step-by-step procedure.
Change the installer language is possible. You can do that by using the country abbreviation at the bottom of the screen or from the dropdown list:

Click Next to proceed to the installation.
Shopware 6 system requirements check
Now, you are at the second installation screen. The Shopware 6 Installer analyzes the environment it works in to confirm that the system requirements are met. Click the arrow buttons to see the entire requirement list. You will see which requirements are not met. Besides, the Shopware 6 installer displays which settings to optimize.

Accepting general terms and conditions
The next step is available in almost every installation. You should peruse the license under which the system operates. Next, agree to the license terms to continue the Shopware 6 installation.

Further database configuration
Accepting the Shopware license lets you proceed to the further database configuration. This time, you need to provide the credentials for accessing the Shopware database. Two way are at your disposal:
- Create an empty database in advance;
- Let the Installer create one for you.
The second approach is associated with the following steps:
- Check the New Database box;
- Specify its name.

If you’ve already created any databases, the Installer shows them in the Database Name field after filling in the user and password fields. Therefore, you can choose one for your Shopware 6 website.
The selected database must be empty. Otherwise, you won’t be able to import the tables into Shopware.
In the advanced settings, Shopware provides the ability to specify the port of the database. Optionally, you can also provide a socket.
Database import and installation
Now, when all the requirements are met, and credentials are specified, it is possible to install the Shopware database. You just need to hit the Start Installation button to initiate the database import to Shopware 6.

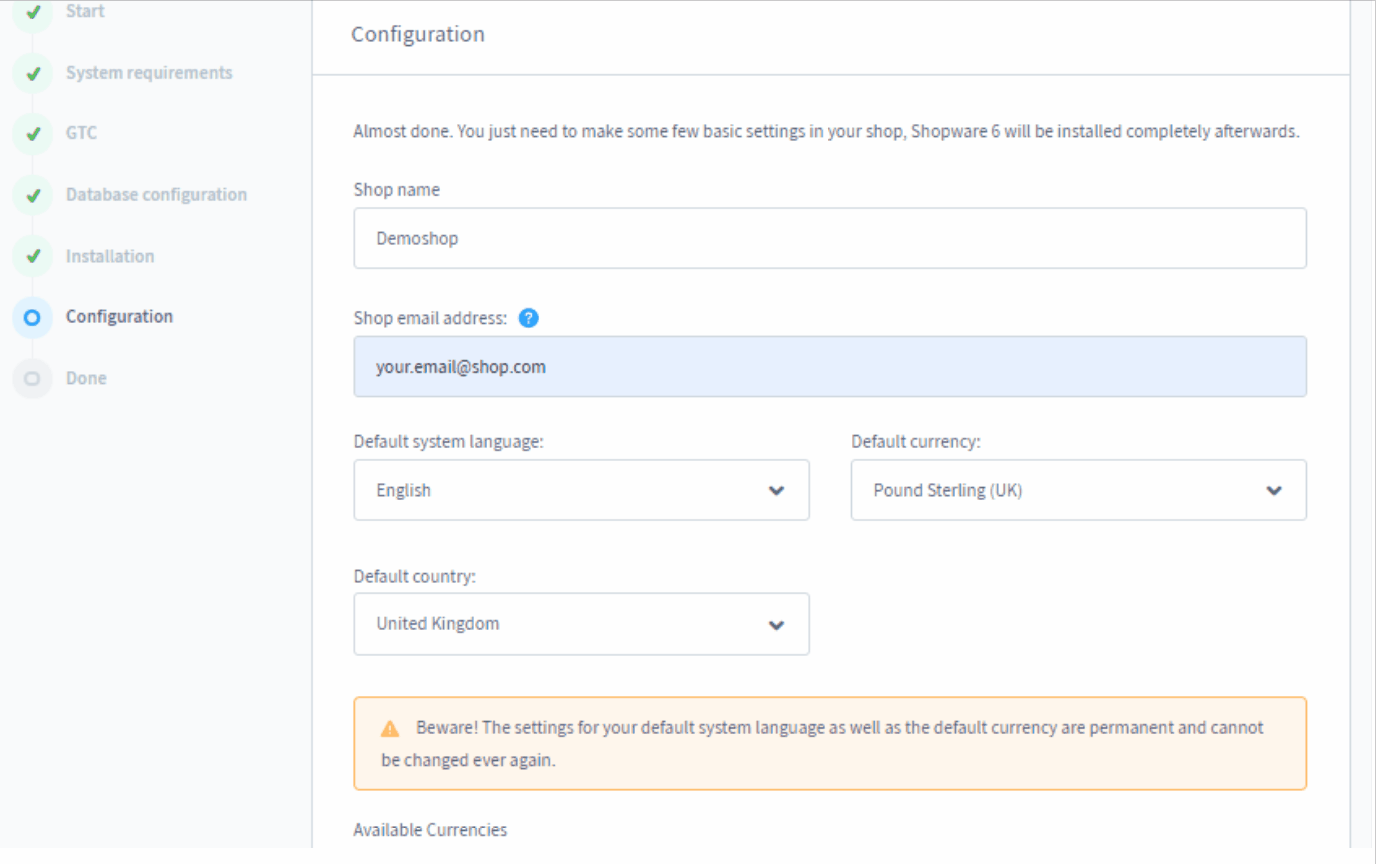
Shopware 6 shop configuration
The last step requires specifying the basic settings for your Shopware 6 installation.
- Specify the default email address associated with your shop. It will become the global email address for all emails.
- Specify the default system language. You cannot change this setting at a later date. It will be used as default, affecting both the frontend and admin areas.
- Specify the default currency. You cannot change this setting at a later date.
- Shopify supports the following default currencies:
- Euro,
- British Pound,
- US Dollar,
- Polish Zloty,
- Swiss Franc,
- Swedish Krona,
- Danish Krone,
- Norwegian Krone,
- Czech Koruna.
The currency specified is considered the default option in the shop with the currency factor 1. Note that Shopify provides the ability to add more currencies using corresponding conversion factors.
- Specify the administrator for the Shopware 6 administration interface. Enter the relevant data. Note that the system enables you to create additional users after the installation. You can do that in the admin interface.
Final Steps
Congratulations! You’ve just installed your new Shopware 6 website. The Installer will transfer you to the admin area of your e-commerce storefront. You can log in to it via the admin user specified while setting up your Shopware 6 installation.

How to Import Any Data to Shopware 6
In Shopware 6, you will find lots of entities that can be transferred between your e-commerce website and external systems. Customers, orders, categories, products, and numerous other store elements are fully transferable. For instance, you may need to run a migration to Shopware 6 or synchronize two Shopware storefronts, exchanging all these entities. Integration with CRM, accounting, or ERP systems may also require importing and exporting the corresponding information. Since the platform doesn’t let you leverage these processes by default, it is necessary to install a third-party tool to run data exchanges successfully. Therefore, pay attention to our Improved Import & Export Extension for Shopware since it offers additional data transfer capabilities that are not available in Shopware 6 by default. Contact our support for more details.
Shopware 6 Essentials FAQ
How to create a Shopware ID?
Along with installing Shopware 6, you will need to create a Shopware account and get a Shopware ID (provided automatically upon the account creation).
How to create a Shopware account?
The creation of a new Shopware account takes place on a registration page. You click on the Register Now link and fill in the required fields. Don’t forget to confirm your intent in responding to an email.
What is Shopware master data?
Under Shopware master data, we assume contact information and various company details, such as an address, email, phone, company name, etc. You provide this data upon registration.
How to add a shop in Shopware?
After the theShopware 6 software is installed, you can create a new Shopware shop in your merchant area. The corresponding link is situated at the right section of your start-screen. Note that you have the possibility to choose between a cloud storefront or an on-premise website. After that, you have to specify information about your new Shopware Shop and save it.
How to add a payment method in Shopware?
It is possible to add a payment method in your Shopware account under Basic Information -> Accounting. The system lets you leverage the following options: PayPal, credit card, or direct debit.
How to create a deposit in Shopware?
You can pay in advance for your purchases. It is possible to create a deposit under Merchant Area -> Shops. Choose a shop, click Open Account Details, and add funds there.
How to purchase Shopware extensions?
After adding a deposit to your Shopware shop, you can purchase extensions on the Shopware Marketplace. Alternatively, it is possible to do everything in the Plugin Manager.
How to get support in Shopware?
Shopware support regarding your Shopware account and license is available via email (info@shopware.com) or by phone (+49 2555 9288 50). Send inquiries about accounting and financial services to financial.services@shopware.com or +49 2555 9288 510.
How to migrate to Shopware 6?
Since you cannot perform migration to Shopware 6 with the help of its default tools, it is necessary to install a third-party extension that will automate data transfers and help with different attribute standards. Use the Improved Import & Export tool for Shopware 6 to run the migration. Contact our team for more information.
How to automate import and export processes in Shopware 6?
Use the Improved Import & Export extension for Shopware 6 to automate data transfers to and from your e-commerce website. The tool lets you create a schedule of updates to run import or export processes automatically.
How to integrate Shopware 6 with external systems?
You need the Improved Import & Export extension for Shopware 6 to connect your e-commerce website to all possible external systems, including ERPs, CRMs, and accounting services. Our module automates import and export processes as well as modifies data according to the requirements of your Shopware store upon import. Similar principles are applied upon export – the data is modified following the requirements of the connected systems.
Get Improved Import & Export for Shopware by Firebear Studio
Explore Shopware


